|
|||||||
 |
|
|
LinkBack | Thread Tools | Display Modes |
|
#1
 04-05-2012, 11:17 PM
|
|||
|
|||
|
This DIY is intended to go through a rear sway bar, HD mounts & alloy link ends install. I used Whiteline products, but there are obviously other brands which this DIY will still work for. Please use this "guide" at your own discretion.
I would not classify it as difficult & I would say you should do it in about an hour if you have everything you need on hand. I installed the following part # on a 1994 GF8 Rear sway bar - BSR20XXXZ HD rear mounts - KBR21-24 HD alloy link ends - KLC26 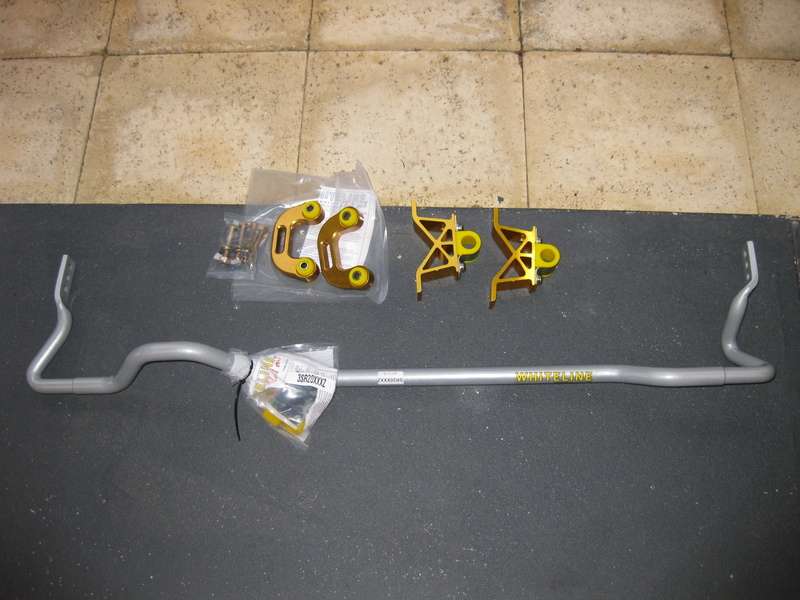 What size sway bar is right for you & your application, is up to you to work out. The different sizes of rear bars, combined with either OE or upgraded front bar, WILL change the handling characteristics of your car. If you are unsure of what you need, contact your supplier of choice & discuss what you want to achieve by installing them. Removal. Jack the car up and put some support under there, chock the front wheels, make sure the handbrake is on. Please ensure this is done safely as you are going to be working under there. I started by removing the old bar, links & mounts in one go. This may or may not work for you, as it may not be able to clear your exhaust when you remove everything. If this happens, just remove the mount & or link from the passenger side of the bar & it will come out. I unbolted the bottom bolt on the link end on both sides. Shown in this photo with the socket & ring spanner attached. 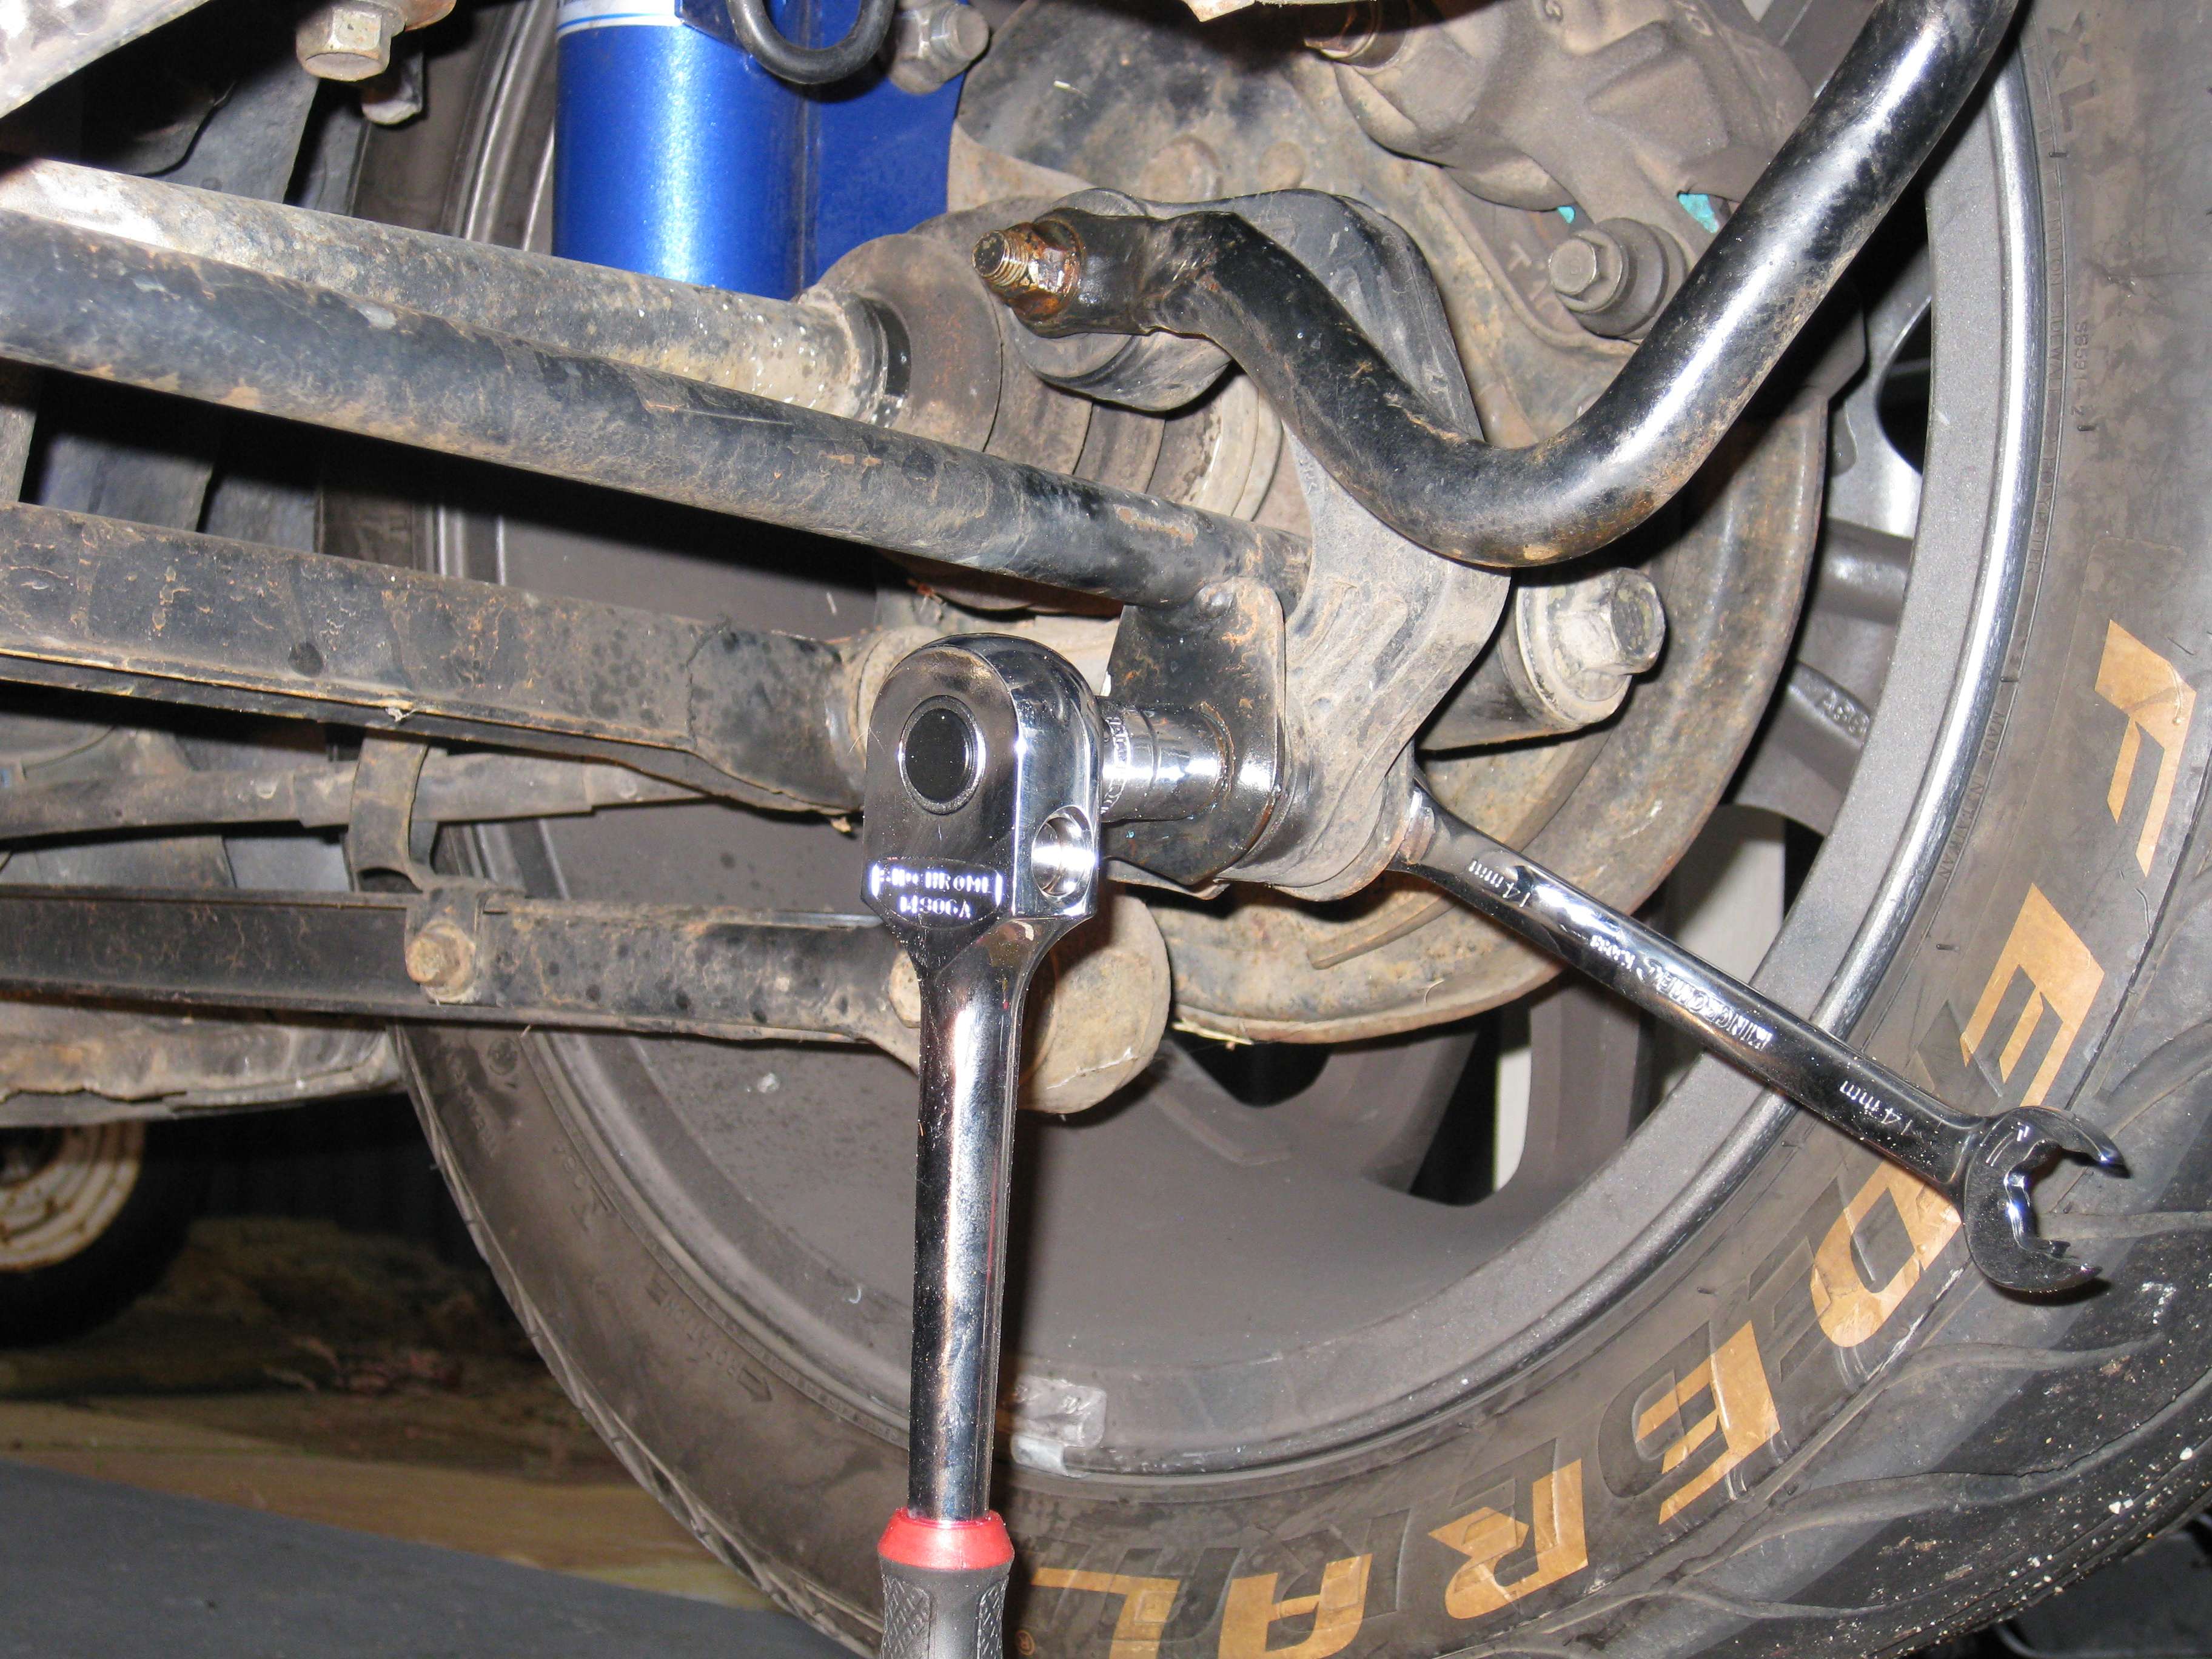 Repeat this for the same bolt on the other side. 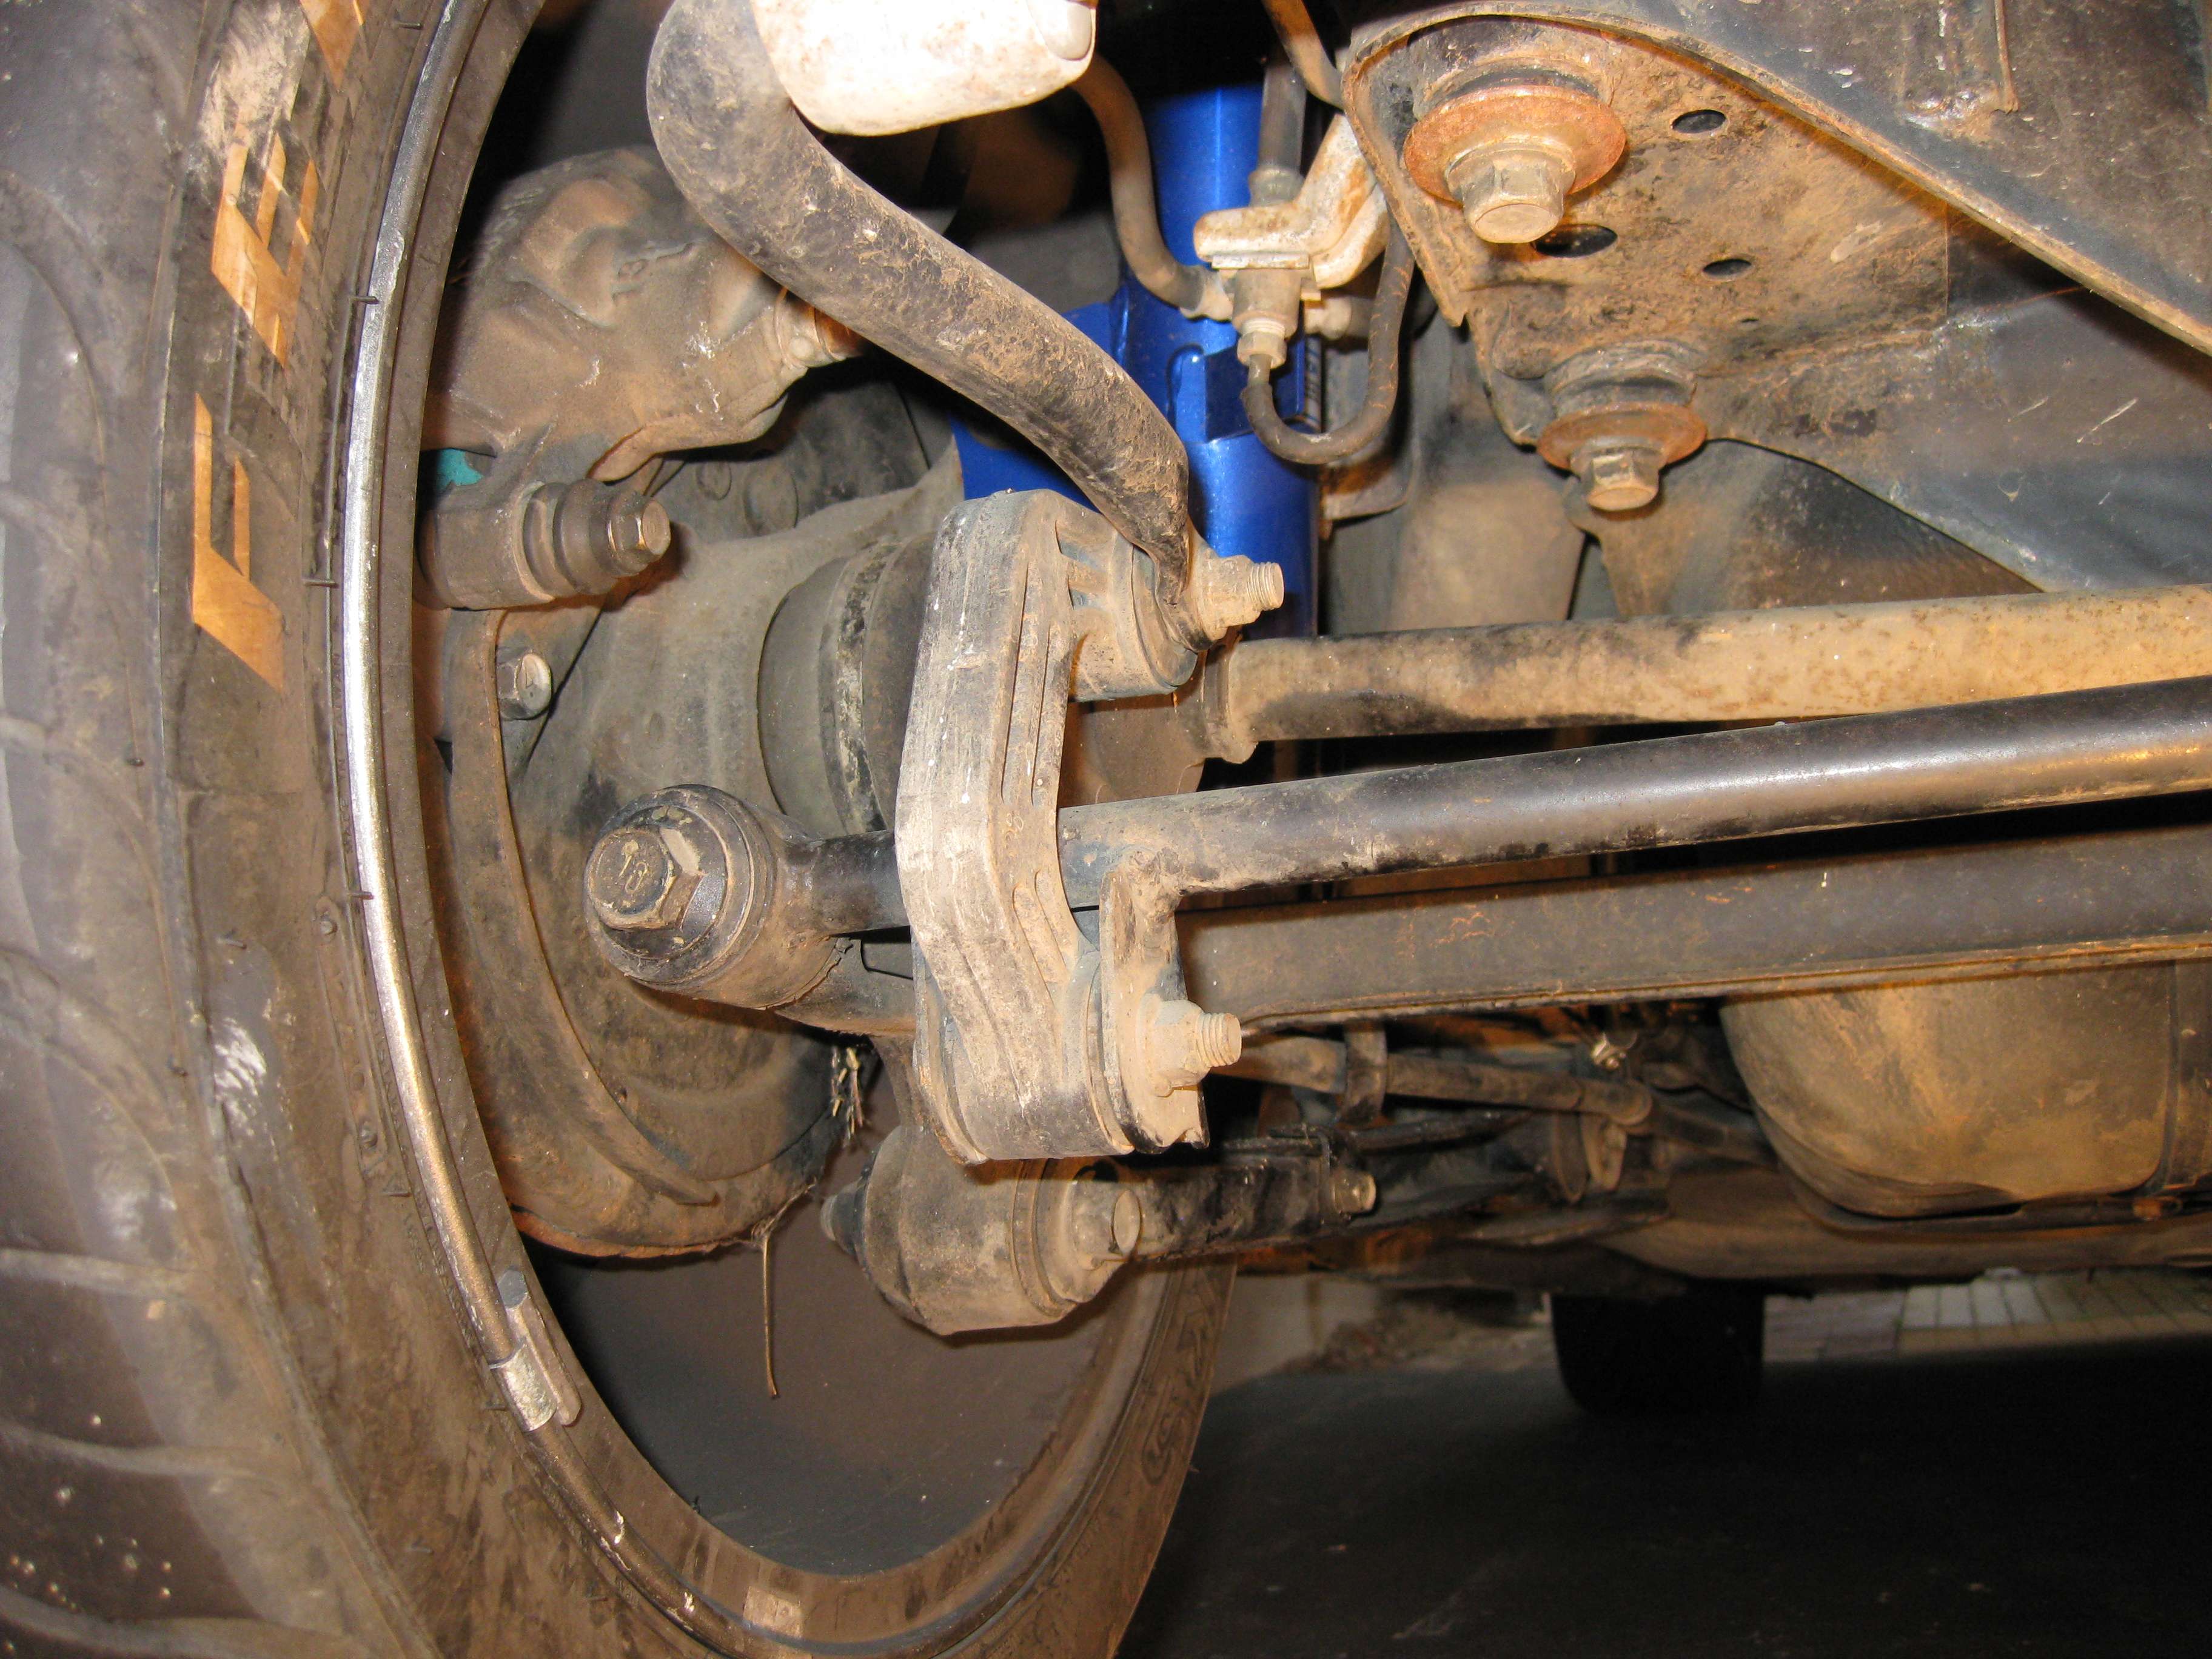 Undo both mount bolts on each side (4 X blots total) The bolt where the socket is attached is a little tricky to get to. This is where you may (dependant on vehicle model) have to use a 1/4" drive socket set like I did.  Pull out the sway bar, link ends & mounts in one go. You will have to manoeuvre things a little to get it over & around the exhaust. I have placed it down next to the Whitleline gear to compare sizing & what I pulled out. 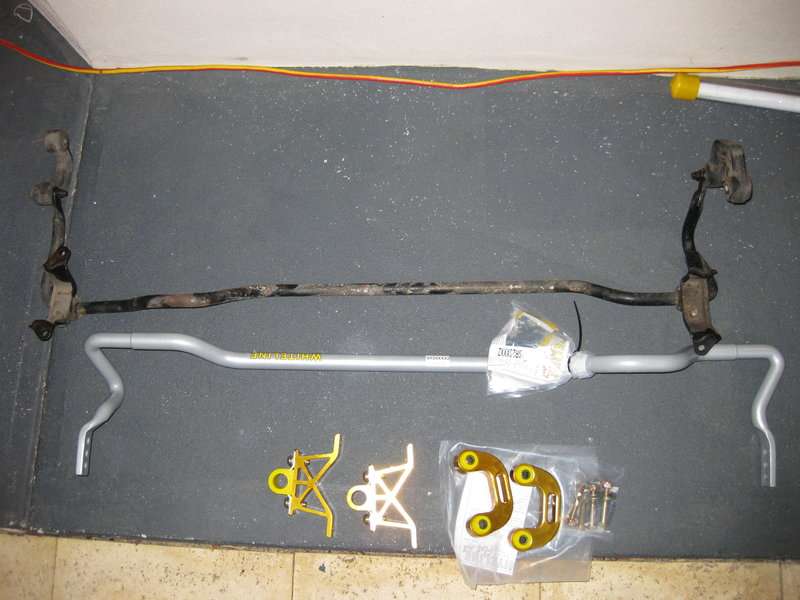 You can see here the comparison in the different sizes of OE & the Whiteline. I think the standrad bar is around 20mm. 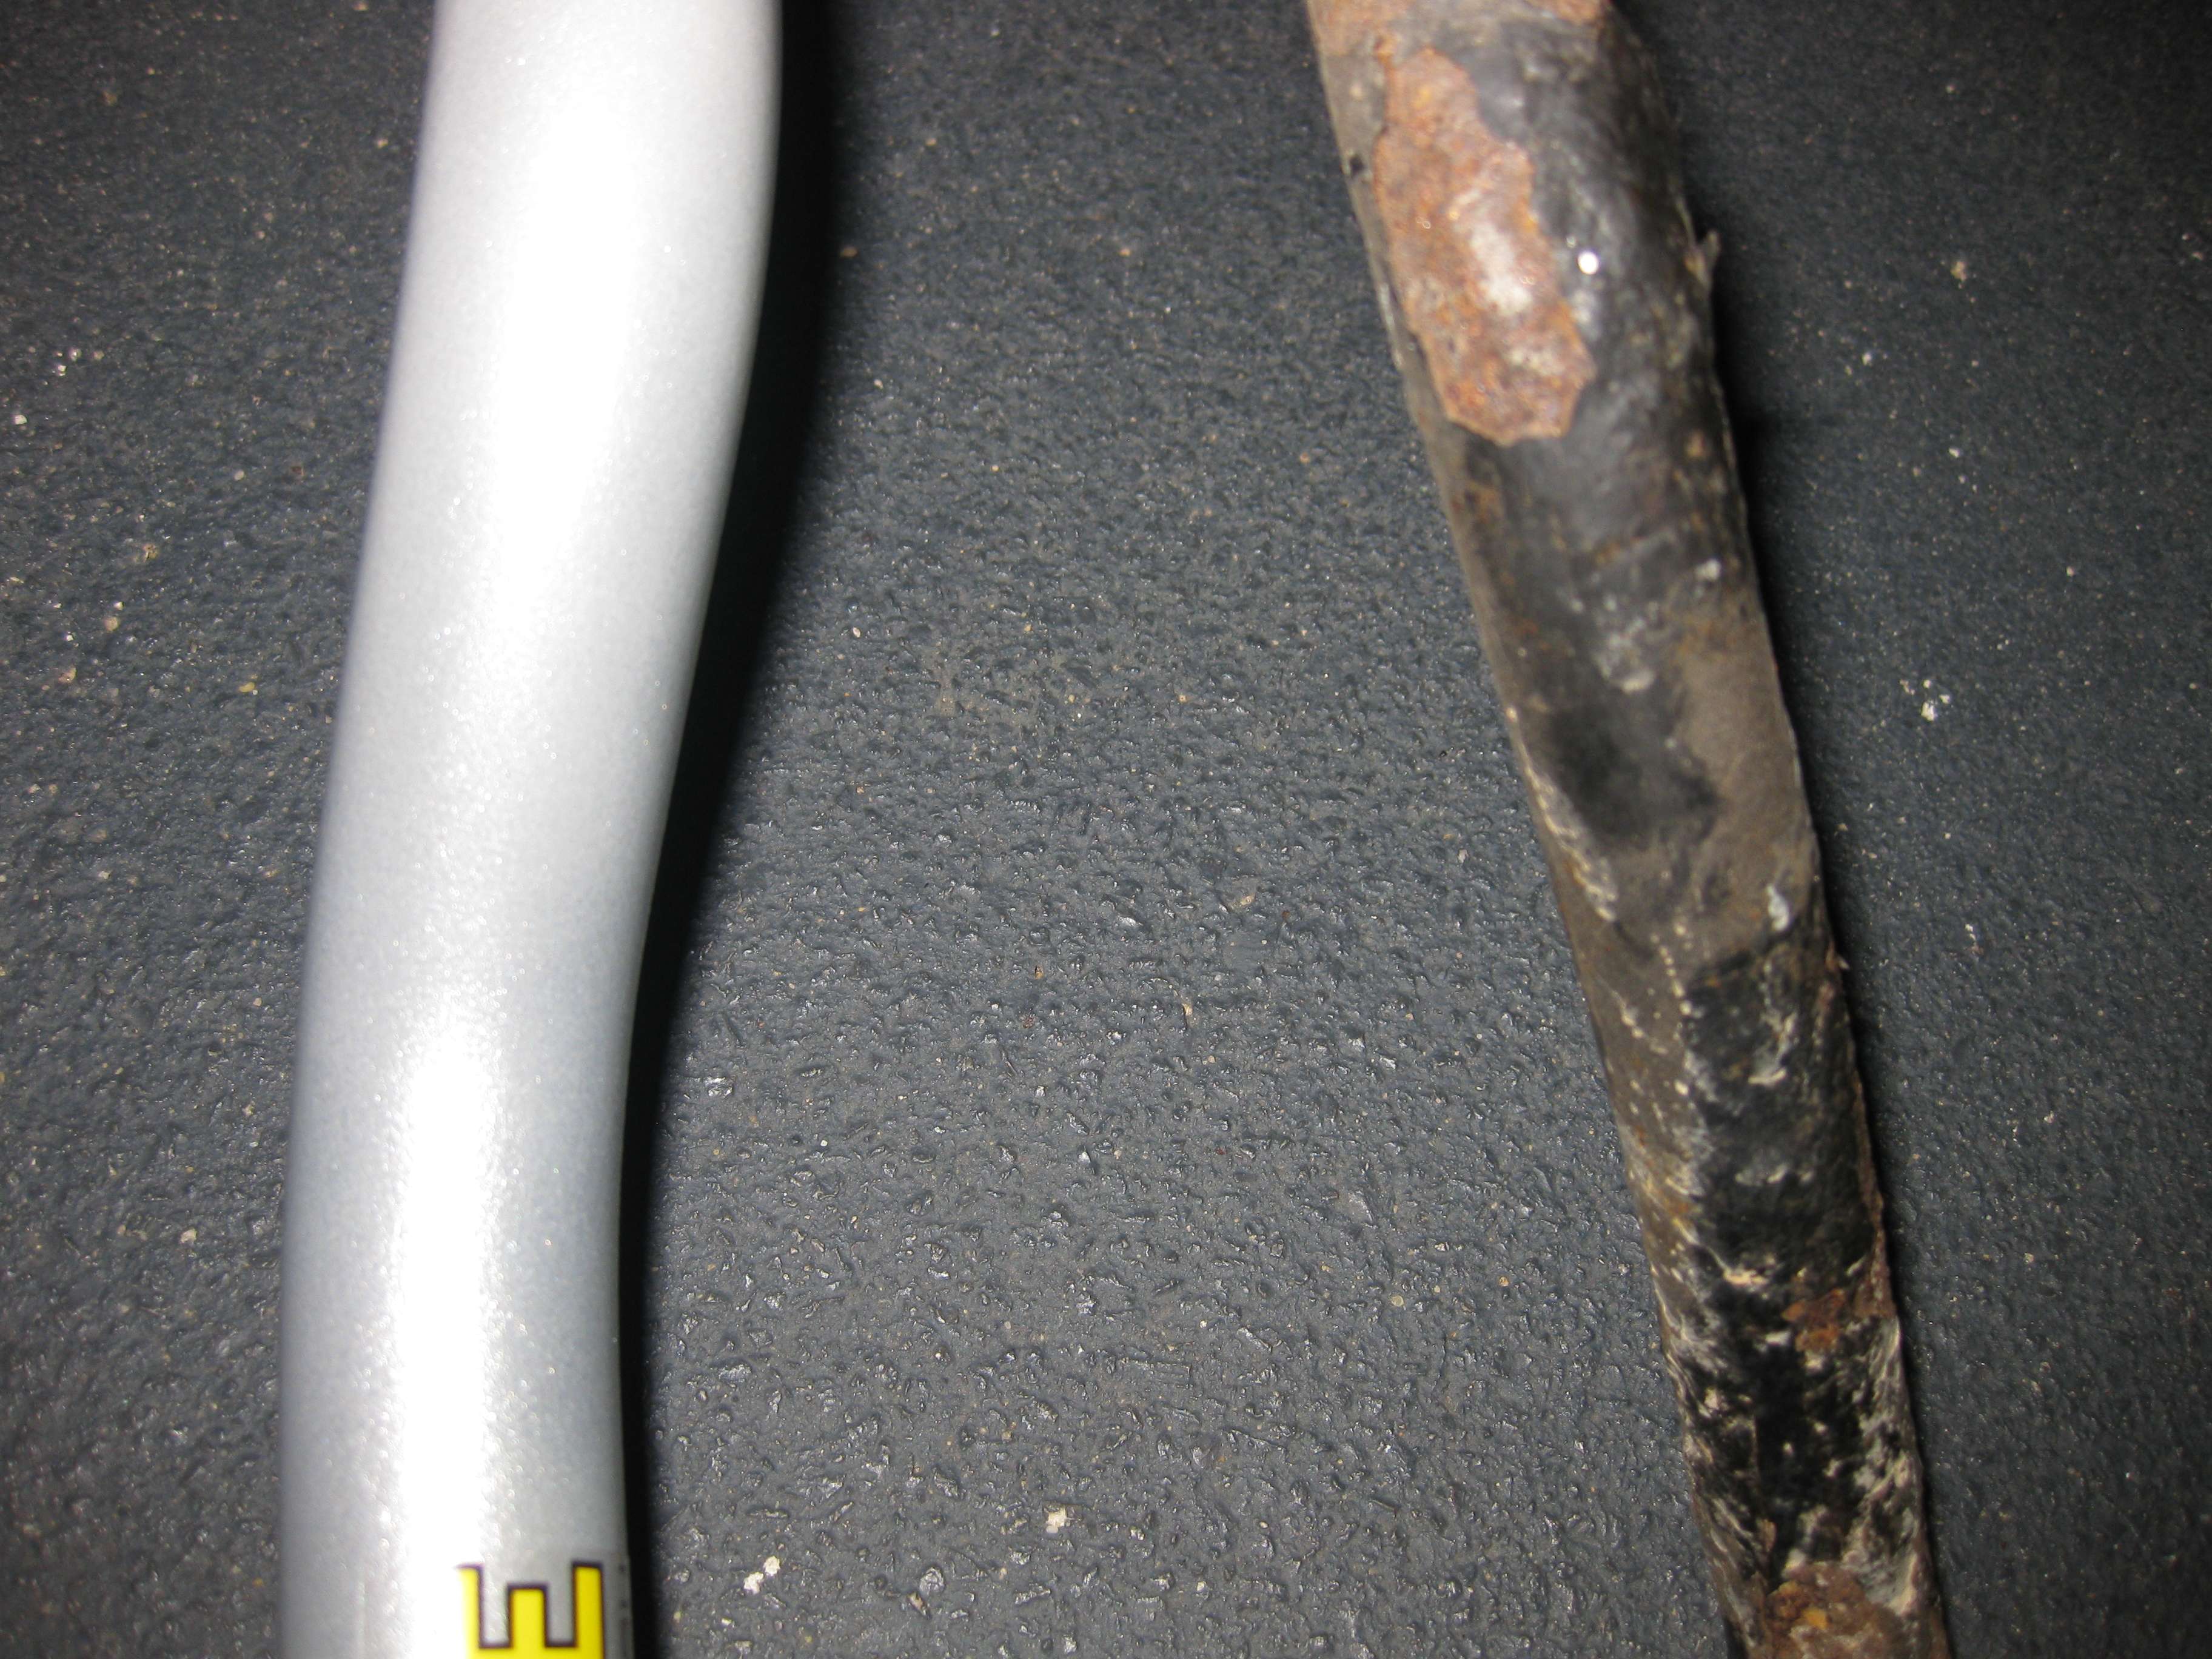 Install. Firstly install the HD mounts. Take note on the instructions that come with them. There is a protruding part on them that must face to the rear. You can see it in the photo below, on the vertical part of the mount, between the saddle mounting bolt & the sway bar mounting bolt on the right hand side. This is only on one side of the mount & it has to face the REAR. If you don't face it the right way, the sway bar saddles will not bolt up to the mounts, as the bolt holes will not line up. 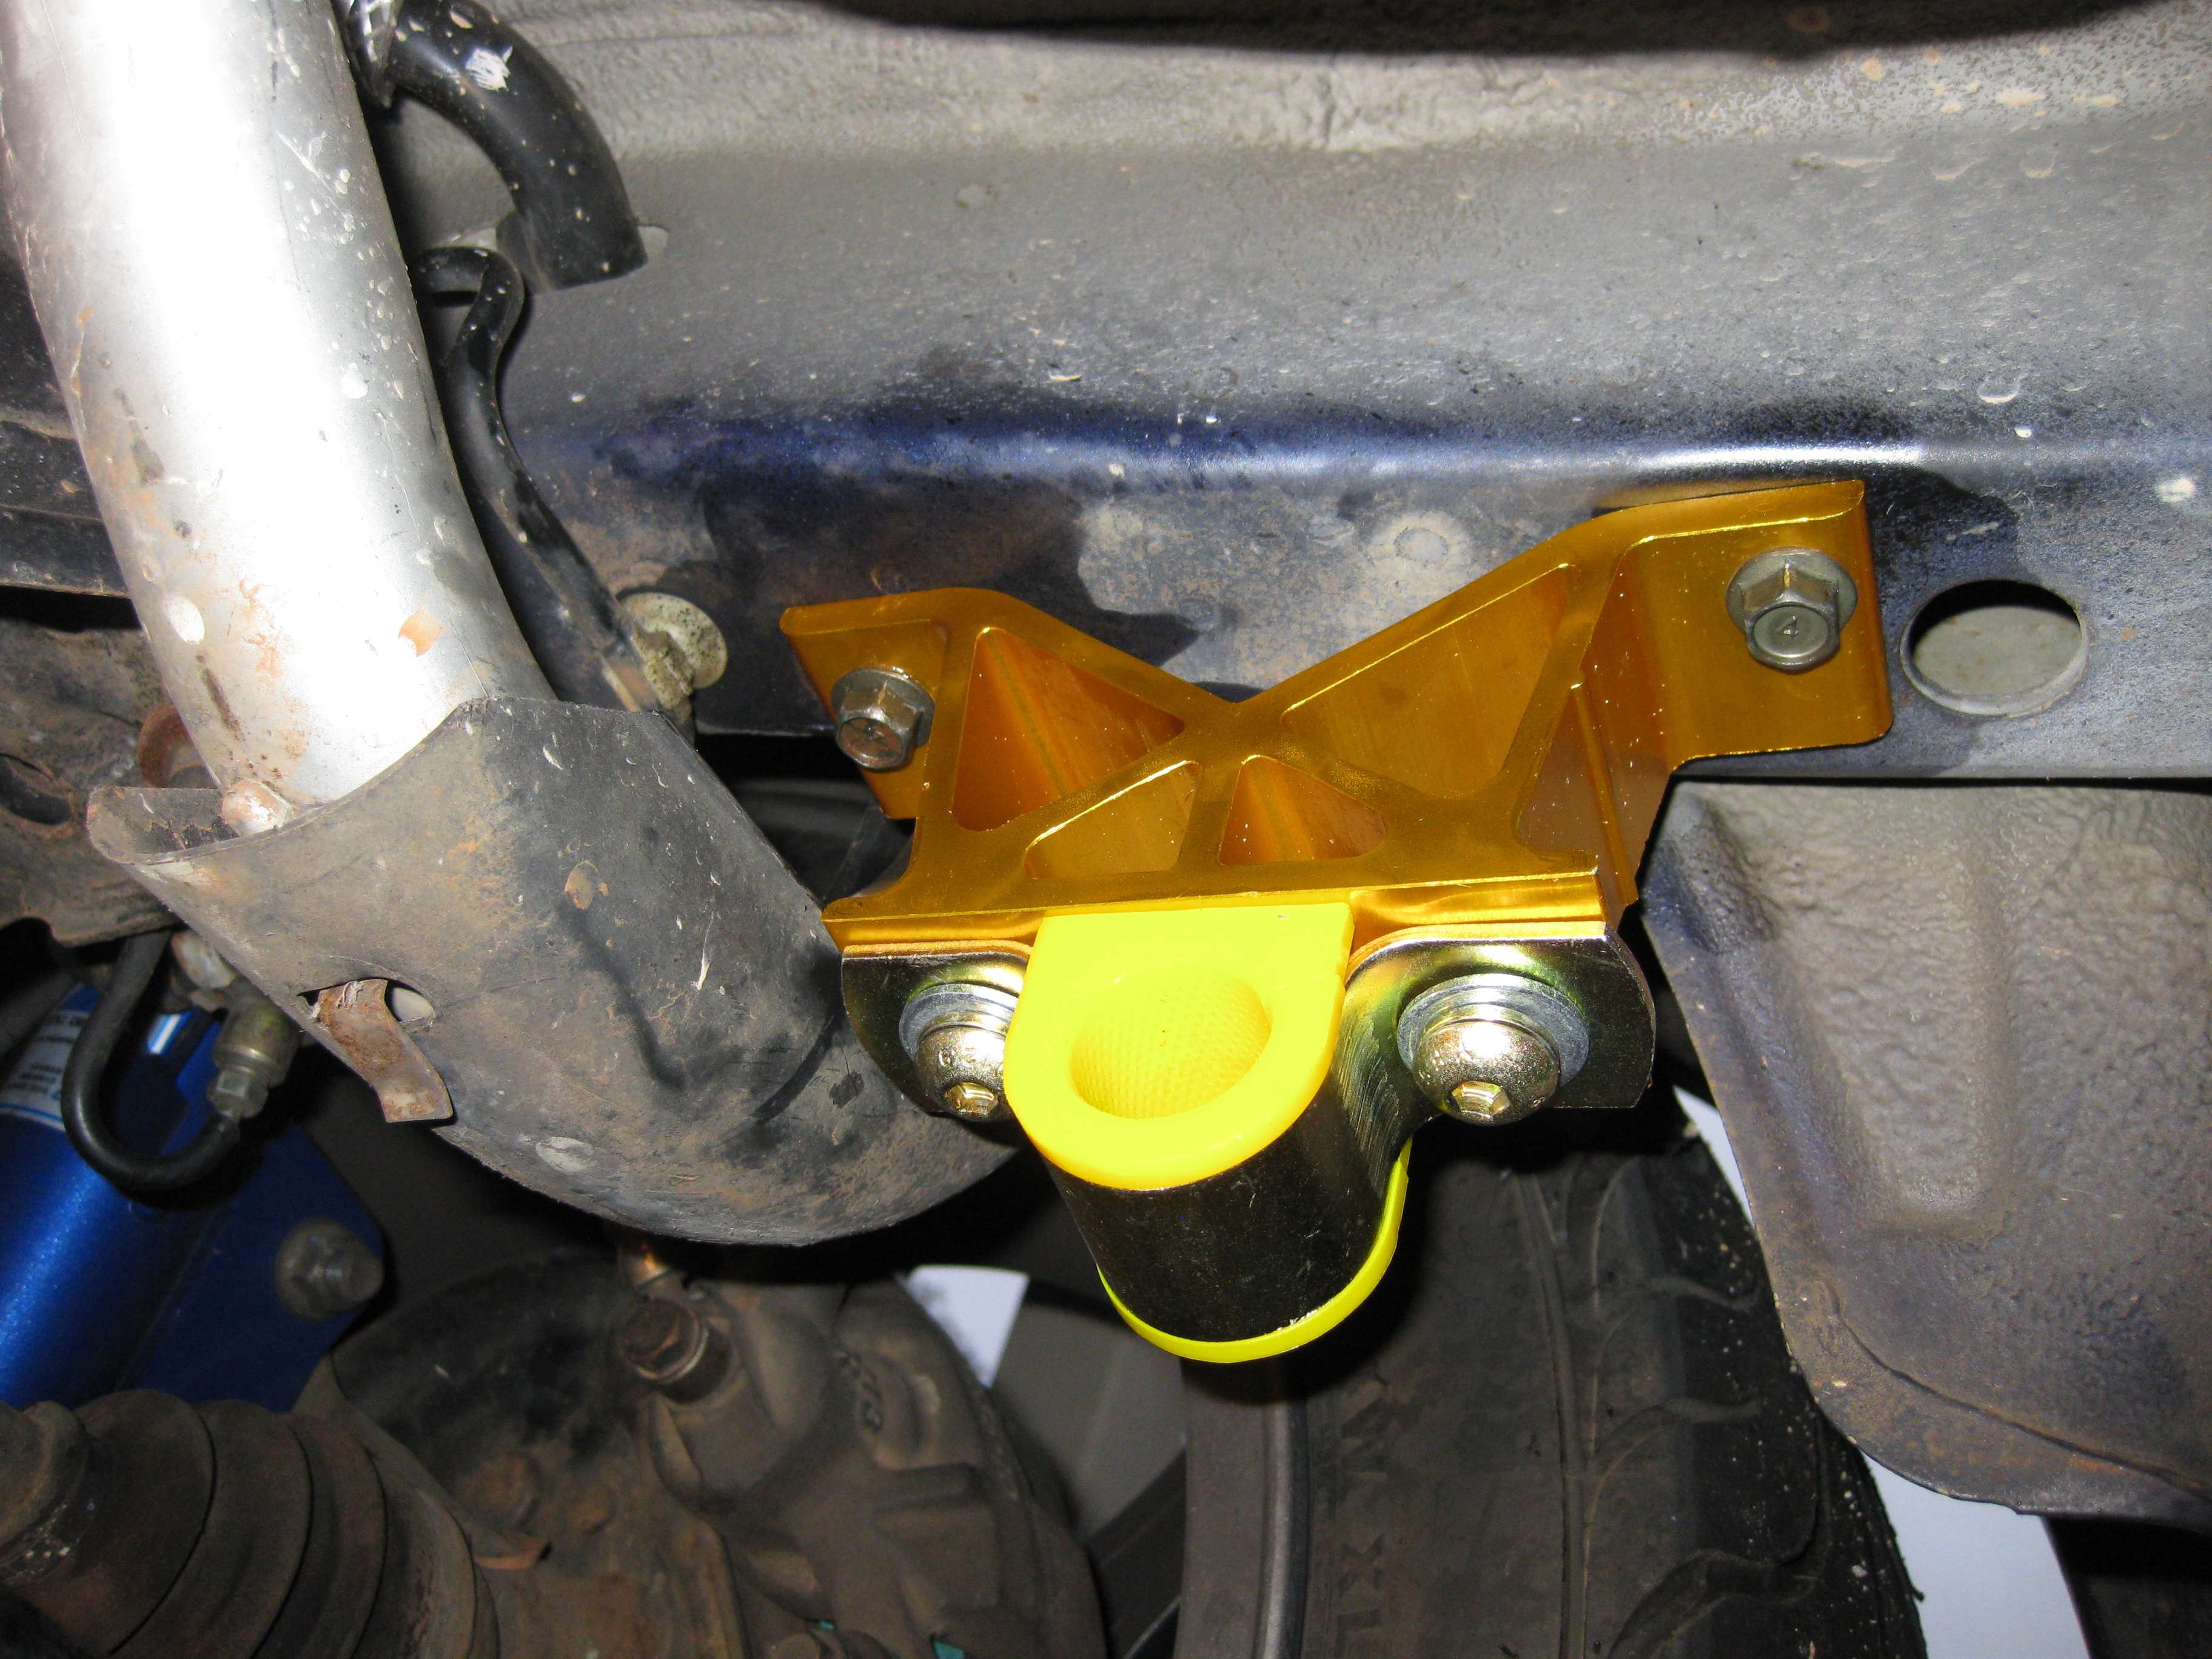 Then, grease up the bushing & saddle that comes with the bar / link. Undo the sway bar saddle on the mount (if its still attached to the mount) & fit the bushings over the bar. Push the saddles over the bushing on one end & bolt it to the mount (hand tight only) . Hook up the other end & once again hand tighten the bolts, leaving everything & little lose to move around for now. 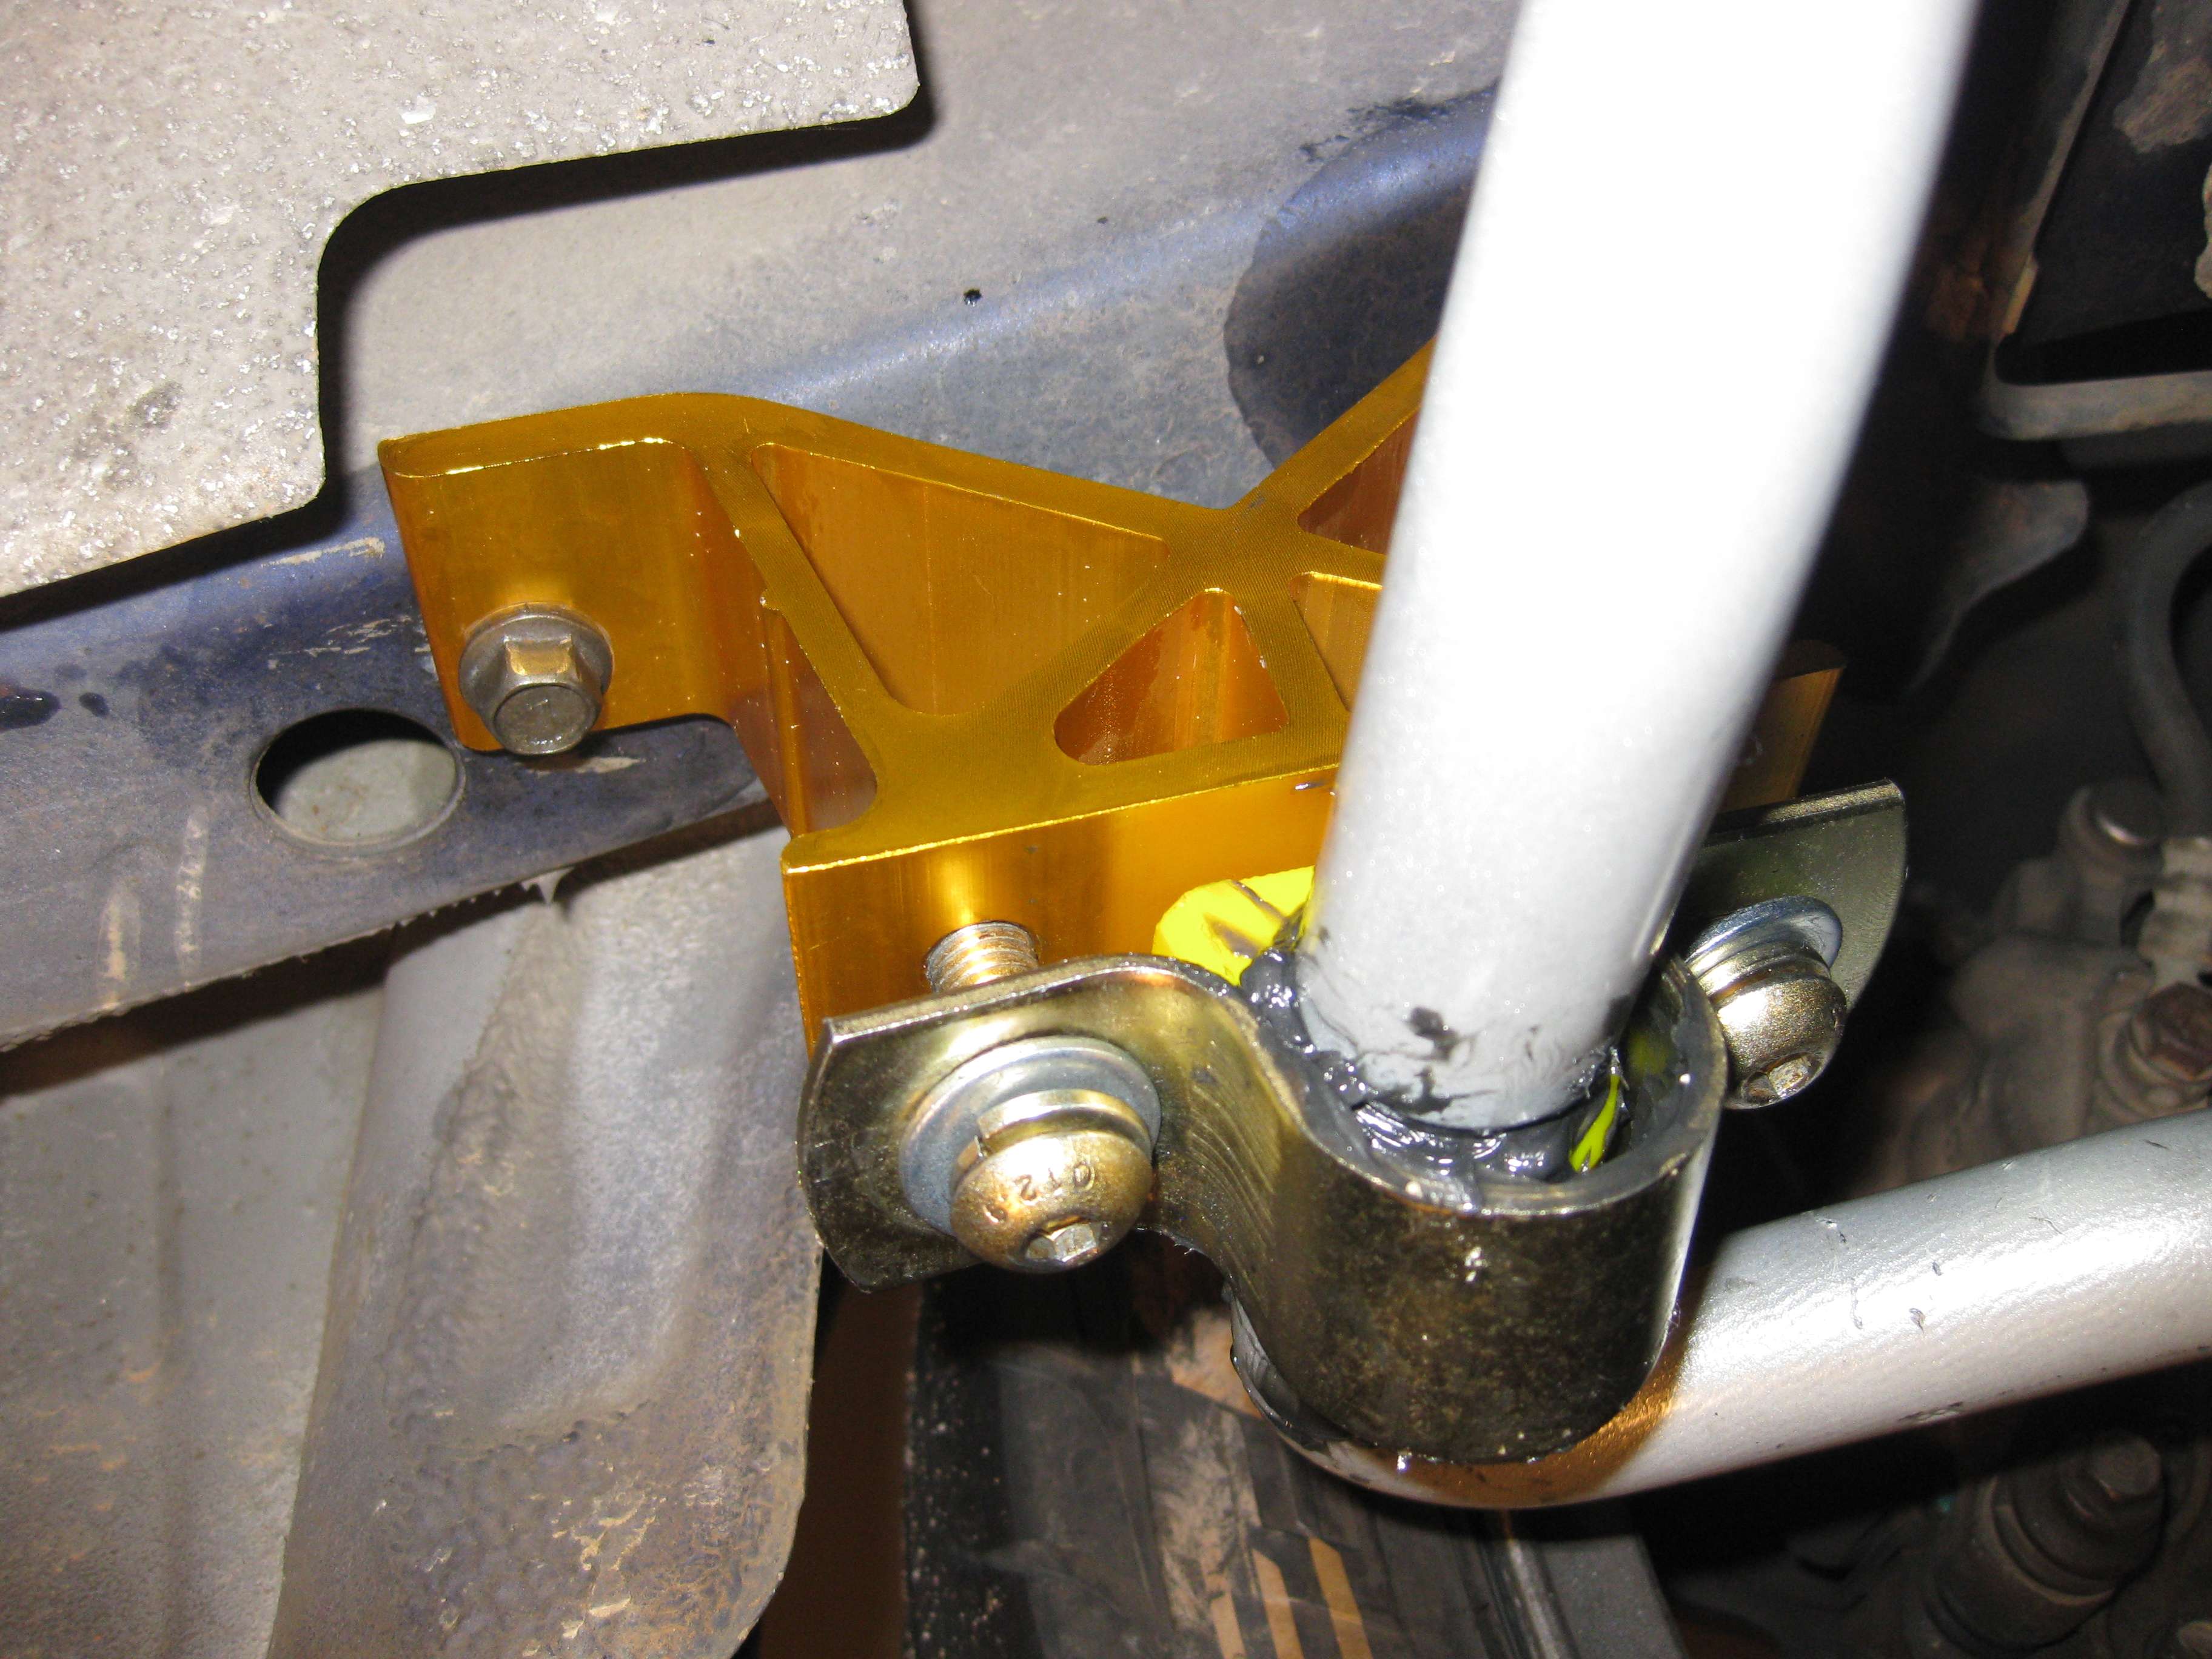 Attach the sway bar link ends. Take note of the washer placement if using the Whiteline products. They come in the instruction sheet or the installation sheet can be found from the Whiteline website. The sway bar I installed has 3 different mounting points. The hole pointing towards the front is the softest setting, the one towards the rear of the car (closest to the main length of the bar) is the hardest setting. I set mine on the middle setting for now. 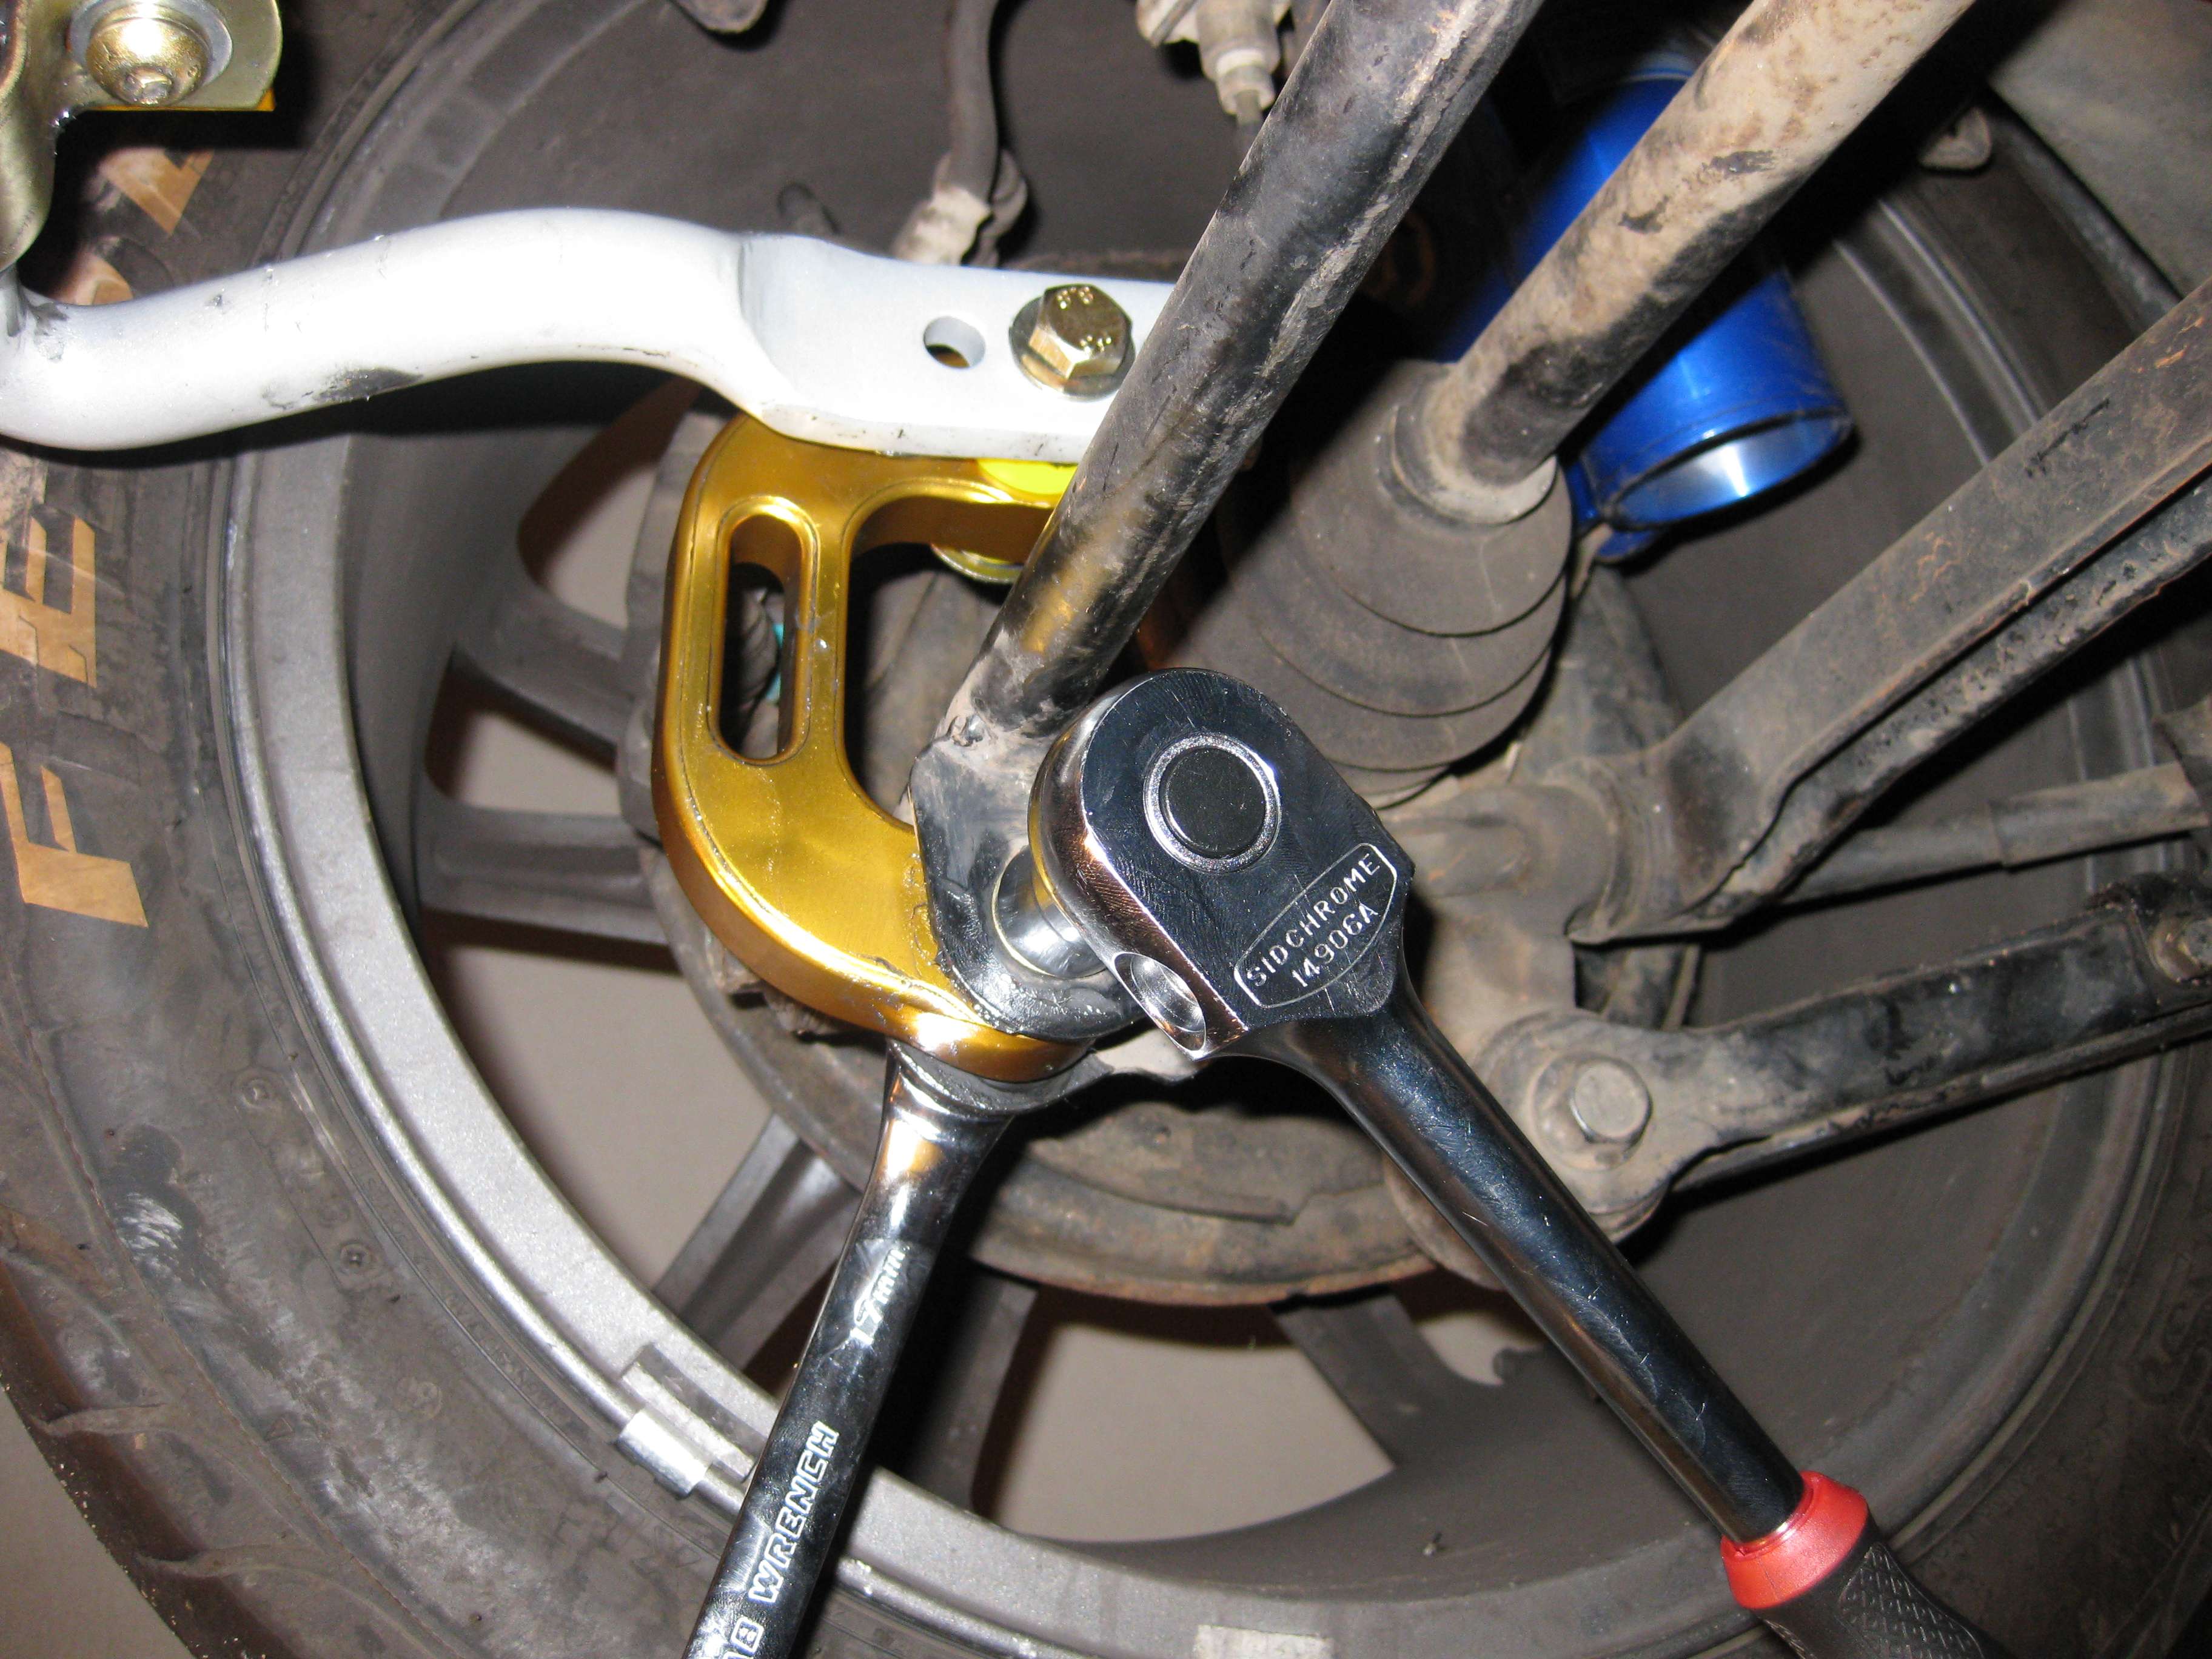 Tighten everything up now & you're done. 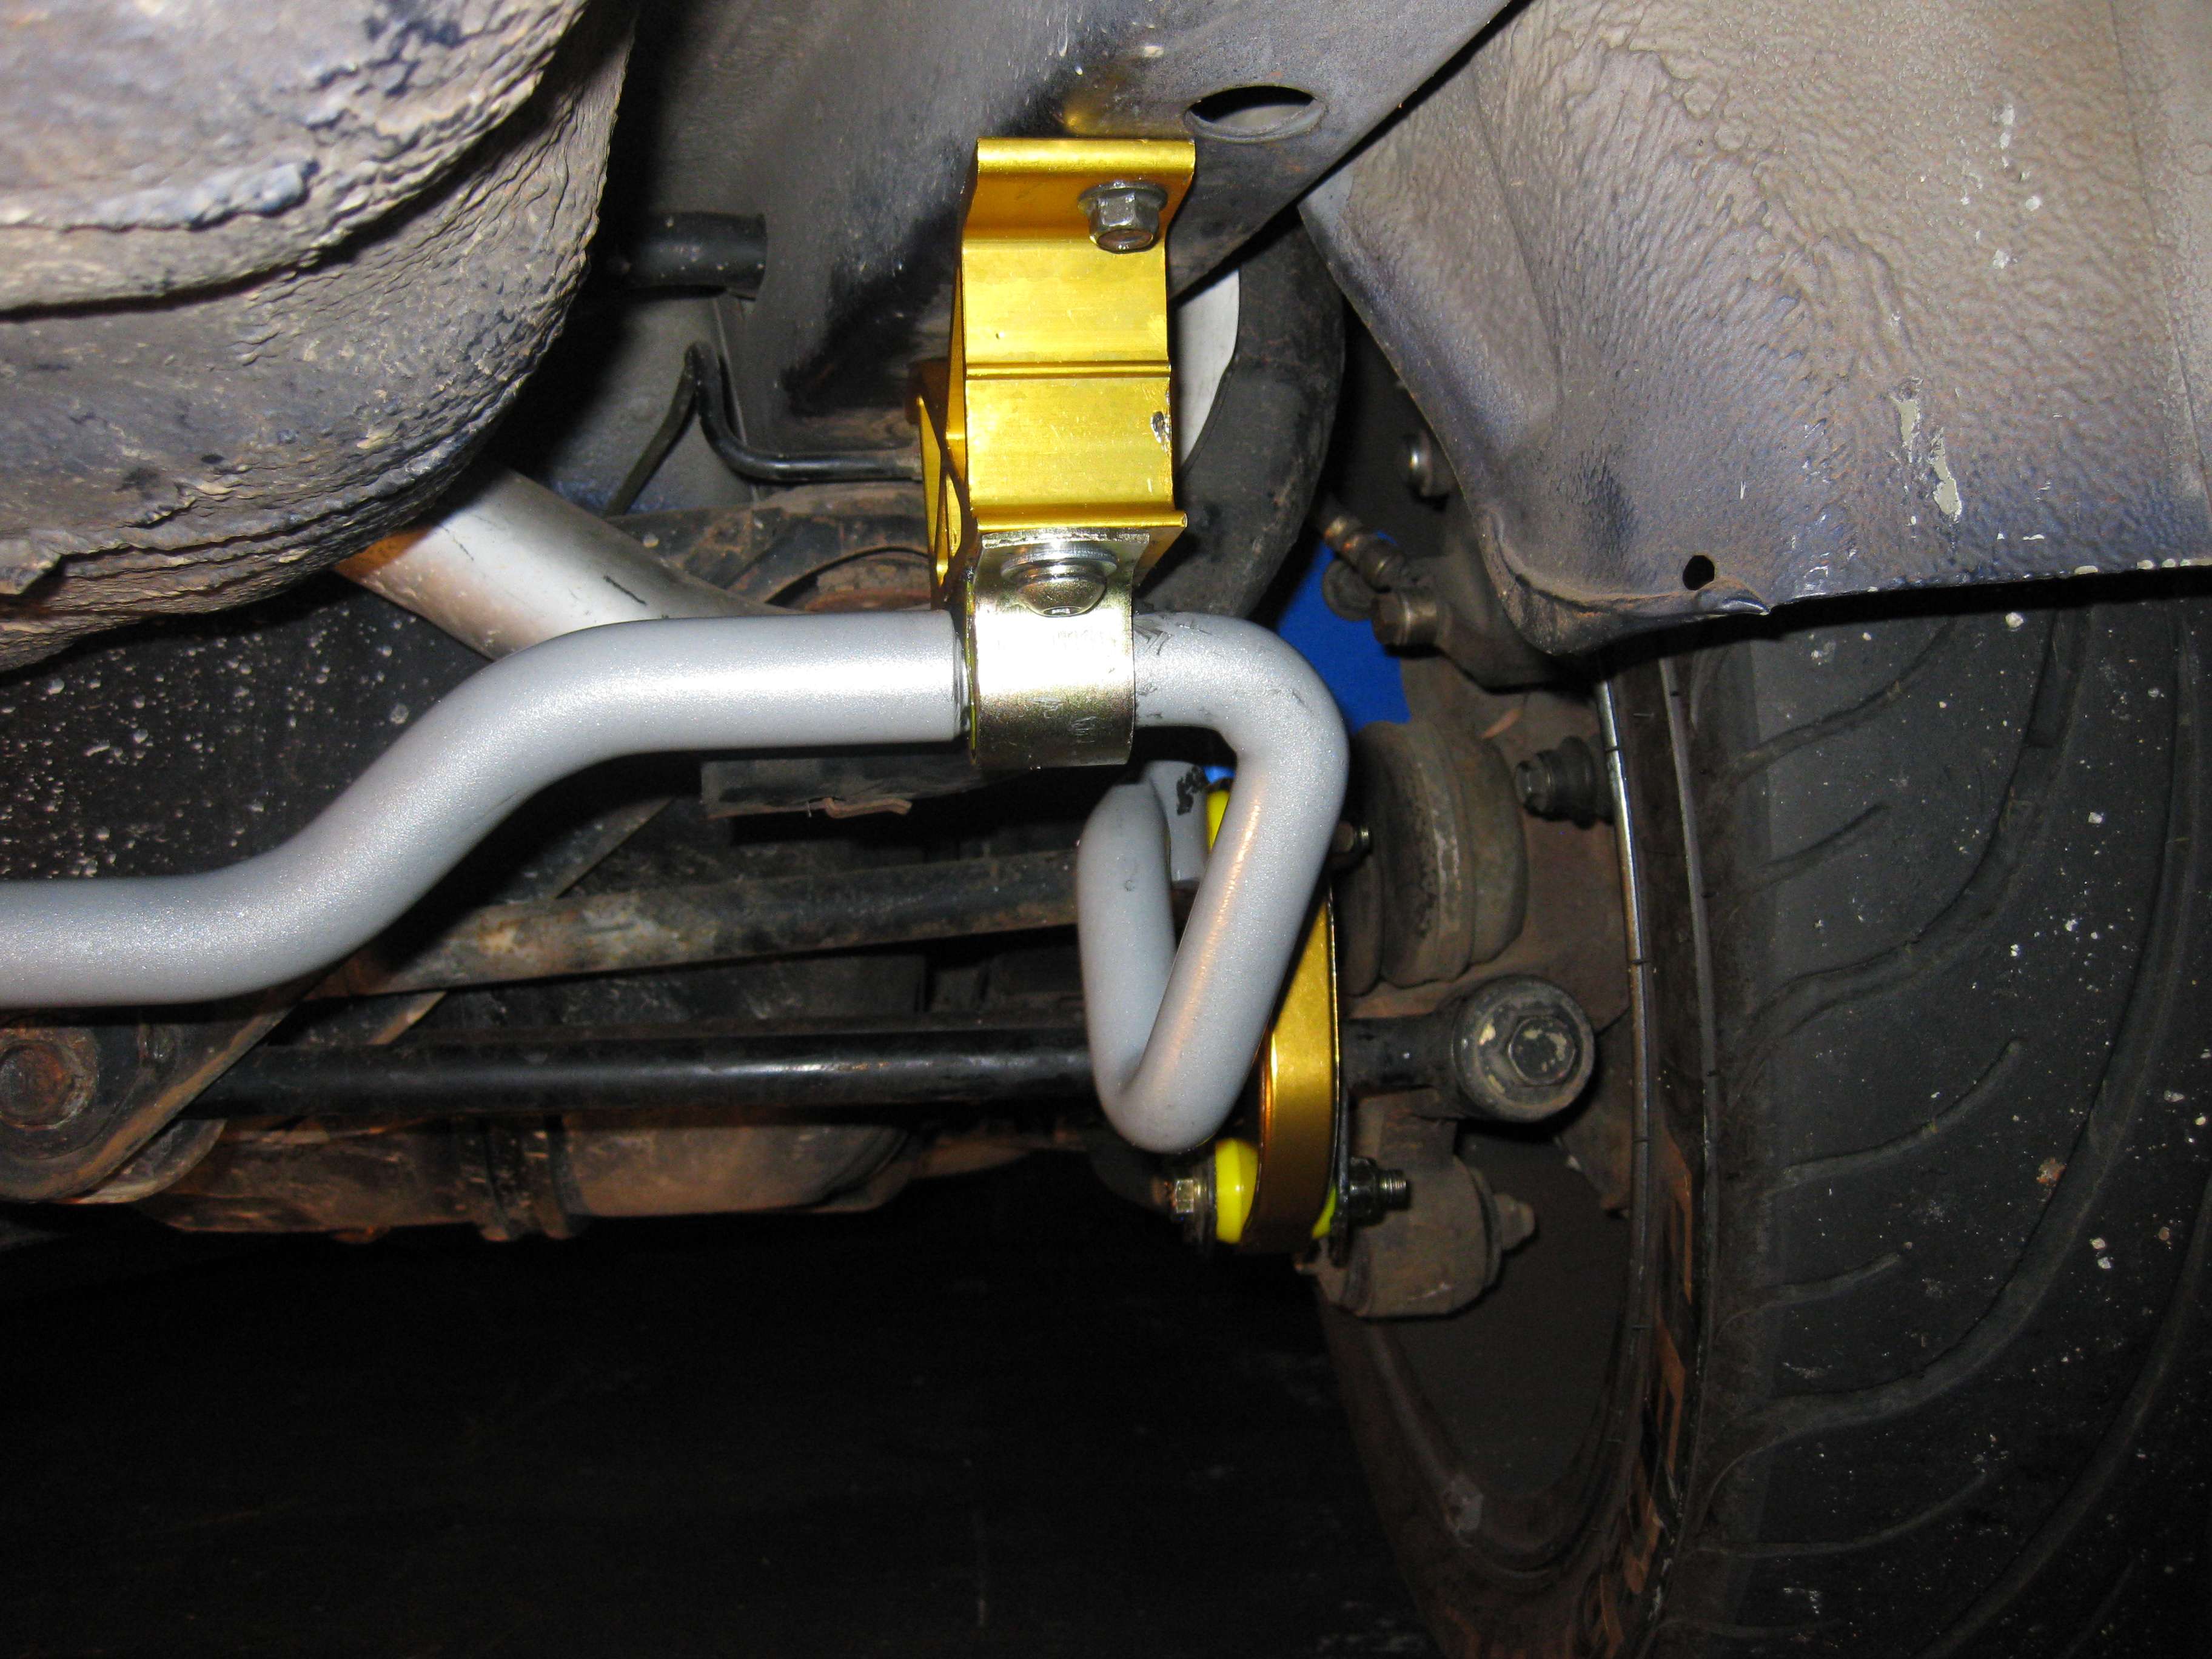 Go for a drive, just take it easy to start off and feel the differences in your new bar. Take your time in a safe environment & get used to the differences. Be careful of "lift off oversteer" with the new rear bar. Please don't take everything I have written as gospel. It's meant as a guide & a guide only. Use safely at your own discretion.
__________________
Cheers, Simon. Last edited by RoughStilin; 05-05-2012 at 10:40 AM. 
|
| The Following User Says Thank You to RoughStilin For This Useful Post: | ||
Qu3xy (31-07-2012) | ||
|
#3
05-05-2012, 07:34 AM
|
||||
|
||||
|
Like good work simon.
How amazing is the turn in now?
__________________
2016 Subaru Outback - Work Wagon 350NM of CVT Goodness Pit Crew, shit talker.
|
|
#6
05-05-2012, 10:24 AM
|
|||
|
|||
|
Quote:
Quote:
From the instruction sheet. - Swaybar installation should be done with the vehicle at normal ride height. To enable better access to the undercarriage, drive-on hoist/ramp may be used.
__________________
Cheers, Simon.
|
|
#7
05-05-2012, 10:28 AM
|
||||
|
||||
|
Quote:
__________________
Signarape!
|
|
#8
05-05-2012, 10:41 AM
|
|||
|
|||
|
First post fixed to remove the bricks. Safety first

__________________
Cheers, Simon.
|
|
#9
05-05-2012, 01:40 PM
|
||||
|
||||
|
Ah of course, I didn't think about the preloaded suspension for the swaybar. I also find on lowered cars you sometimes need to jack the car up and slowly lower it to the right spot for the last few bolts.
Either way, a few planks of wood or bricks under the wheels would make it much easier to get under, would certainly agree with needing to chock the front wheels (don't rely on the handbrake if the rear wheels are up on bricks). One big brick would be much safer than a few little ones stacked on each other.
__________________
MY93 Impreza GX 1.8L, 0hp, 0nm
|
|
#10
05-05-2012, 04:04 PM
|
||||
|
||||
|
I like it, better than than the Bumph Whiteline give you! If I may add, do follow Whitelines instruction to recheck all hardwear after 100k's or so, I found I had to retension some areas ever so slightly.
Cheers.
|
| The Following User Says Thank You to X12 SRT For This Useful Post: | ||
rexwaggon (17-05-2012) | ||
|
| Tags |
| bar, diy, links, mounts, rear, sway |
|
|
 Similar Threads
|
||||
| Thread | Thread Starter | Forum | Replies | Last Post |
| Whiteline 3point adjustable 22mm rear sway bar MY04-MY07 WRX STI | tinno | For Sale | 2 | 09-05-2012 10:03 PM |
| wtd-wrx rear sway bar c links | thrashet | Wanted | 0 | 02-09-2010 08:52 PM |
| Whiteline Rear 24mm Sway Bar | siaw | Wanted | 1 | 20-11-2008 12:46 PM |
| FS: Alloy rear links & Selby's (aka whiteline) 22mm rear sway | Darren | For Sale | 0 | 25-08-2005 01:23 PM |


 3Likes


 Linear Mode


