|
|||||||
 |
|
|
LinkBack | Thread Tools | Display Modes |
|
#611
 06-09-2016, 06:07 PM
|
|||
|
|||
|
Quote:
__________________
Doing it for all the wagons out there 
|
|
#612
06-09-2016, 06:13 PM
|
||||
|
||||
|
Thanks for the explanation on the coupler!
They do look the goods, as does the rest of the build 
__________________
2015 Forester XT Premium 2020 VW Tiguan Allspace teejay: If I wanted a comeback Id wank in front of a fan
|
|
#613
07-09-2016, 11:07 AM
|
|||
|
|||
|
Heres a pic with the air filter inplace. Now that is what i call a COLD AIR INTAKE !!!
Have a bit of work to do to the pipe leading into the turbo to make it fit nice and proper. But you get the idea. And i will be boxing it in to keep road debris out, and ducting that box to the foglight openeing in the front bar. Hopefully get a little ram air flow positive pressure build up inside the box at high speed. 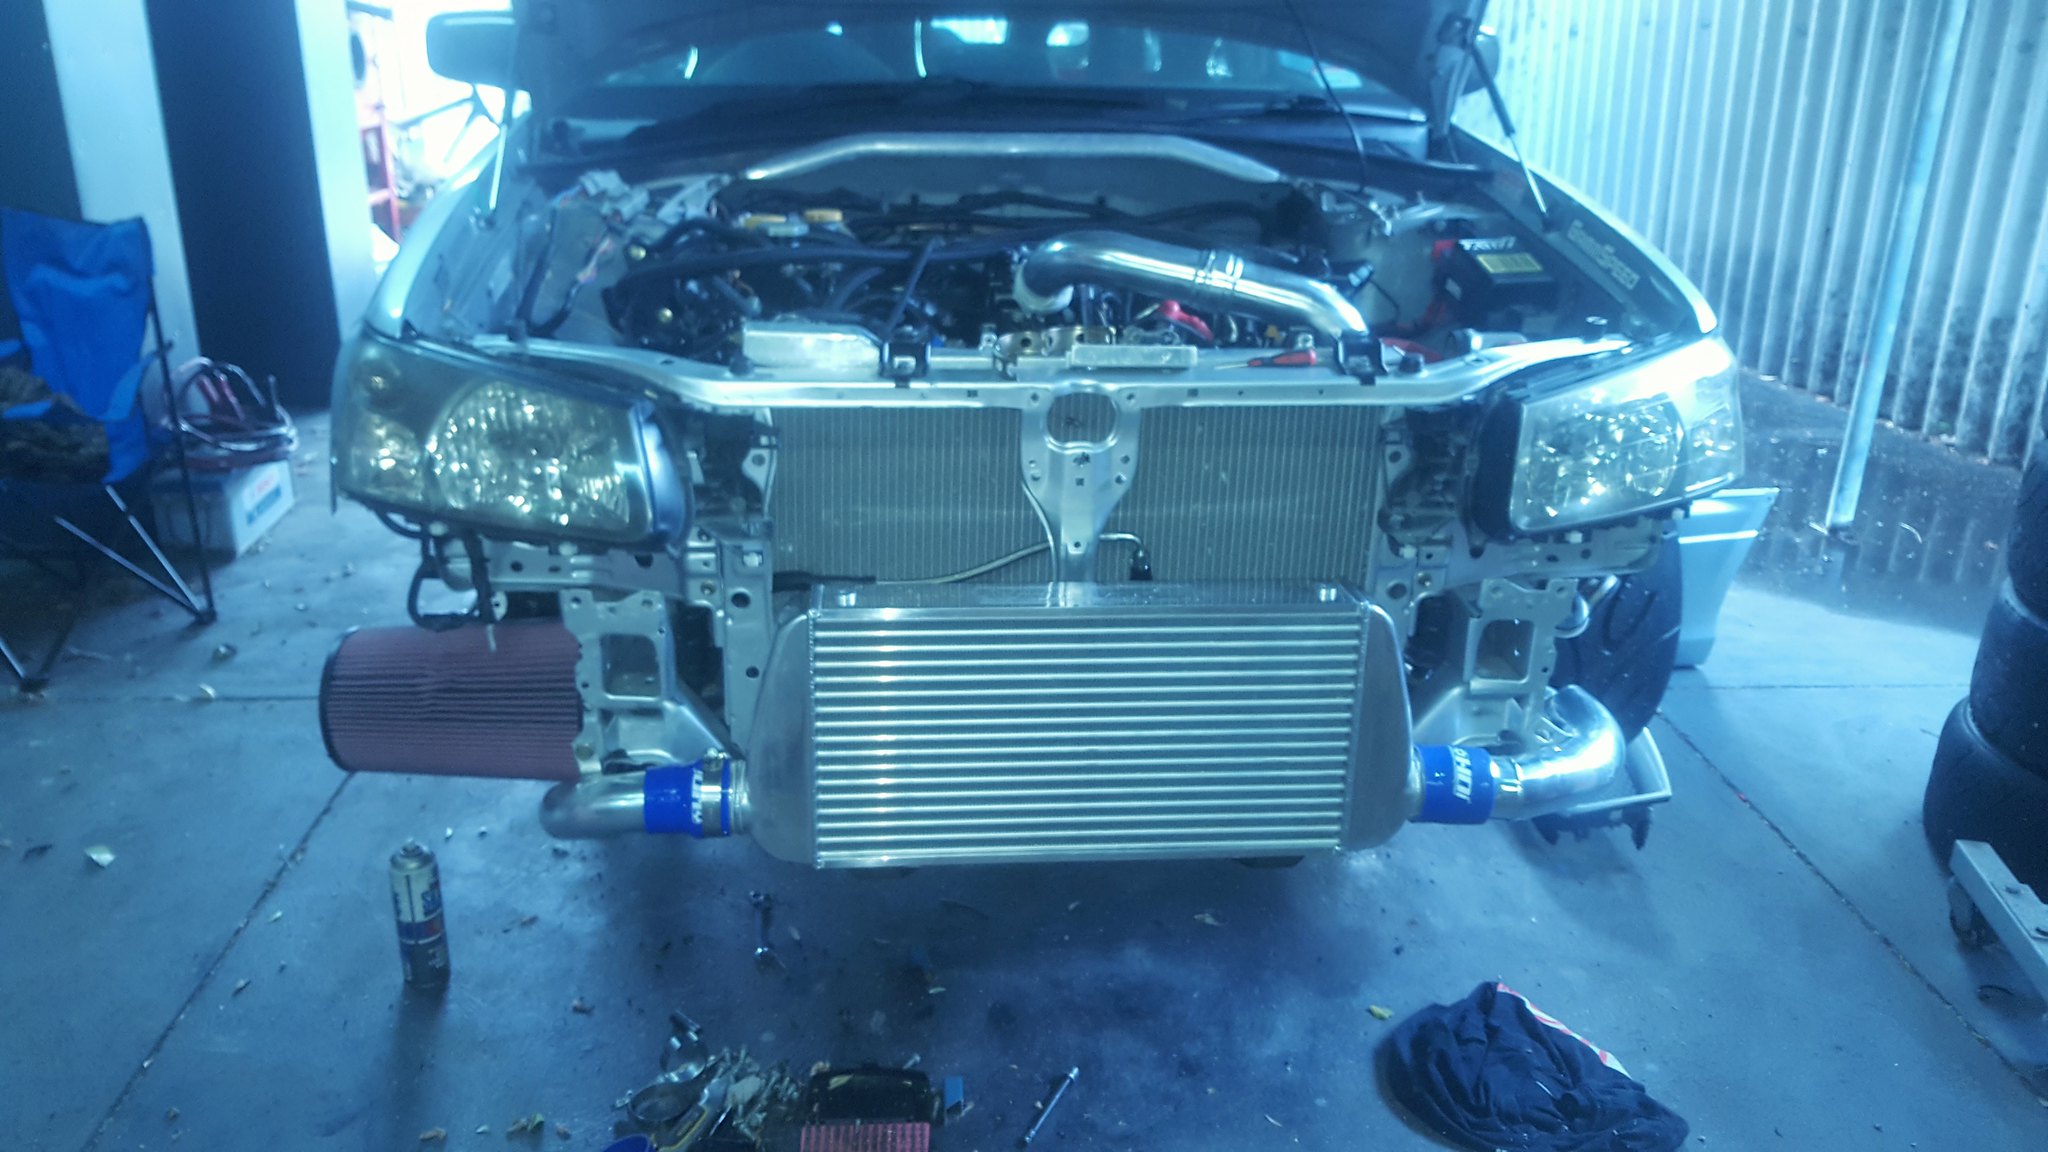
__________________
Doing it for all the wagons out there
|
|
#614
07-09-2016, 03:35 PM
|
|||
|
|||
|
Heres how i plan to stop hose blow outs at any of the FMIC connections. A 12mm alloy rod has been welded onto the FMIC and pipework, either side of the silicone join. Then a thin alloy link slips on. Lastly, R-clip cotter pins slot into the rods to lock it all in place. One link per silicone coupling.
These T-bolt style hose clamos will be replaced in favour of Murray constant tension clamps aswell. Im just using them for now as its all i have here. The throttle body connection will be sililar, except on the throttle body, a small bracket will be built to mount on using the throttle body mounting bolts. The bracket will then hold the rod for the throttle body side. The turbo compressor outlet will be difficult as that connection actually uses a 45° elbo silicone coupling. And im not sure how well i can weld into the compressor cover? But i could build a little bracket that mounts onto the compressor cover bolts, and holds the the turbo end of the strap that way. Or perhaps slip it over the boost pressure refference port in the comp outlet? 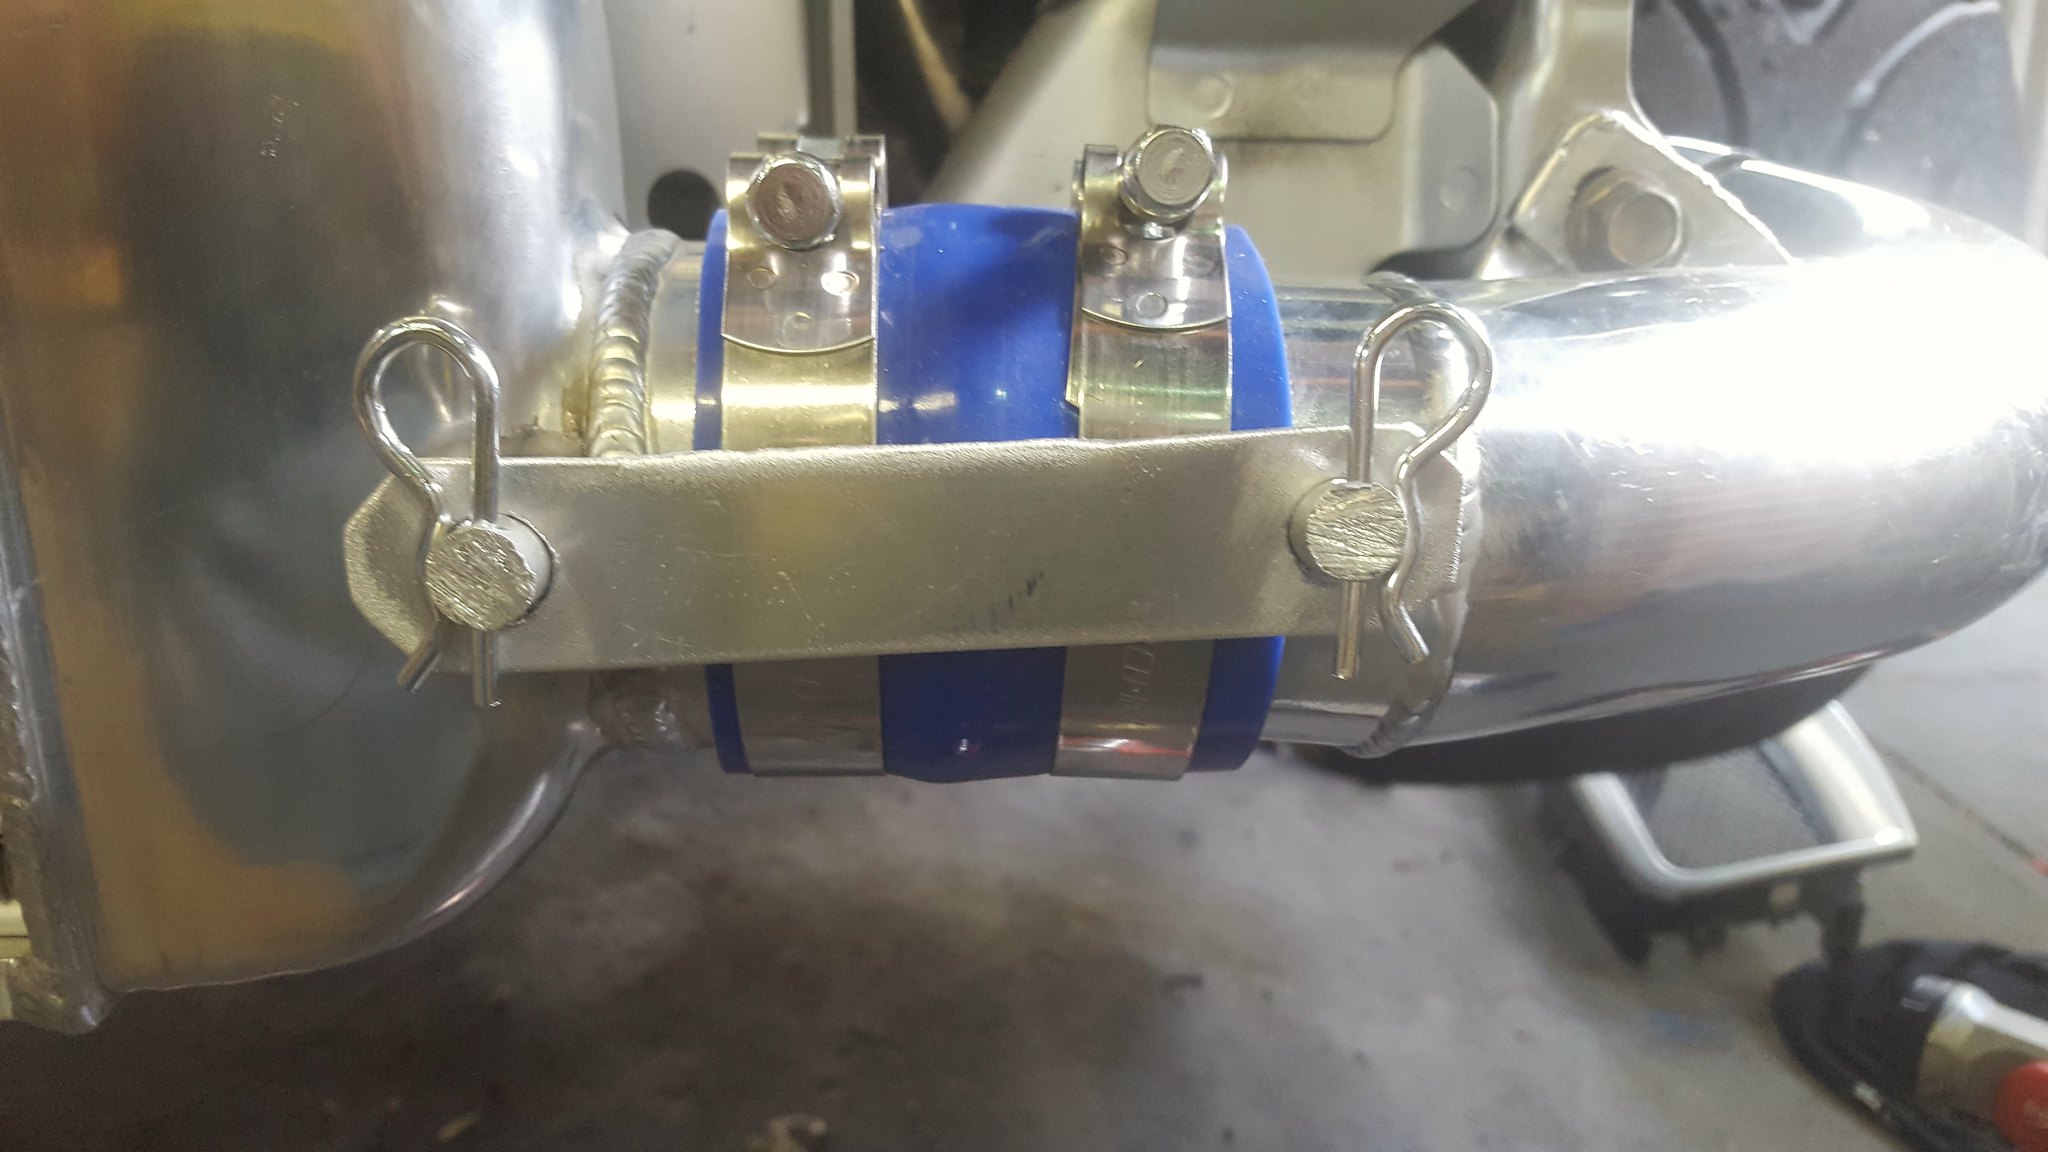
__________________
Doing it for all the wagons out there
|
|
#616
08-09-2016, 07:19 PM
|
|||
|
|||
|
The turbo oil drain mini sump is built. I do still have to weld some brackets that will locate it to the turbo so the wieght isnt hanging off the drain fitting. Its about as low as i dare go. It has 3 weld on sockets. The top port is a -4, and it will be used to drain oil from the catch cans, And also provide ventilation to the sump. The lowest port is a -6, and that will be connected to the suction port of the oil scavenge pump. And coming off at 45° is a -10 that will screw directly to the turbo drain fitting using a single 45° female - female union.
First, placement was mocked up. And then i carefully drilled a single hole where a port was later to be installed. Then i set up a slow back purge. Then 2 halves were joined together all the way around using a fusion weld. I am very impressed with it, it looks like a robot done it. Penertration was spot on with zero internal sugaring. Then the port holes were marked out and drilled, and then filed/de-burred to ensure absolutely no dags that could brake off and end up in my oil system. The bottom port for the scavenge pump needed a small length of tube to help get the perfect contour to the bottom of the dome, so it can drain from almost the lowest point. Then i thoroughly washed the inside with boiling hot water and detergent, then let to dry and then acetone washed. I wanted to be 100% sure all dust was out before welding it up. Then i setup the purge again and welded in fully the ports. I also made the external gate exhaust tube. Screamer pipe for the LOLs. Basically a tube expander from 1.75" up to 2". Then a short 90° bend. The bend will be cut off diagonally on the lowest point so it sits flat with the lowest part of the car. I really like welding SS316, it just looks better than SS304. I will put up some pics of it fitted to the car later. Its too late now. 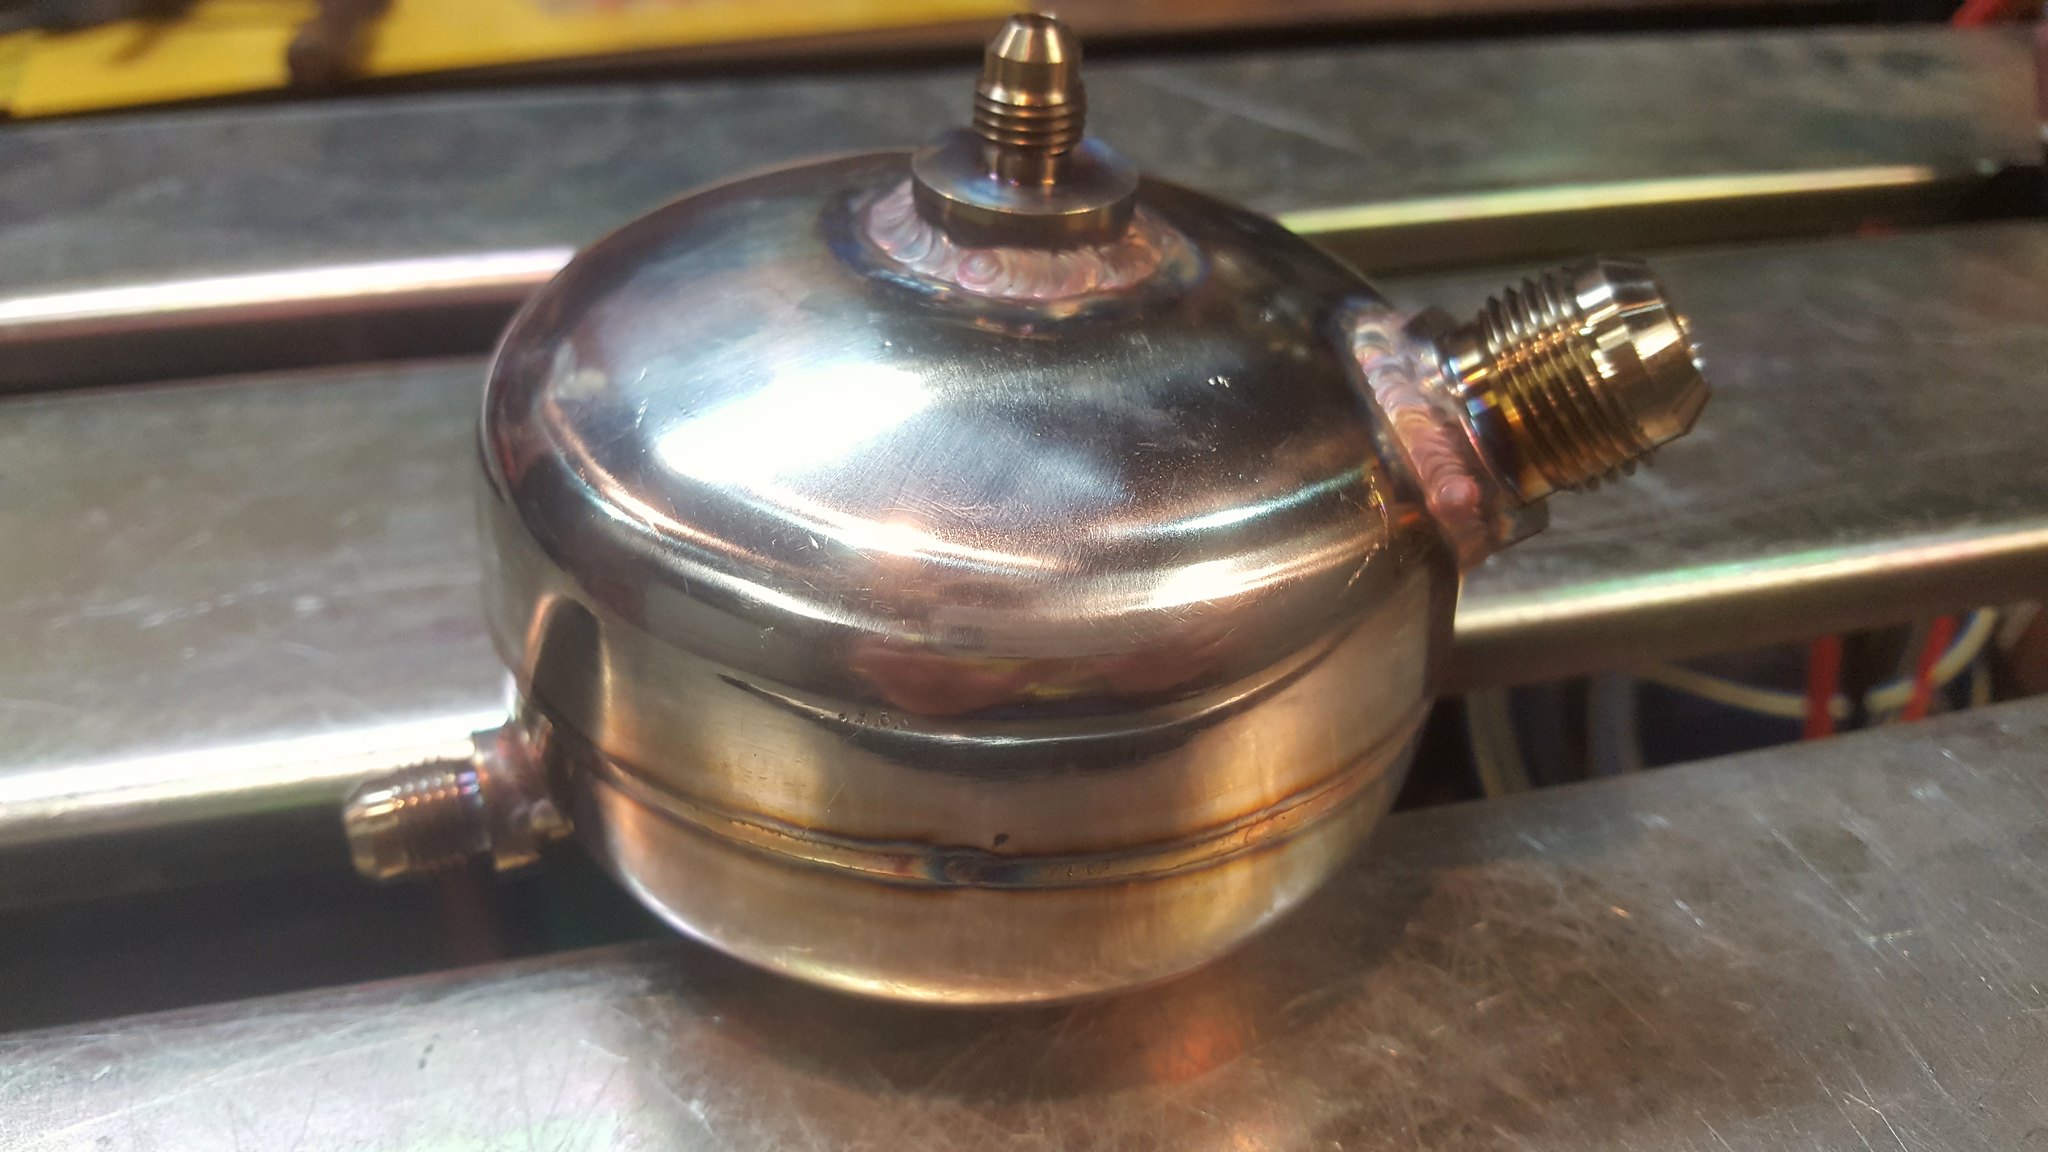 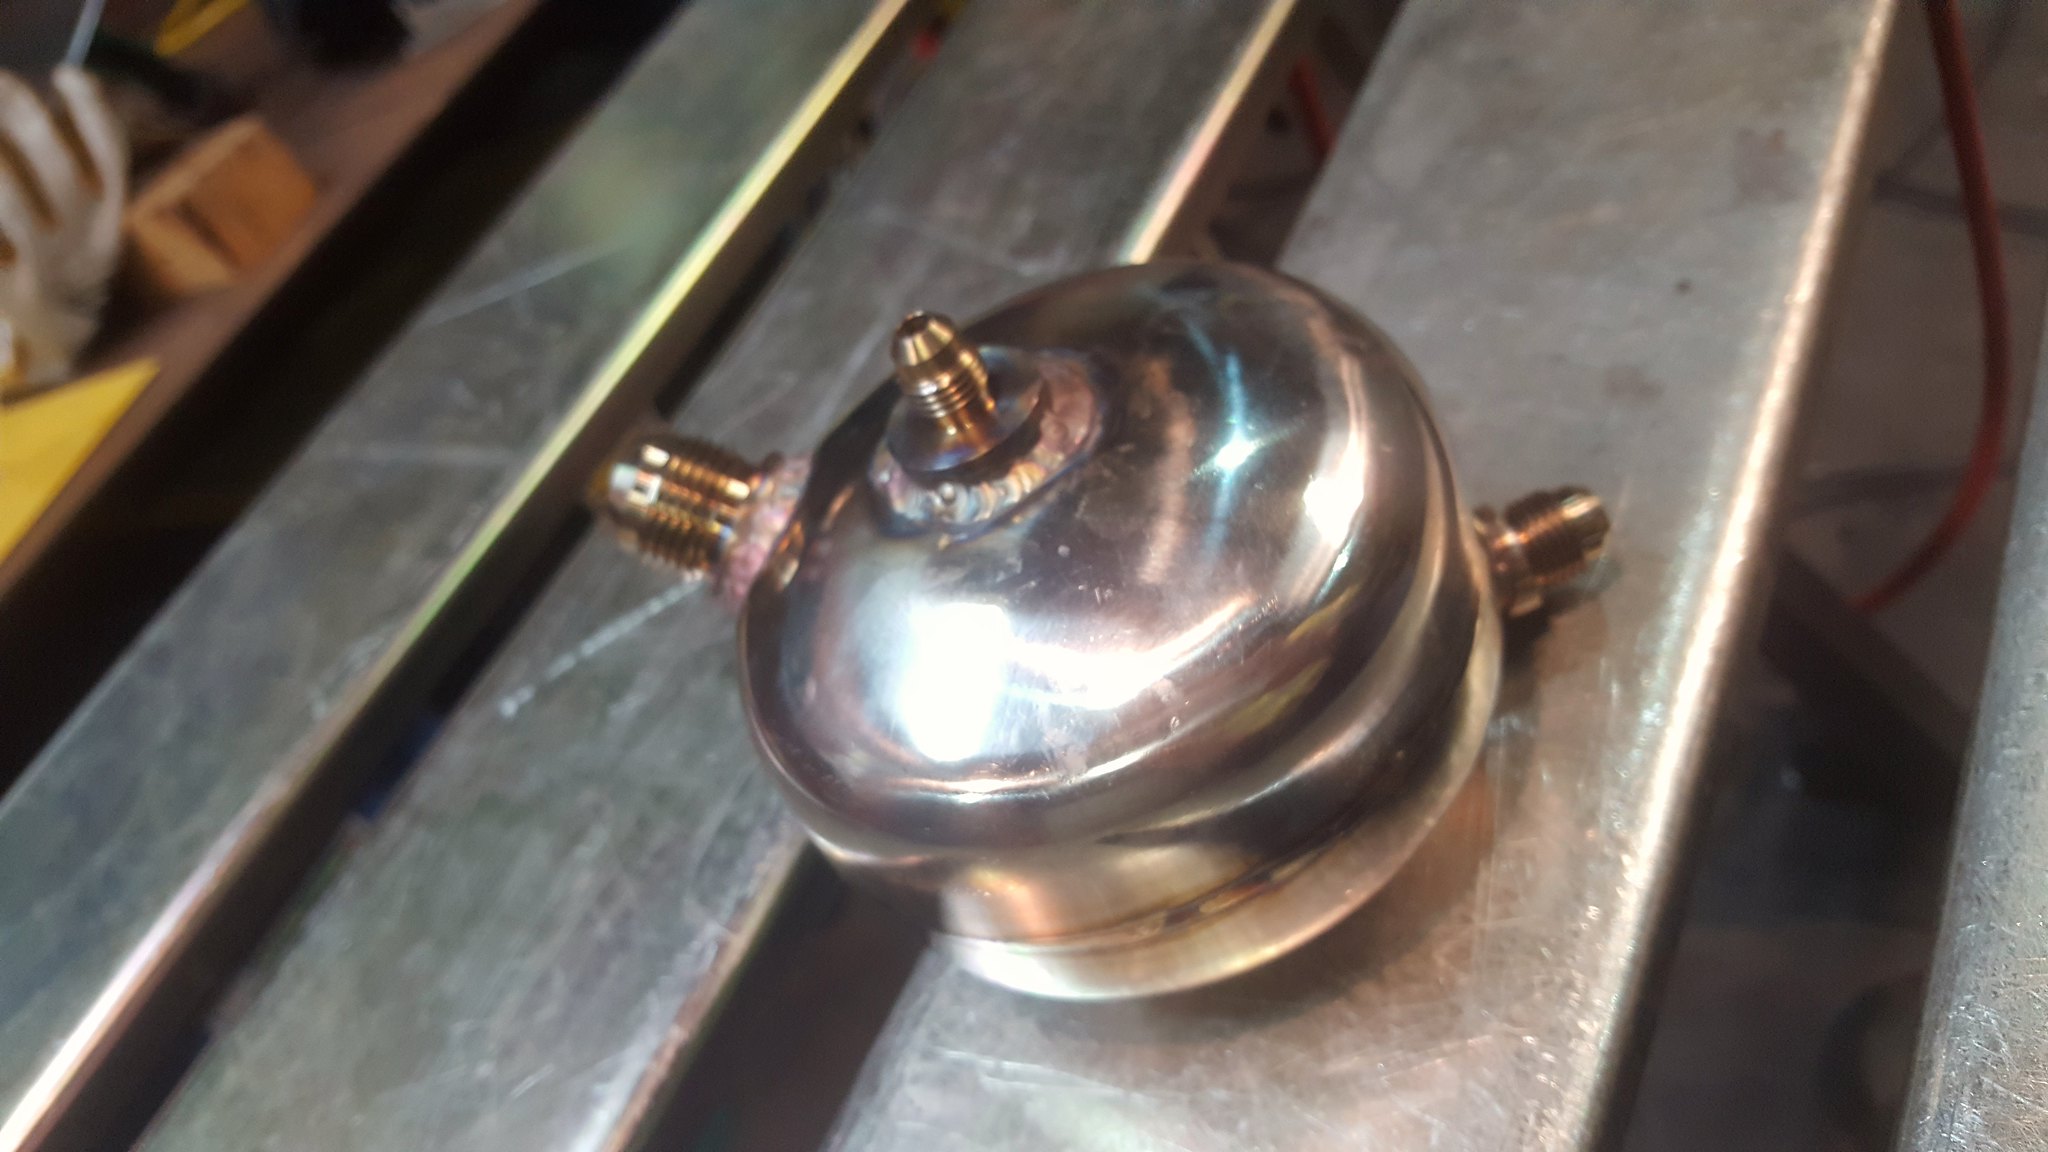 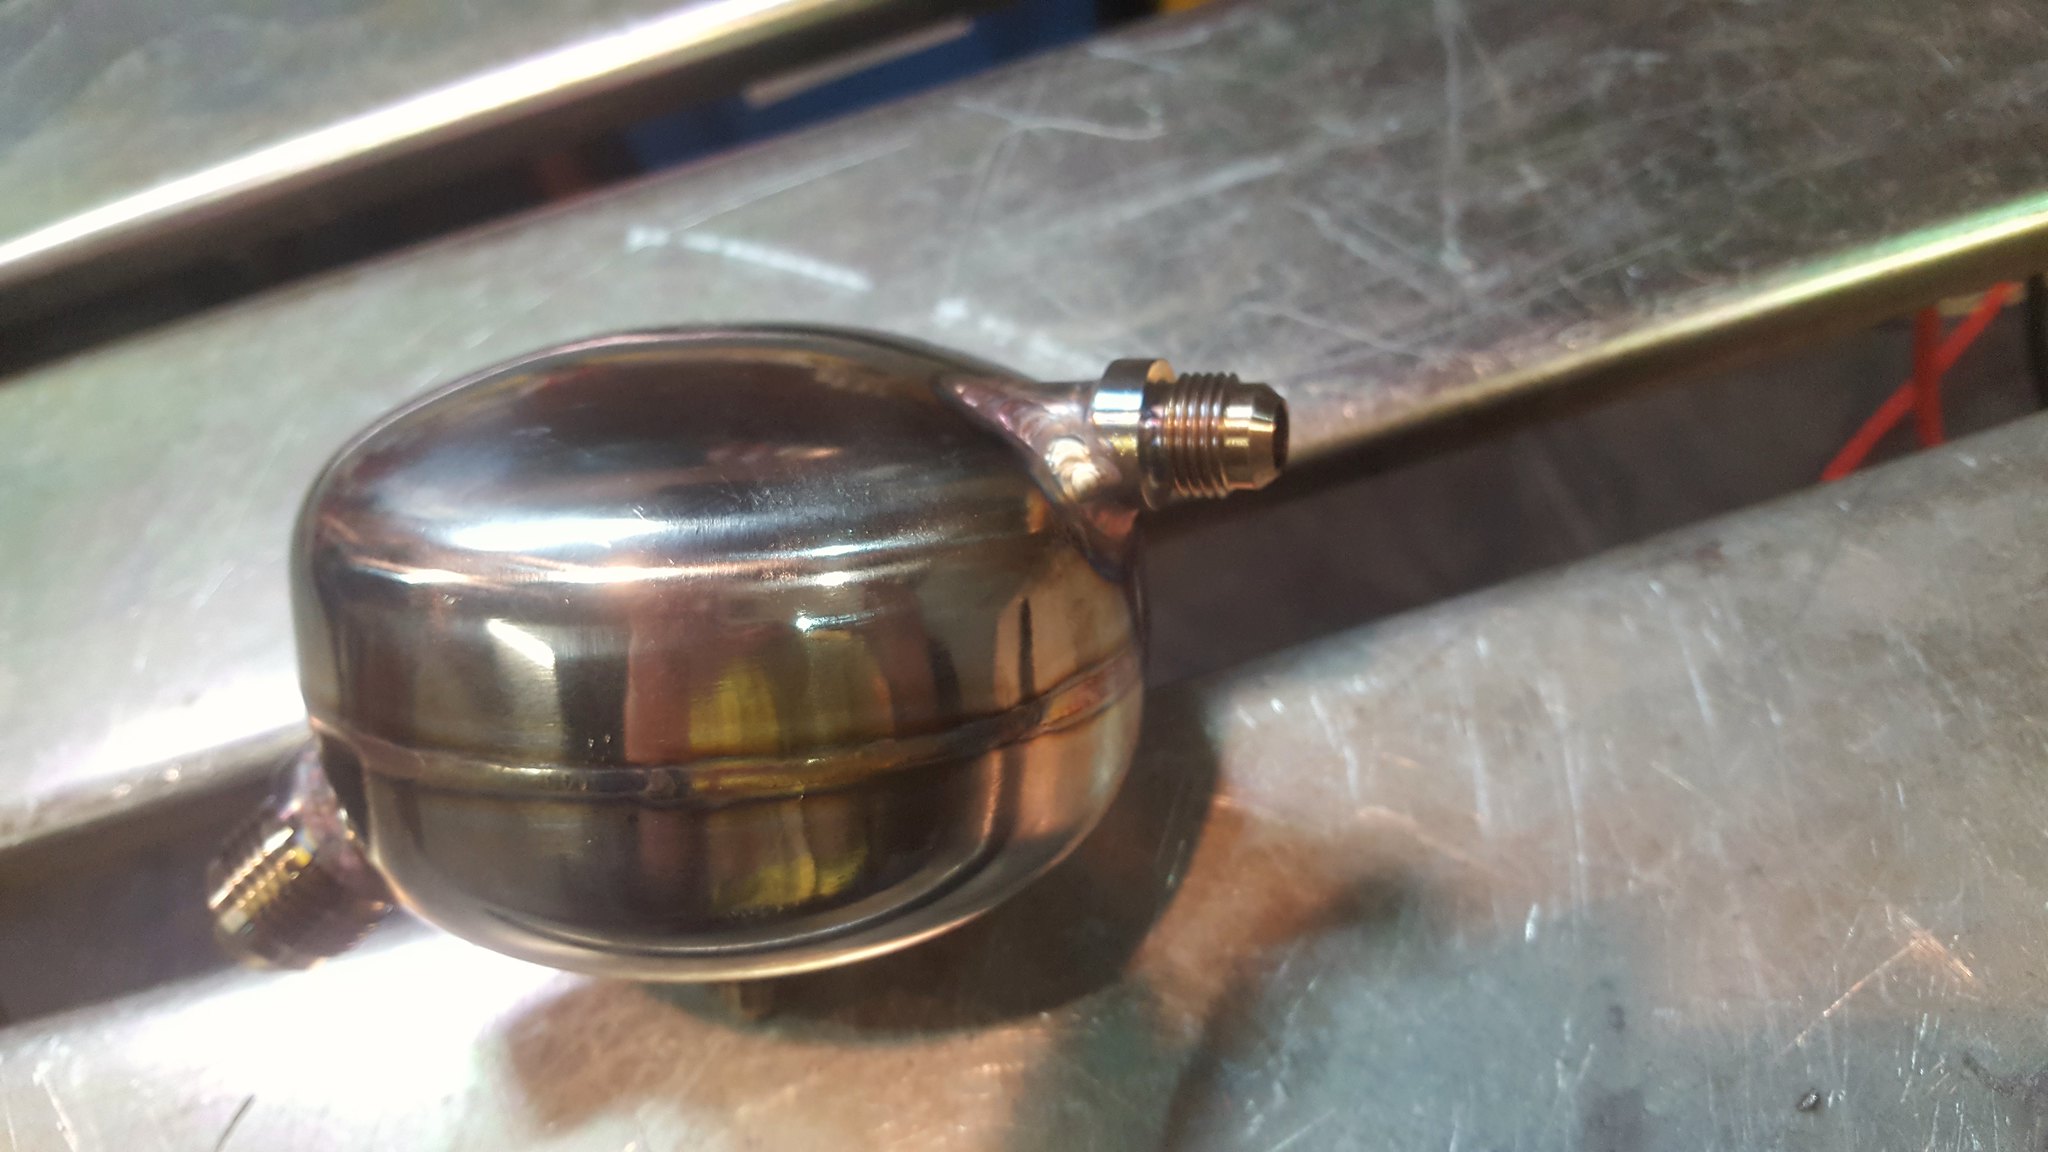 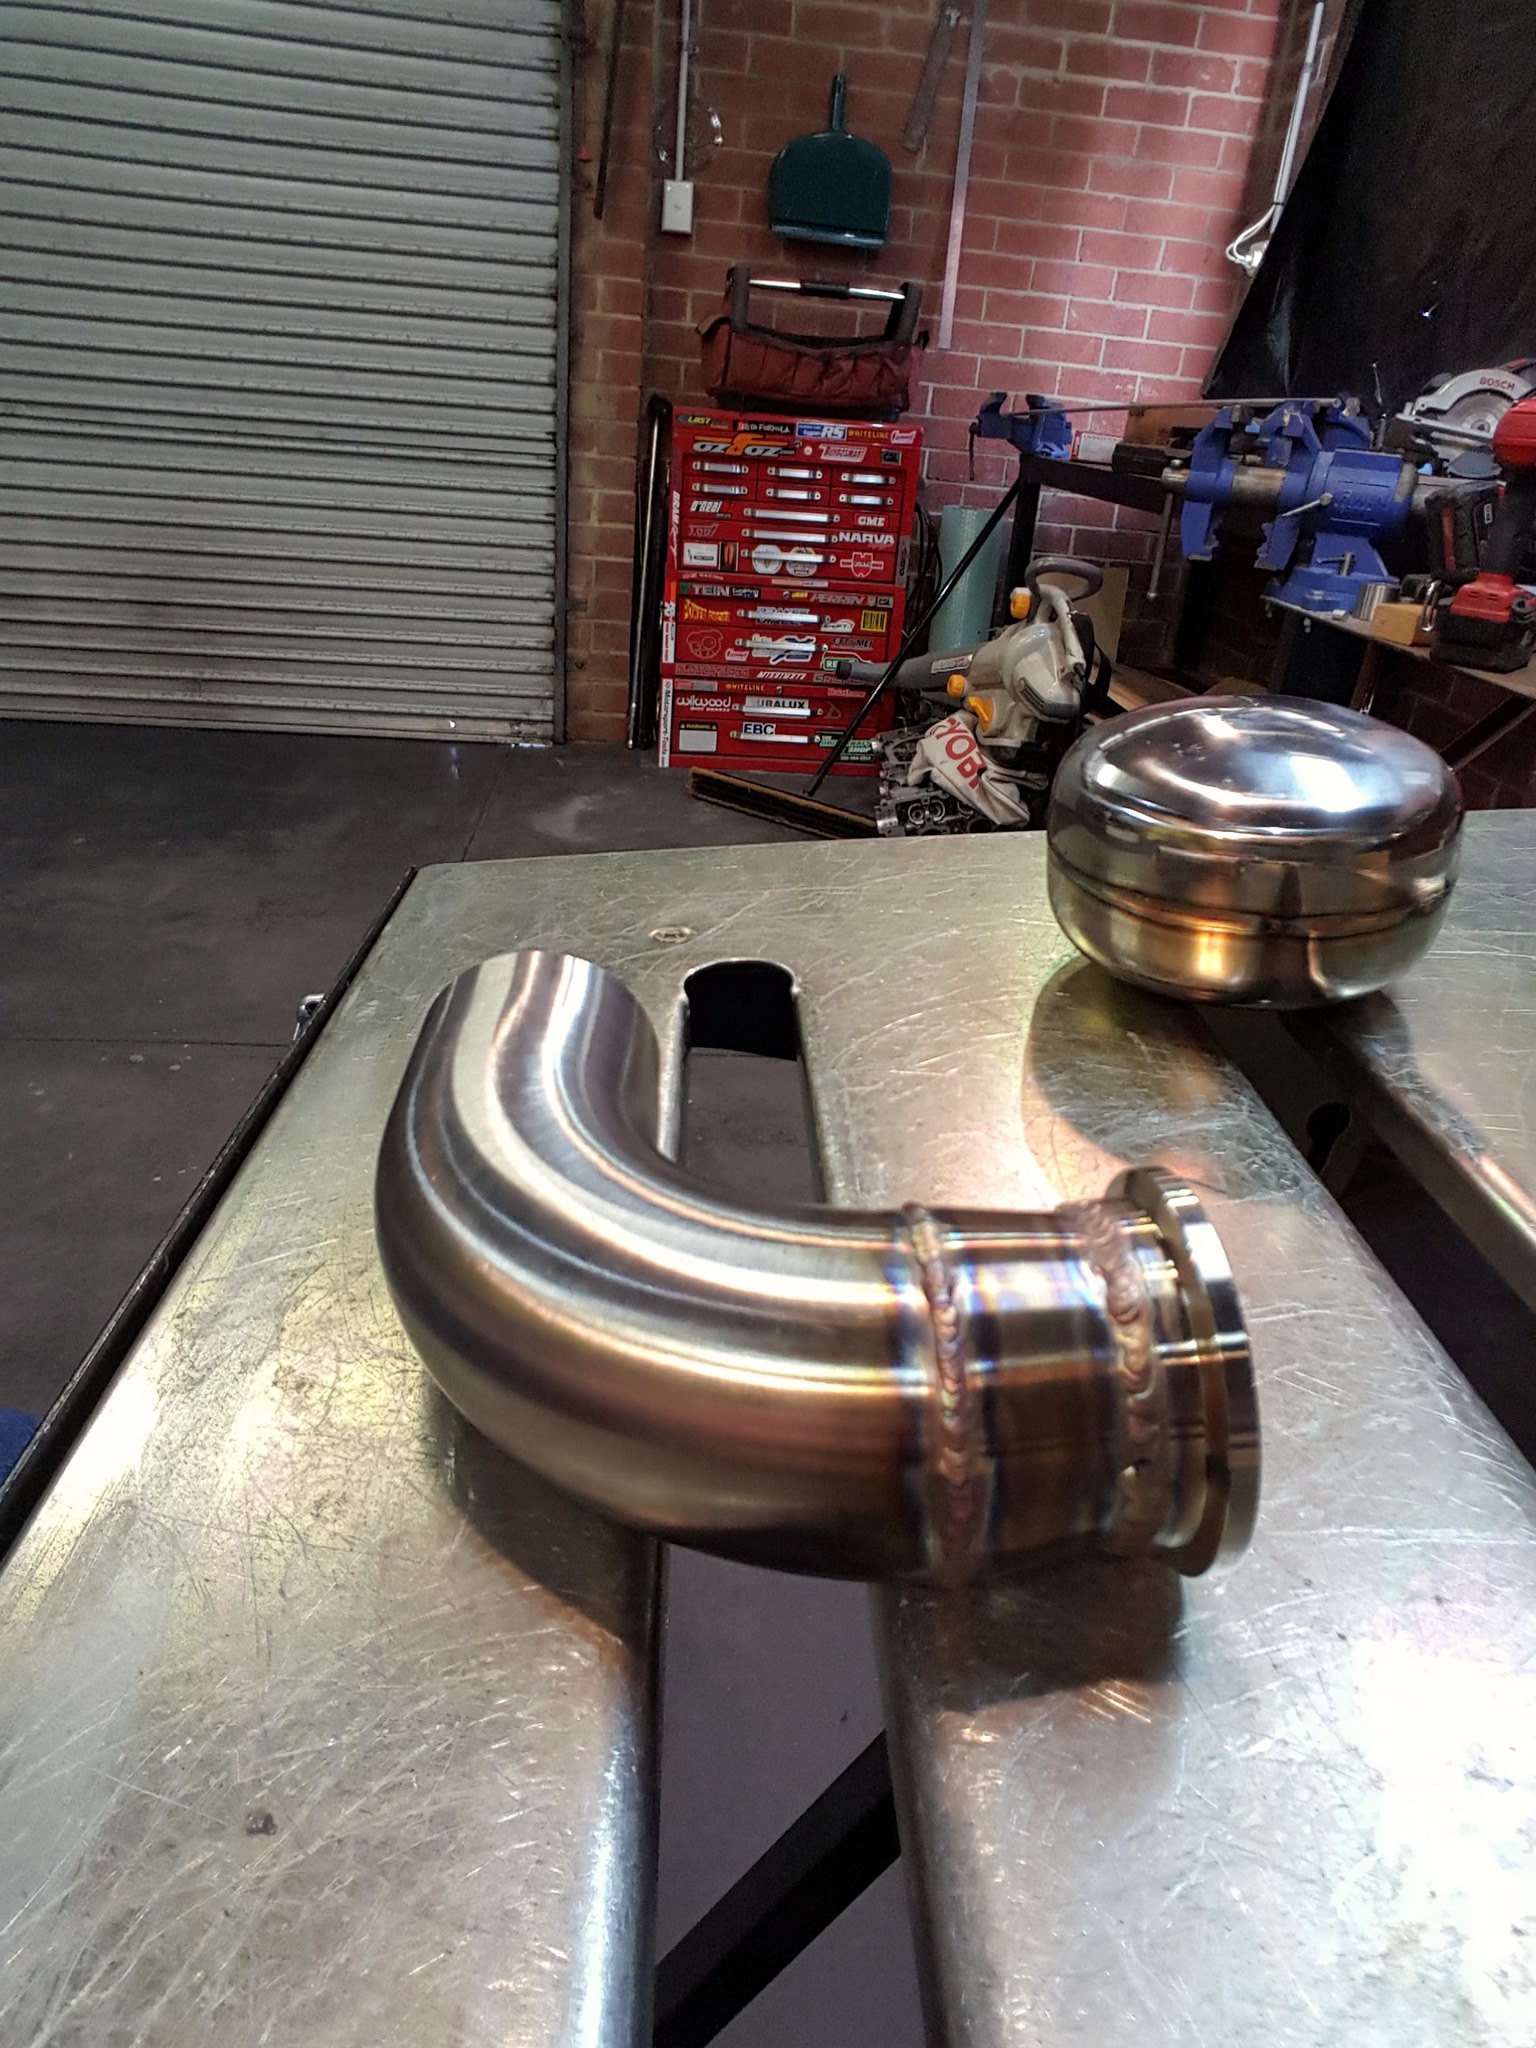
__________________
Doing it for all the wagons out there
|
|
#617
08-09-2016, 07:26 PM
|
|||
|
|||
|
Quote:
__________________
Doing it for all the wagons out there
|
|
#619
09-09-2016, 07:53 PM
|
|||
|
|||
|
Quote:
__________________
Doing it for all the wagons out there
|
|
#620
15-09-2016, 07:46 PM
|
|||
|
|||
|
Slow week as far as yeti mods go. I did get out in the shed this evening and do a little. But nothing to exiting. Just a little re-work. I wasnt happy with how low the drain sump hung, so i chopped out the mid section and re-welded the 2 ends back together. It now sits at a good level. But i also decreased its volume down to probably what i would consider the smallest possible. I actually cut a bit more out of the middle than i had anticipated.
And i also changed the direction the suction port to the scavenger pumps faces. I was a bit worried that if i had it facing rightward, with the drain entrance kind of leftward, then there could be a potential issue on clockwise direction race tracks (barbagallo) where the oil could build up on the left side away from the suction tube, and potentially flood the turbo. So i now have the port facing rearwards, and i am able to angle the entire dump that way to as i now have a little more space to work with hieght wise. In hindsight, i should of had the suction port coming in dead center ontop of the sump, with a straw so it can siphon from the very lowest part of the domed sump. Maybe if i ever build a new one, ill do it that way. Heres some dodgy camera phone pics to show the new sump, and how low it hangs relative to all the other low hanging stuff. You can also see tge screamer pipe, which i will cut off horizontal at about the level of the sump. When i had the sump cut open, i was mighty impressed with the inside finish of the welds, the back purging made such a massive difference. Without it there would be horrible dags poking in everywhere. 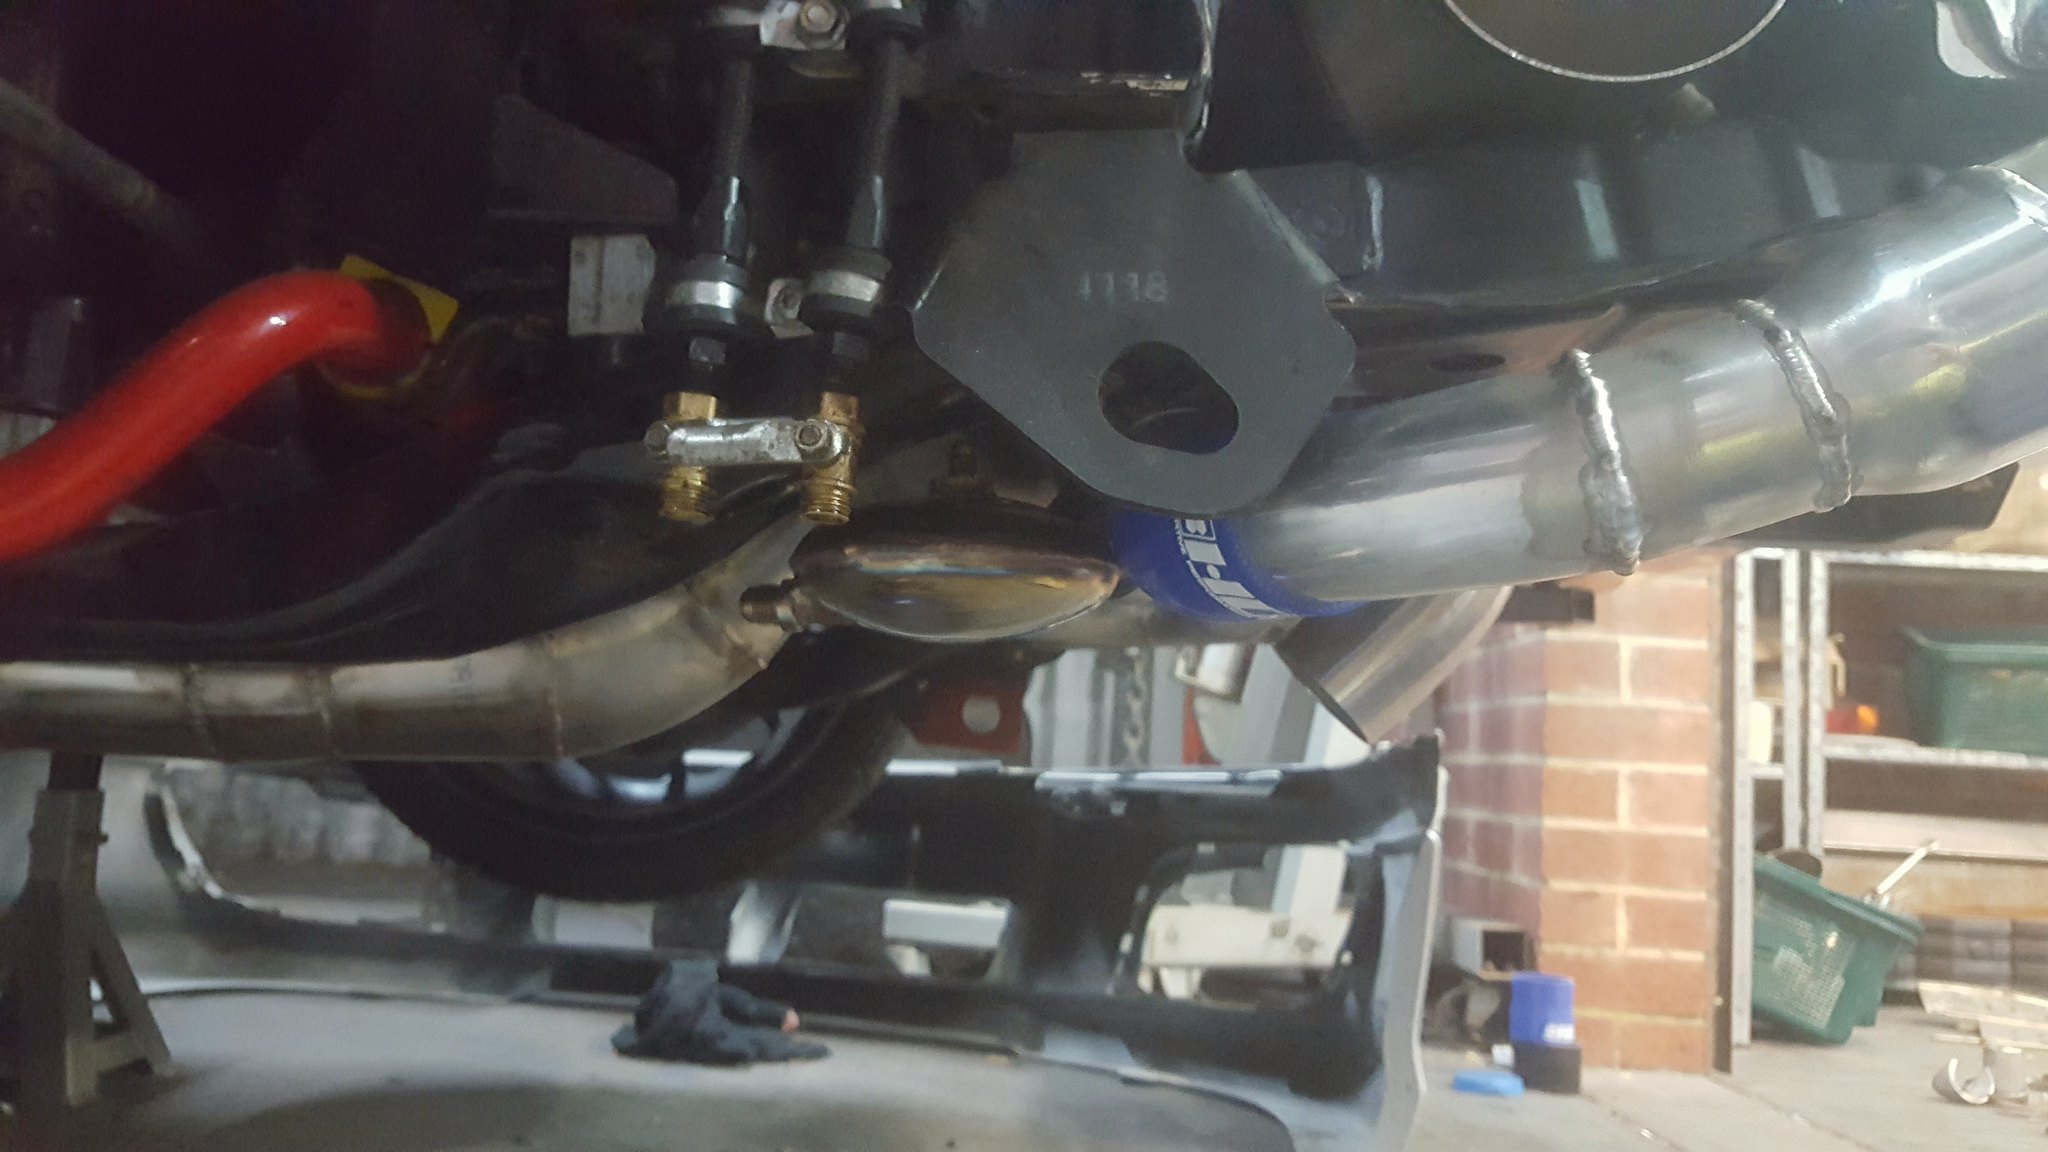 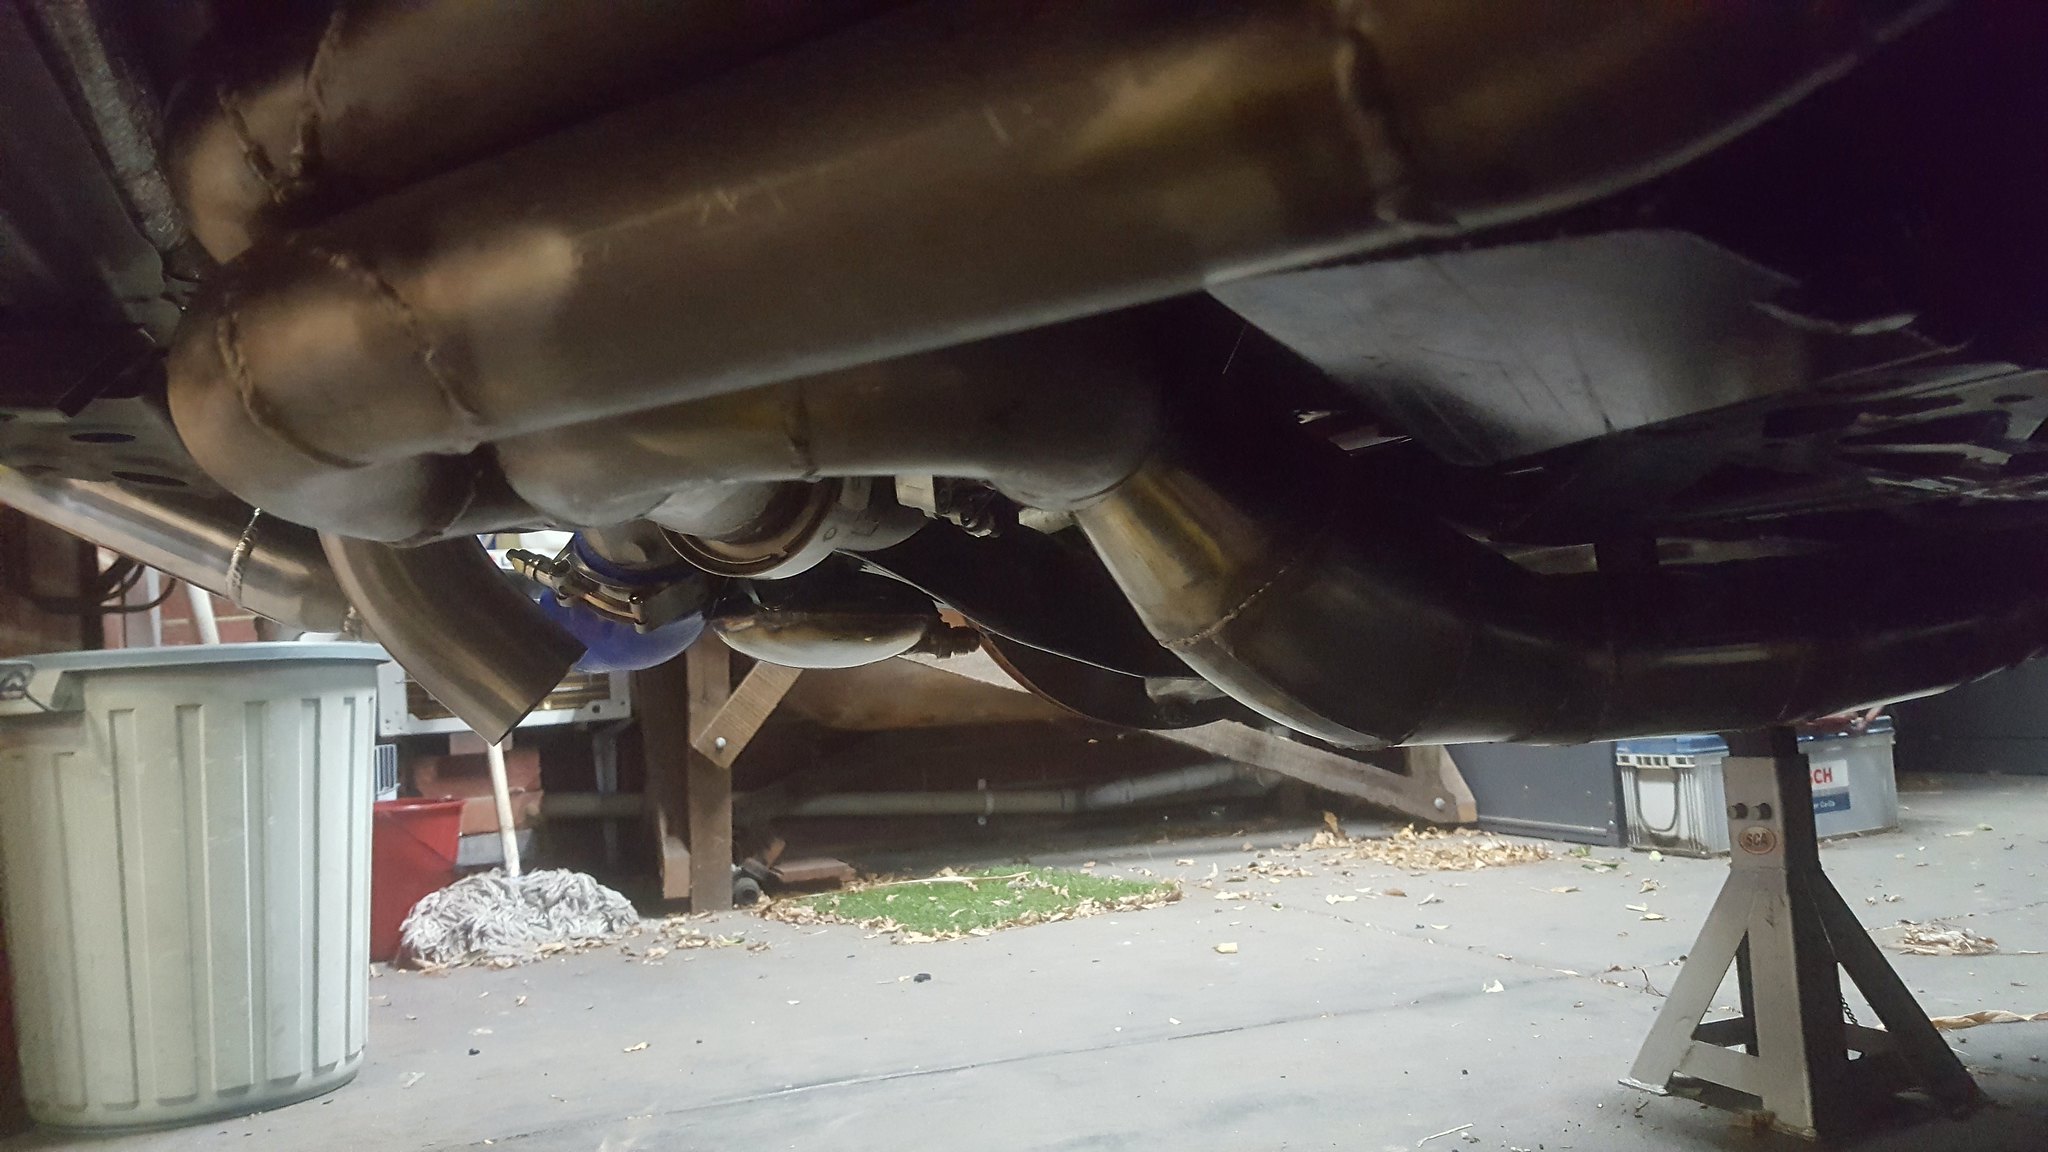
__________________
Doing it for all the wagons out there
|
|
| Tags |
| sled, yeti |
|
|


 636Likes


 Linear Mode


