Very good observation Grapejuice.
Gordon has a few maps to access via the Blitz SBC Spec R.
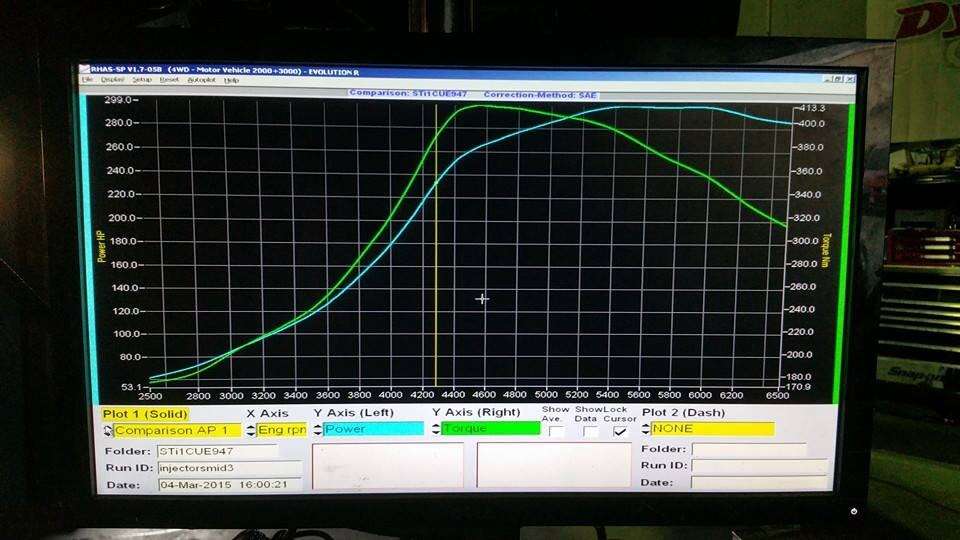
Set the touch of the button, he can get this at 1bar which we will call Chart A:
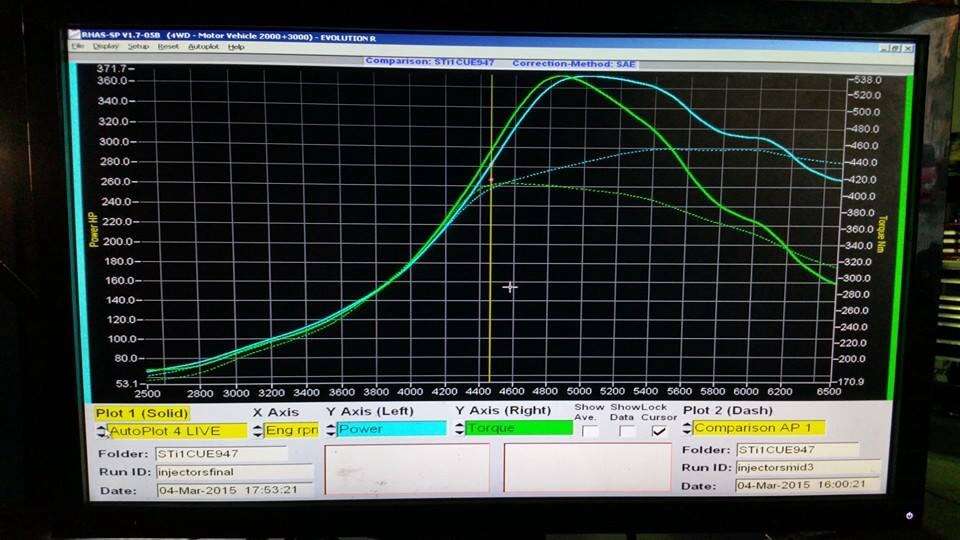
He can then press the high boost setting and get this at 1.7bar (Chart B with Chart A in the dotted lines):
Boost graphs here:
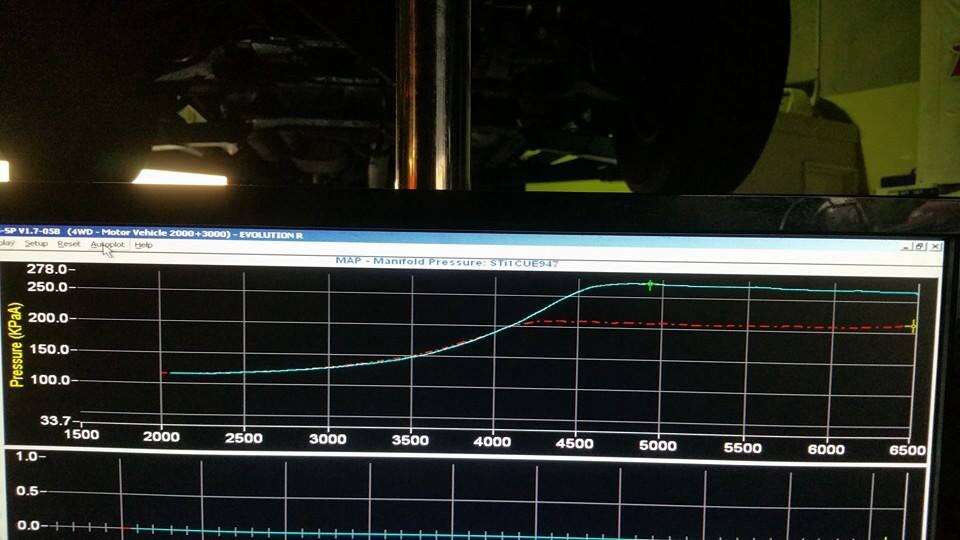
Chart A is tuned to achieve good consistent power at 1bar. Timing is optimised at the top end as well.
Chart B:
Shows linear power holding, while torque is dozing off because Ignition timing is not optimised. This is to protect the engine with almost factory timing at the top end.
Chart B also overlaps Chart A and you can see how the extra power is generated safely in comparison to Chart A.
Our Dynapack 5000 was calibrated last year. I do not include boost as a 3rd dimension as it stretches the Axis out, giving less resolution.
Gordon is a qualified engineer and I appreciate working on his car. TBH, he worries over the slightest discrepancy and consistently provides feedback via his independent AFR meter and knock sensing device. This in turn allows me to improve the tune on his STi with his accurate feedbacks.
I love a customer who communicates onboard driving info with me regularly and in turn, I can tune the car to his specifications and liking. This type of driver-tuner communication is very common overseas, especially for track tuning.
An average tune in Japan takes over a week. I also practice per job charging. Our charges are very reasonable and way lower than others here. For a job like this done for Gordon (turbo supplied+installed+ fit injectors and regulator and tune), it costs less than having a turbo supplied and installed anywhere else in Perth.
Quote:
Originally Posted by grape juice

Looking at the dyno printout again.
If you drew a line in the middle of the torque and power curves you'd have (IMO) a really good outcome for a daily.
|