Perth-WRX.com  

Go Back   Perth-WRX.com > Technical > Cosmetic
Register Diddy Kart ArticlesAll AlbumsBlogs FAQ Community Calendar Today's Posts Search


Welcome to Perth-WRX, click here to register!

Reply
 
LinkBack Thread Tools Display Modes
  #61  
Old 02-12-2008, 04:47 PM
STI Master
Member
 
Join Date: Dec 2006
Location: Perth
Posts: 592
Thanks: 3
Thanked 1 Time in 1 Post
SKYHIONPSI at standard level
Default

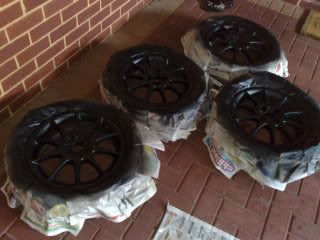
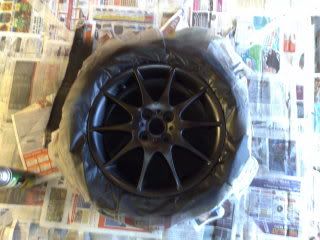
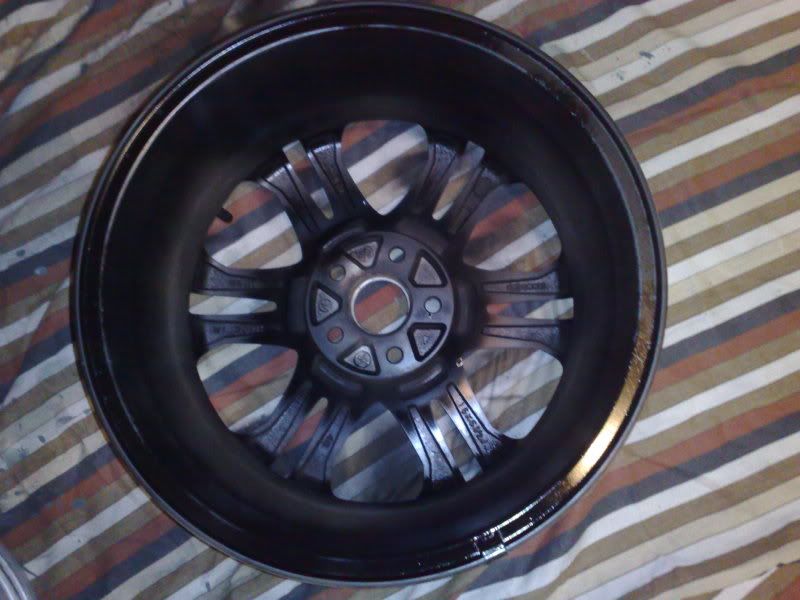
I have had a couple of PMs about my wheel painting DIY thread i created on another forum. I might aswell put it up here if people are interested.

Cheers

Quote:
Hi

This is my DIY for painting wheels at home. I think by doing it this way i have saved a lot of money and its just a good way to do something to your own car and know you did it and not paid to get it done.

Items needed:

spray cans of chosen colour (2 wheels can get away with 1 can of paint. you may want to use more if you are spending a good amount of time on each wheel)
spray cans of clear
rags
metho
600-800 grit sand paper
drop sheets

Step 1:
I started off by taking my wheels off the car and getting the tyres and any weights pulled off. This gave me a blank canvas to work with. I washed the wheels thoroughly, inculding using wheel cleaner and a big scrubbing brush and getting in all the nooks and crannys. Once this was complete i air dired them and used a rag to get into all the small places. there was still a fair amount of grime imbedded into the wheels on the inside so i just decided to spray right over this and just wait and see what would happen. I also removed my centre caps before washing and ended up just painting them with 1 coat of black and 1 clear coat.


Step 2:
I rubbed the wheels very lightly with a wet and dry sandpaper around 600-800 grit. This just gave the surface a small bit of roughness to it so the initial coat of paint had something to grab onto. I then get some metho and gave the wheels a good rub down to get rid of any fine bits and just a general clean. After this dried the first coat of paint would be applied.

Step 3:
I started with my first coat of paint, i did a small trial section to see what the best results were, i found by giving the wheel a light coat starting on the inside with the wheel laying on its face. This was a good base layer because it wasn't too thick or anything yet and dried quite fast. I was only doing 2 wheels at a time so if you are doing 4 at a time by the time you move from wheel to wheel the previous coat will be dry and can start spraying the next one. The second coat consisted of getting the majority of paint on the wheels getting good coverage but not going on too thick so it would run or pool in any particular places. After this coat dried i checked in direct sunlight any places that i might have missed and touched them up accordingly. The final coat of paint was basically the finishing coat and had to be even, smooth and cover everything. After waiting half an hour it was touch dry and the wheel was turned over so i could paint the face. I basically repeated this whole step but on the front face of the wheel which gave good results. Be sure to check in direct sunlight for unpainted areas as you may miss some or spray may not reach.


Step 4:
After giving the wheels 24 hours to dry they were completely dry, depending on conditions though it may need more or less time. Check on the back of the can you are using. I then applied the clear coat to finish them off and seal and protect the wheels. The clear coat should resist dirt and grime but probably not scratches or gutter rash. This was applied with one good coat over the whole area in a similar fashion to step 3. Give this another 24 hours before replacing tyres and getting them re-balanced and put back on your car. Shops use stick on weights now so they are hidden from the front of the wheels and rest inside your wheel.


If there are any points other people who have done the same would like to add that would be great.

Cheers
Reply With Quote
  #62  
Old 02-12-2008, 05:16 PM
phatskinz's Avatar
STI Master
Member
 
Join Date: Feb 2007
Location: perth
Posts: 536
Thanks: 0
Thanked 0 Times in 0 Posts
phatskinz at standard level
Send a message via MSN to phatskinz
Default

Great DIY guide mate
Reply With Quote
  #63  
Old 02-12-2008, 05:50 PM
redlib's Avatar
Subaru Tech Division
Member
 
Join Date: Sep 2007
Location: Perth
Posts: 1,263
Thanks: 3
Thanked 5 Times in 5 Posts
redlib at standard level
Default

What paint did you use
Reply With Quote
  #64  
Old 02-12-2008, 08:08 PM
STI Master
Member
 
Join Date: Dec 2006
Location: Perth
Posts: 592
Thanks: 3
Thanked 1 Time in 1 Post
SKYHIONPSI at standard level
Default

sorry, just used regular spray packs from bunnings. Not sure how long it will last with all the road grime and washes and what not, but i guess ill find out the hard way.

Cheers
Reply With Quote
  #65  
Old 02-12-2008, 09:12 PM
Potty Training Scoobie Noobie
Member
 
Join Date: Jun 2007
Location: perth
Posts: 67
Thanks: 0
Thanked 0 Times in 0 Posts
kennny at standard level
Default

great diy, just curious as to what it looks like on the car, any pics?
Reply With Quote
  #66  
Old 02-12-2008, 10:58 PM
STI Master
Member
 
Join Date: Jul 2005
Location: North of the river
Posts: 533
Thanks: 0
Thanked 1 Time in 1 Post
spikey at standard level
Default

Quote:
Originally Posted by Huy
Could be in for this too. Thinking about painting my stock STi rims...orange. Only for the track so who cares!
I have a set of 05 BBS sti rims already done in sti pink,only for the track of course
Reply With Quote
  #67  
Old 02-12-2008, 11:04 PM
Huy's Avatar
Huy Huy is offline
Flat Four Father
Member
 
Join Date: Jul 2005
Location: Dianella, Perth
Posts: 2,302
Thanks: 0
Thanked 0 Times in 0 Posts
Huy at standard level
Send a message via MSN to Huy
Default

Sure, Terry! Nothing wrong with that for street wheels!
__________________
R34 GT-R Vspec II Nür - Black Pearl

Stack that Cheese
Reply With Quote
  #68  
Old 03-12-2008, 02:10 AM
klass8wrx's Avatar
WRX Hi Five Club
Member
 
Join Date: Apr 2007
Location: Northways
Posts: 237
Thanks: 0
Thanked 0 Times in 0 Posts
klass8wrx at standard level
Default

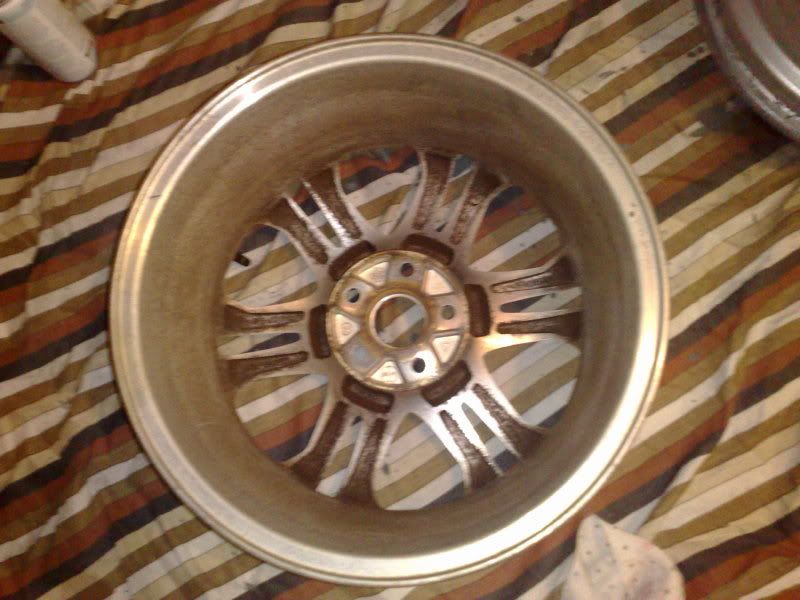
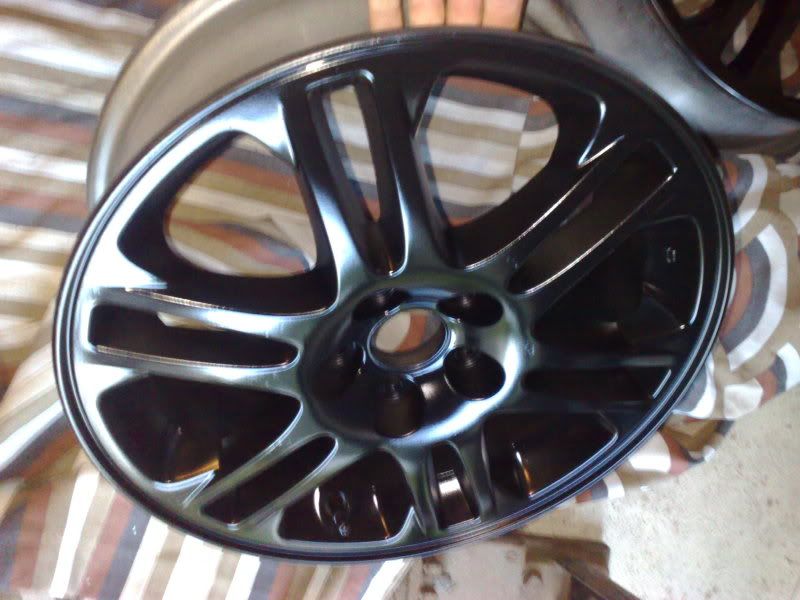
Mate and I did a DIY on his sportivo rim's the other day. 3 coats, $50 and 6hrs later...Turned out mint


__________________
Moving on

Last edited by klass8wrx; 03-12-2008 at 02:13 AM.
Reply With Quote
  #69  
Old 03-12-2008, 04:47 PM
STI Master
Member
 
Join Date: Dec 2006
Location: Perth
Posts: 592
Thanks: 3
Thanked 1 Time in 1 Post
SKYHIONPSI at standard level
Default

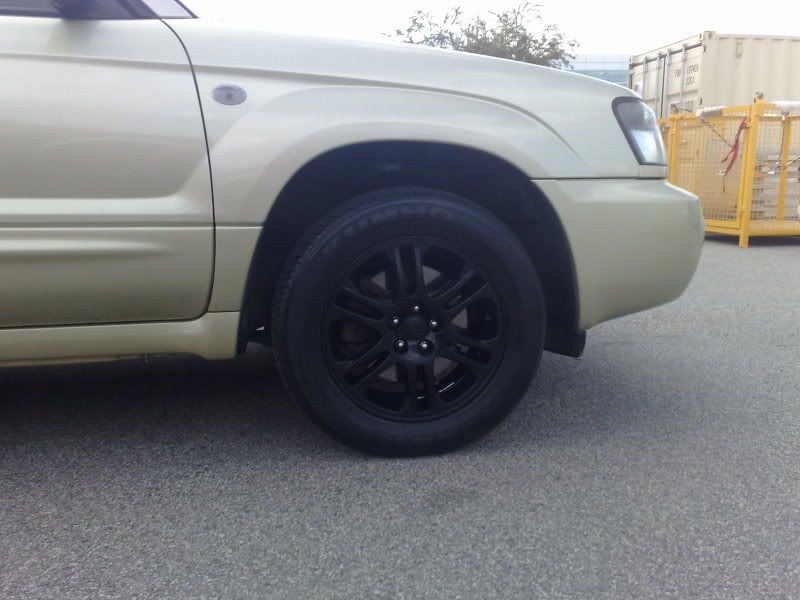
pics on the car. only a wheel shot as i dont have all 4 on yet, will throw more up after.

Reply With Quote
Reply

Tags
painting, rims


Posting Rules
You may not post new threads
You may not post replies
You may not post attachments
You may not edit your posts

BB code is On
Smilies are On
[IMG] code is On
HTML code is Off
Trackbacks are On
Pingbacks are On
Refbacks are On


Welcome to Perth-WRX, click here to register!

All times are GMT +8. The time now is 03:16 AM.


Powered by vBulletin® Version 3.8.9
Copyright ©2000 - 2024, vBulletin Solutions, Inc.
Content Relevant URLs by vBSEO