|
|||||||
 |
|
|
LinkBack | Thread Tools | Display Modes |
|
#911
 15-03-2019, 07:46 AM
|
||||
|
||||
|
Bram, go and have a look at the MMS XV Safari car....Rob mounted the additional fuel cell tank in that area albeit inside the car..and it's a fair bit bigger than yours. Yours would ideally be better in the centre as it looks like you are concentrating a lot of weight on the right hand side of the car...
__________________
No Subarus currently owned Last edited by nauli; 15-03-2019 at 07:49 AM. 
|
|
#912
15-03-2019, 09:40 AM
|
|||
|
|||
|
Quote:
The opposite side of the fuel cell will most likely have the drysump resivoir which will help offset the fuel wieght. (30 L of fuel when full, and 5kgs of fuel cell, it isnt that much wieght) The drysump resivoir will be about 10-12L of oil plus tank. And the exhaust runs down the left side of the tunnel in that location aswell. Which will again further help to offset any wieght. Plus muffler which is at the rear left corner usually and actually has substantial wieght to it. It will proabably be pretty equal minus driver at that stage. Im not too concerened with the fuel cell location not being dead central. As it is basically hard up against the diff anyways. The only way to shift it more central is to raise up above the diff. Which then raises the CoG ever so slightly.
__________________
Doing it for all the wagons out there
|
|
#913
15-03-2019, 11:19 AM
|
||||
|
||||
|
Quote:
__________________
No Subarus currently owned
|
|
#914
15-03-2019, 11:38 AM
|
|||
|
|||
|
Yeah. Ofcoarse. But if the cell was bigger than this one, they would have been forced to do that because it simply wouldnt fit anywhere else. Not because having it on the right or left of the diff would make a massive difference otherwise.
In this case, I just dont see the point in raising the cell up 300mm in order to shift it over 300mm when it fits where it fits quite nicely. Which is also the exact same spot as the OEM tank more or less anyways, and wieghs 1/4 of what the OEM tank weighs. And holds half the fuel load as OEM. And Its a whole lot easier to construct a firewall in this location VS anywhere else internally to the vehicle. Because the cell is mostly already out side the car. Its really only a cover and mount that needs to be built in its current spot. And then you still have to fill it. In the center of the car is very difficult to qccess because of all the bar work with the cage. On the side I can easily reach it from the back door.
__________________
Doing it for all the wagons out there
|
|
#915
17-03-2019, 03:46 PM
|
|||
|
|||
|
I have constructed the mounting system to secure the fuel cell to the car. I used some 20x20x1.6 SHS tube to construct a rectangle frame to match the top flange of the fuel cell container. I then set a bunch of riv-nuts into it, to allow the cell to bolt to the frame. I then used some 0.8mm steel sheet to wall down the sides of the frame to meet the existing contour of the floor. I copied the contour onto the new sheet metal. And made a bunch of 10mm flange sections to.meet the floor contour. And then I welded it all in.
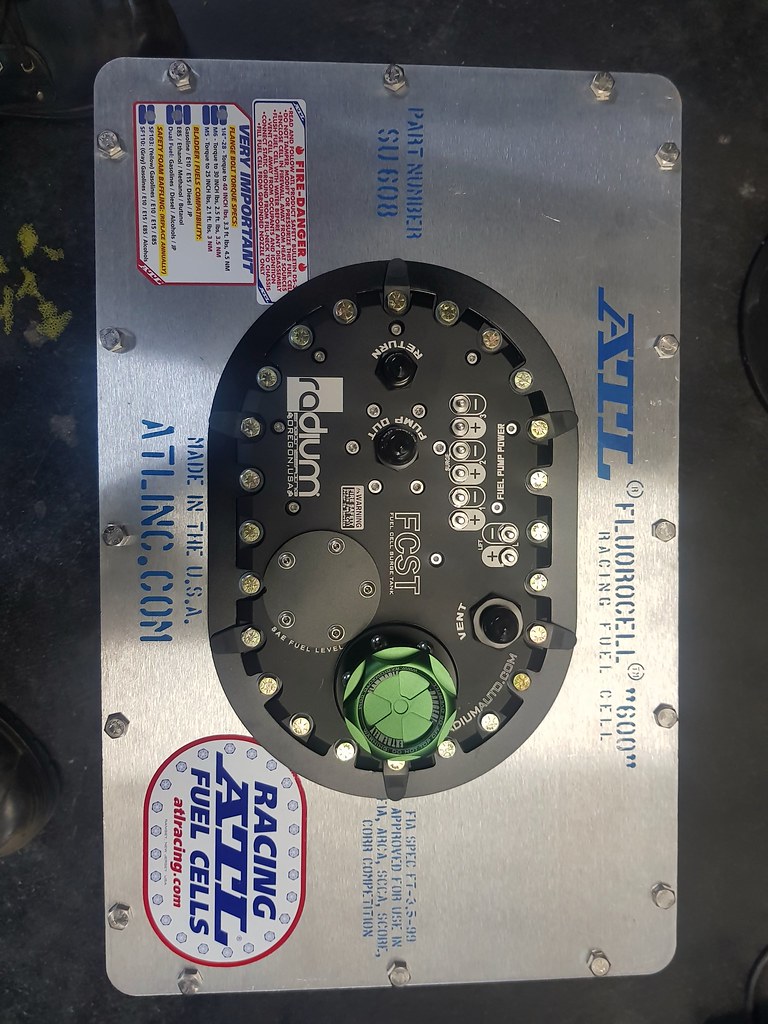
The box section frame is probably over kill for the fuel cell. But I figured it would be easy to construct using this material. And the box section would allow for riv-nuts from below to hold the cell. And also allow for riv-nuts from above to secure over a removeable cover/firewall. And also help to stiffen up the floor after I removed a big section of it to fit the cell in. 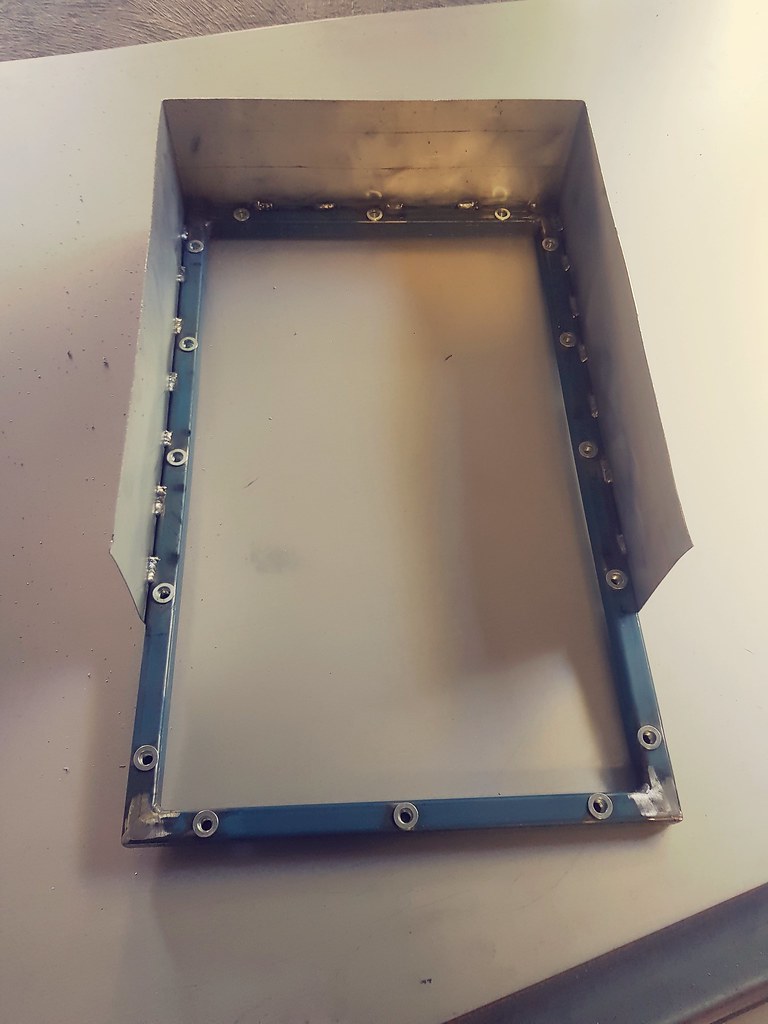 2019-03-17_02-02-21 by bram biesiekierski, on Flickr 2019-03-17_02-02-21 by bram biesiekierski, on Flickr 2019-03-17_02-13-32 by bram biesiekierski, on Flickr 2019-03-17_02-13-32 by bram biesiekierski, on Flickr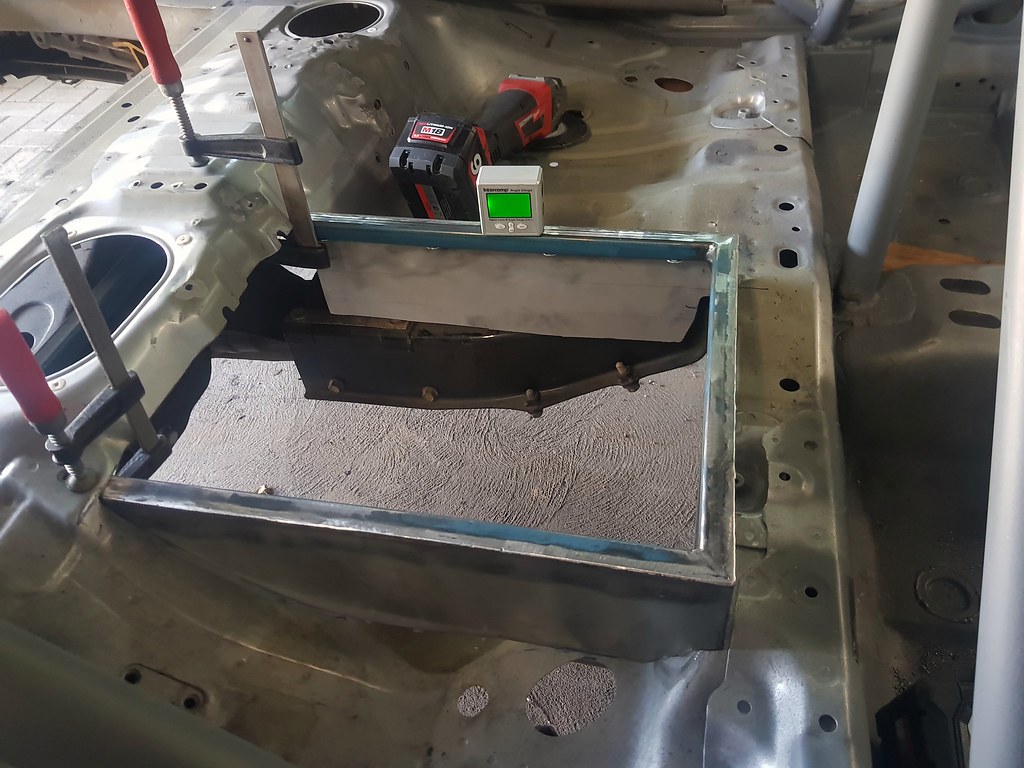 2019-03-17_02-14-17 by bram biesiekierski, on Flickr 2019-03-17_02-14-17 by bram biesiekierski, on Flickr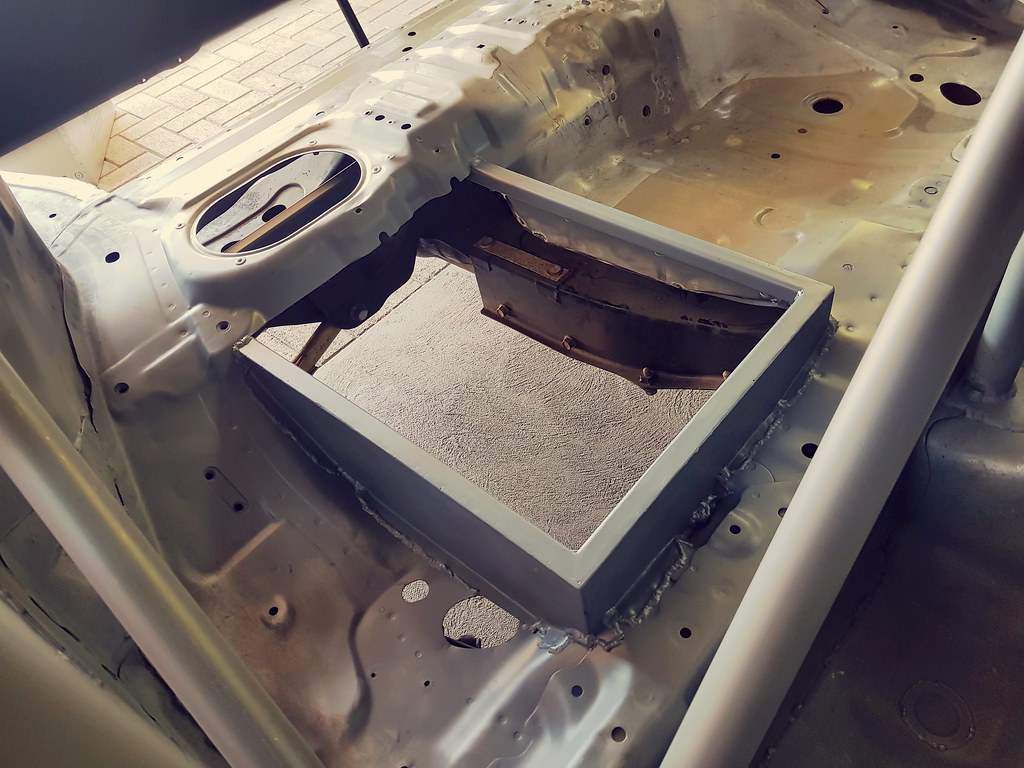 2019-03-17_02-00-31 by bram biesiekierski, on Flickr 2019-03-17_02-00-31 by bram biesiekierski, on FlickrAs mentioned before. The fitment is very tight. This foto shows how close the rear corner is to the chassis rail. The top edge of frame actually touchs on the chassis rail. And the lower corner is also right up against the brake lines. Which will need a minor adjustment to not rub.  2019-03-17_02-00-46 by bram biesiekierski, on Flickr 2019-03-17_02-00-46 by bram biesiekierski, on FlickrHere you can see the clearance to the rear diff cradle. Its very very close. 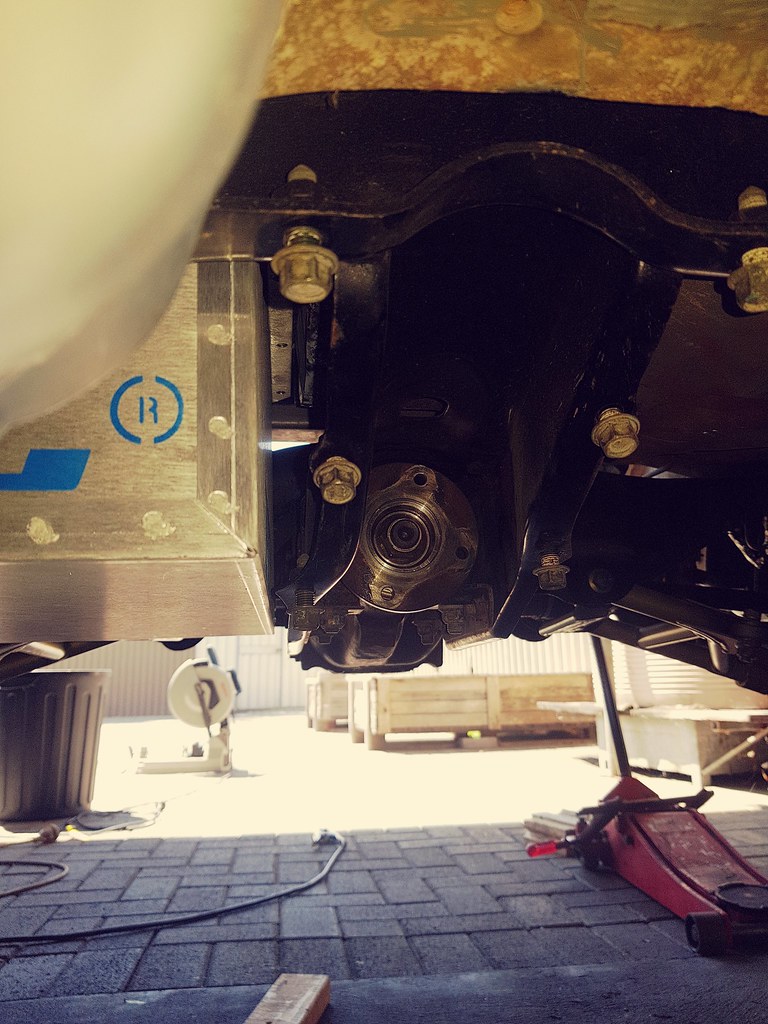 2019-03-17_02-01-30 by bram biesiekierski, on Flickr 2019-03-17_02-01-30 by bram biesiekierski, on FlickrHere is another shot from the rear. Very close to the rear crossmeber and lateral arms. I did shift the box forwards as much as i could to give max clearance. 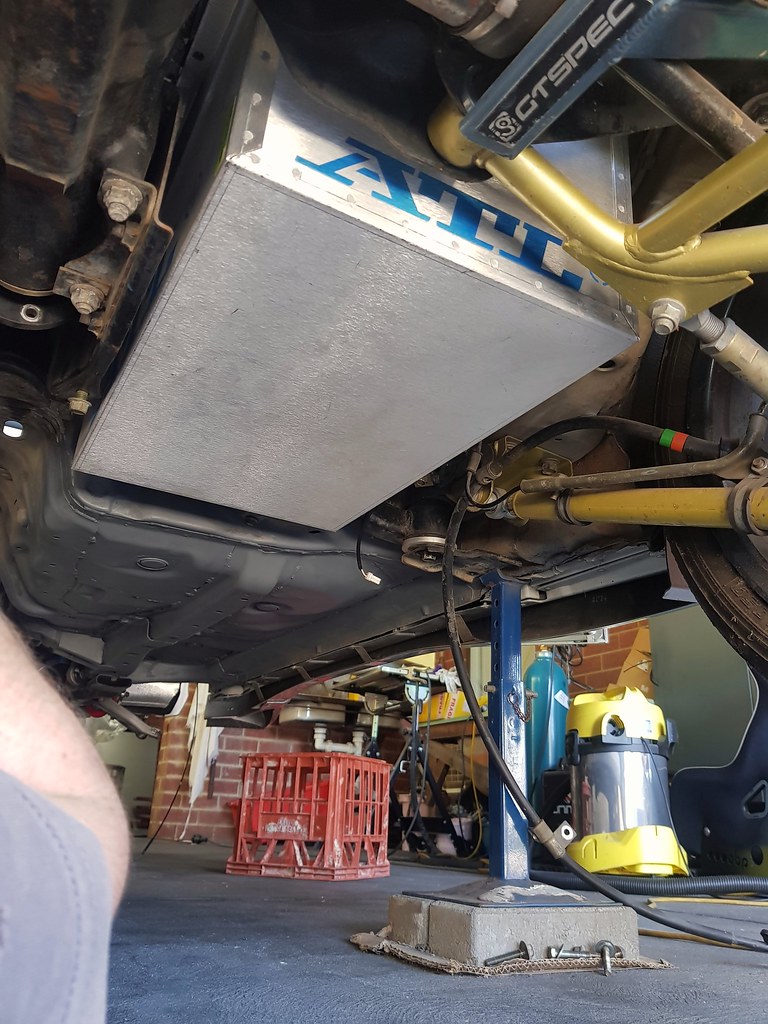 2019-03-17_02-01-00 by bram biesiekierski, on Flickr 2019-03-17_02-01-00 by bram biesiekierski, on FlickrThis is clearance on the front side of the cell to the diff outrigger. Its super close here. I didnt leave enough space to get the front bolts done up. So I think this means the diff out-rigger will need to drop in order to secure the cell in place. I was hoping to avoid this. But its just the way it is. I guess its no different to having to drop the out-rigger in order to remove the OEM tank. 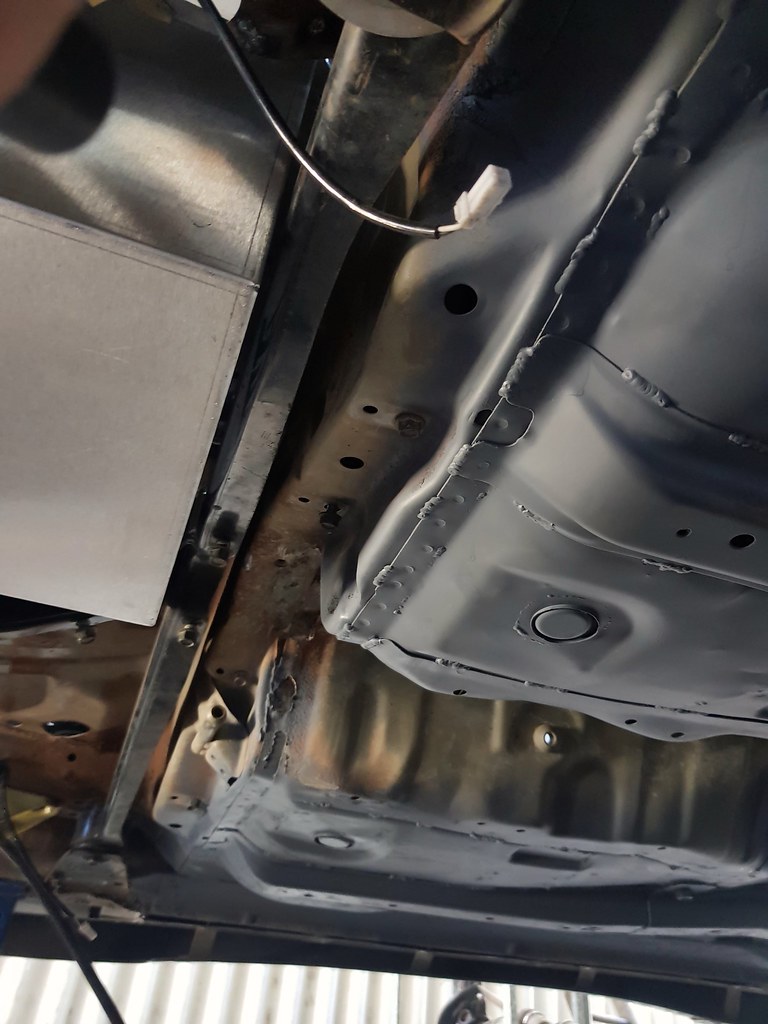 2019-03-17_02-04-28 by bram biesiekierski, on Flickr 2019-03-17_02-04-28 by bram biesiekierski, on FlickrThis is what the bladder looks like without the lid over the box. 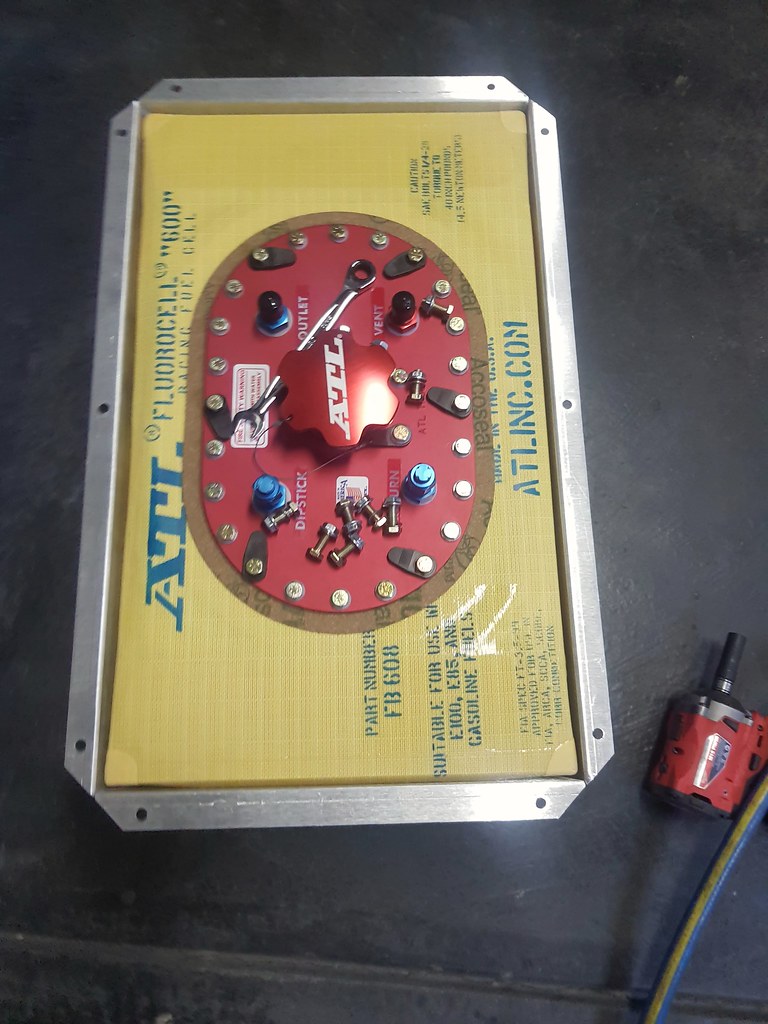 2019-03-17_02-13-56 by bram biesiekierski, on Flickr 2019-03-17_02-13-56 by bram biesiekierski, on Flickr
__________________
Doing it for all the wagons out there
|
|
#916
17-03-2019, 09:25 PM
|
||||
|
||||
|
Very close clearance in some of those pics mate. Do you think there's a chance the cell might get contact with flex and twist under braking and cornering. You have massive tyres and grip levels to contend with.
__________________
Bye bye betty blue. Hello F6.
|
|
#917
17-03-2019, 11:26 PM
|
|||
|
|||
|
Nah. I think it will be fine. The crossmembers themselves are rigid. The box that holds the cell isnt very strong. But it holds its shape well. I dont think there will be issues with it moving about.
__________________
Doing it for all the wagons out there
|
|
#919
22-03-2019, 07:46 AM
|
|||
|
|||
|
__________________
Doing it for all the wagons out there
|
|
#920
23-03-2019, 09:37 PM
|
|||
|
|||
|
More gussets.
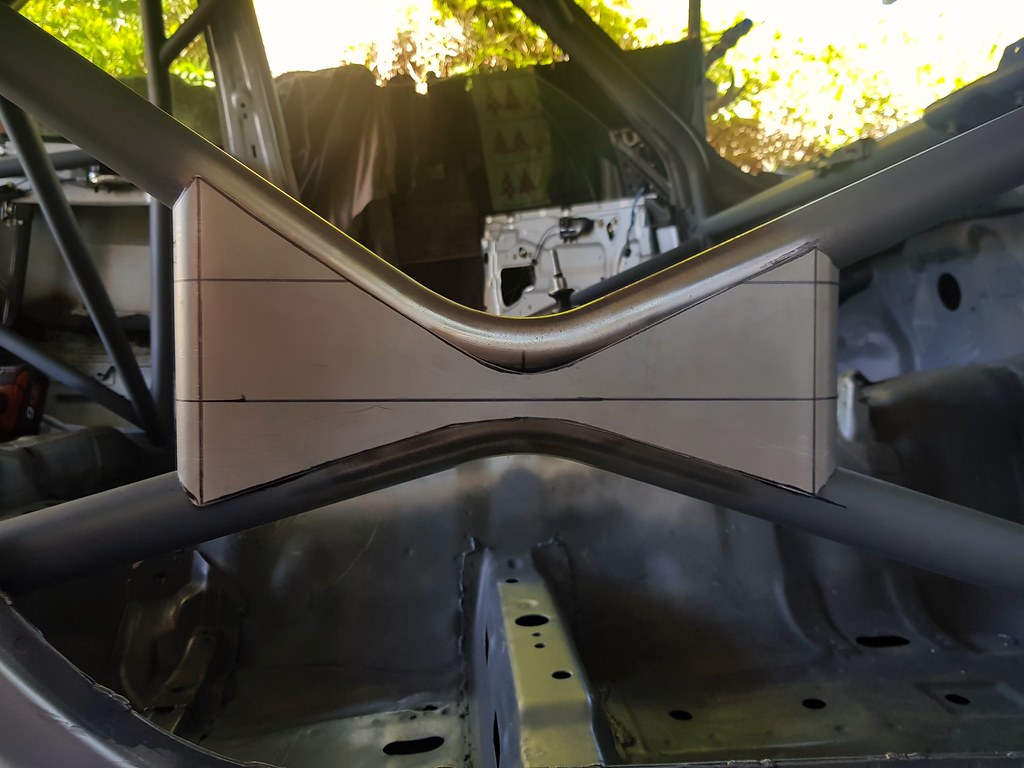 2019-03-23_08-22-18 by bram biesiekierski, on Flickr 2019-03-23_08-22-18 by bram biesiekierski, on Flickr 2019-03-23_08-22-33 by bram biesiekierski, on Flickr 2019-03-23_08-22-33 by bram biesiekierski, on Flickr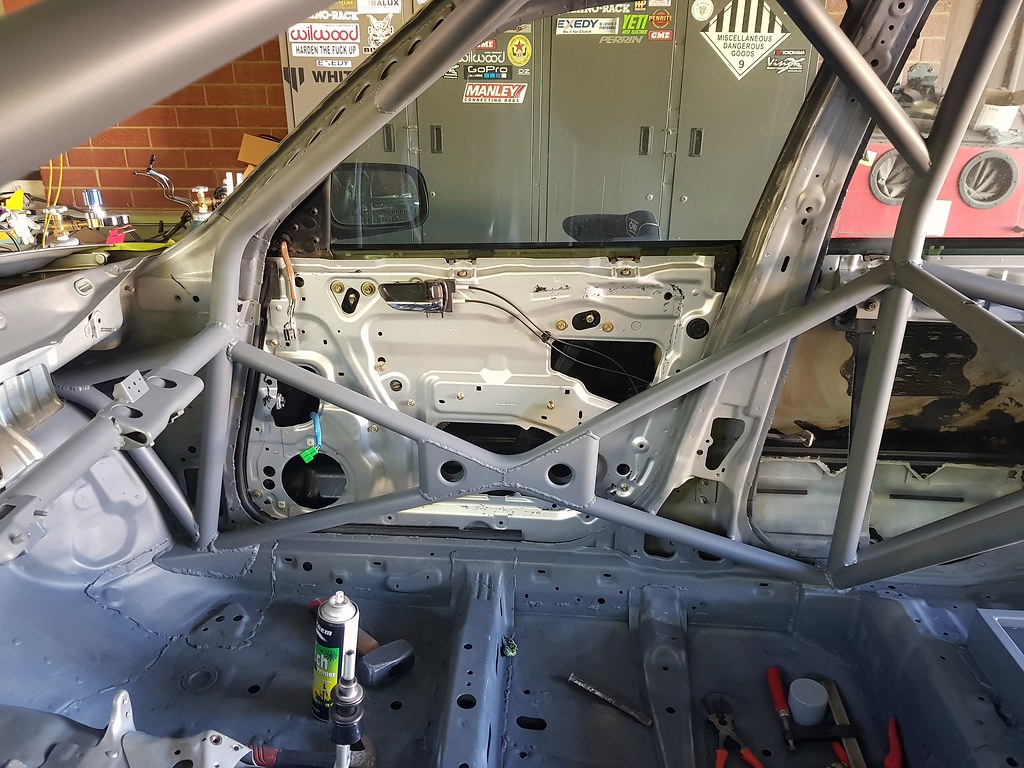 2019-03-23_08-22-57 by bram biesiekierski, on Flickr 2019-03-23_08-22-57 by bram biesiekierski, on Flickr
__________________
Doing it for all the wagons out there
|
|
| Tags |
| sled, yeti |
|
|


 636Likes


 Linear Mode


