|
|||||||
 |
|
|
LinkBack | Thread Tools | Display Modes |
|
#81
 11-04-2012, 09:09 PM
|
||||
|
||||
|
yeah and if you've ever used the series amp i have from alpine they heat up like a bitch haha I'm installing fans behind the two of mine though but screw the perspex


|
|
#85
15-04-2012, 02:59 PM
|
||||
|
||||
|
Doing some dynamat install tonight on bootlid will take pics and post any tips I may learn along the way as I've noticed there isn't a specific dynamat Wrx bootlid DIY anywhere ; ) I will be filling all the frame work in the lid with sound isolation foam then sikaflexing those gaps up then applying the dynamat ; ) hopefully all will go well
|
|
#86
15-04-2012, 07:16 PM
|
||||
|
||||
|
okay so i got a little carried away with the sound deadening and forgot to take photos of every step but i will try explain I'm sure some ppl here are better at this then i am any way.
DIY DYNAMAT GDA WRX boot lid You will need: *1 & 1/2 to 2 sheets Dynamat/sound deadening *Wax n Grease Remover *hard rubber roller *tennis ball/other round object *heat gun/Hair dryer(as i used )*sharp knife *8 sheets of A4 paper *pencil *tape *12mm socket wrench/ratchet STEP 1 get you're wrench and remove the boot i did this by my self but it wasn't very easy so get some one to hold it for you while you remove it. there are 4 12mm bolts to remove. STEP 2 place the boot down somewhere on something soft so you don't scratch it. get a rag and the wax and grease remover and give the boot lid a really good wipe clean get in to the outer skin also. STEP 3 (optional) this is not for everyone i just did this to ensure no rattling at all  i got some sound isolation foam you can probably get it from clark rubber and i cut it up and stuffed it in everywhere there were big gaps or crevises. then i got a tube of sikaflex - 252 and sealed up all the frame work on the boot lid. if you do this it is very messy so be careful to only get the sika on parts that will be covered. 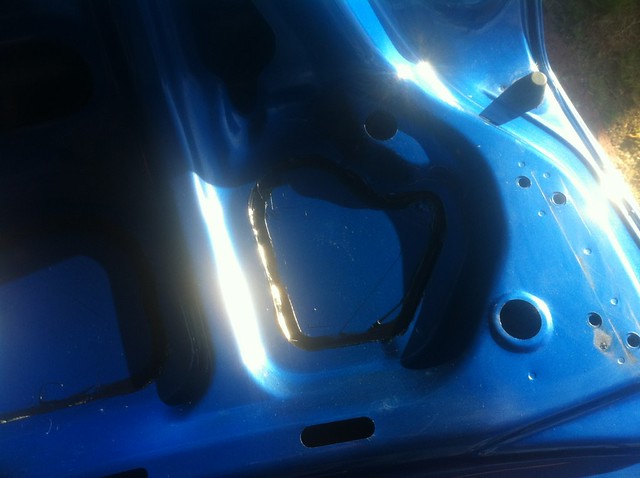 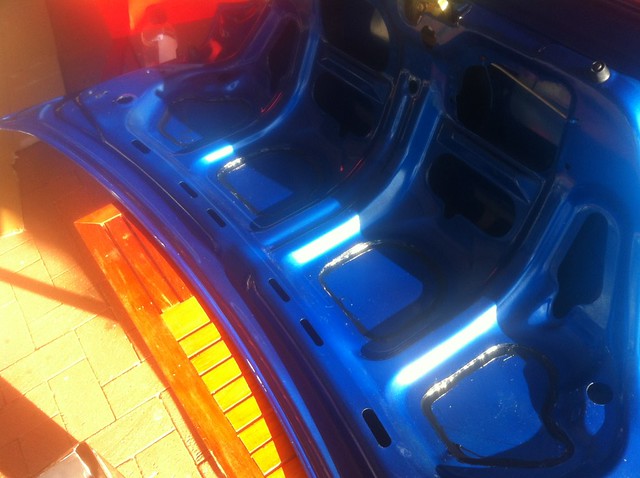 STEP 4 get some A4 sheets of paper and lay them on the parts of the boot that will have the dynamat covering then proceed to trace the shapes out each side is identical so just do the section where the boot attaches then the section next to it and finally the big piece next to that and use them flipped over for the opposite side STEP 5 flip the boot over and lay a sheet of dynamat on the part of the boot where you're badges generally are. now cut it to that shape but about 10-20mm shorter all around (this will use 1 & 1/2 sheet in total if you do it this way otherwise you can just use 1 sheet cut into strips to fit them behind the frame of the boot) STEP 6 get the pieces you traced out cut up twice each making sure you flip them otherwise you will have two identical pieces and nothing to do with one of them :s once cut out place them in there positions on the boot lid and do any necessary trimming. also grab the piece you traced out earlier for the rear of the boot lid and cut it down int strips so you can fit it in behind the frame i did about 6 strips. STEP 7 get your heat gun ready and your roller i used a rubber one from a crafts store. start peeling of the wax paper from the back of the DYNAMAT for the outer skin and put them in the correct positions on the outer skin whilst blowing them with the heat gun and rolling them down. repeat until outer skin is filled. at this point you will already notice the improvement in sound reduction as you tap on the lid. STEP 8 i started on the two far outer parts where the boot attaches as they were smaller and flatter pieces using the same method heat gun and a roller put these down. next is the frame work pieces i started from the top of the lid and worked to the rear of it this time use the heat gun whilst slowly peeling back the wax paper and pressing down with your fingers once the piece is in place use a tennis ball or round object to roll the DYNAMAT on any odd curves this will get them perfectly flat then go back over with the roller. repeat this step until the lid is complete. STEP 9 stand back and admire. 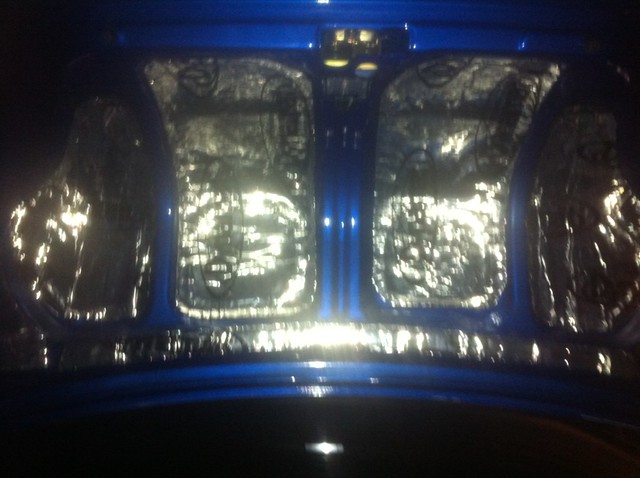 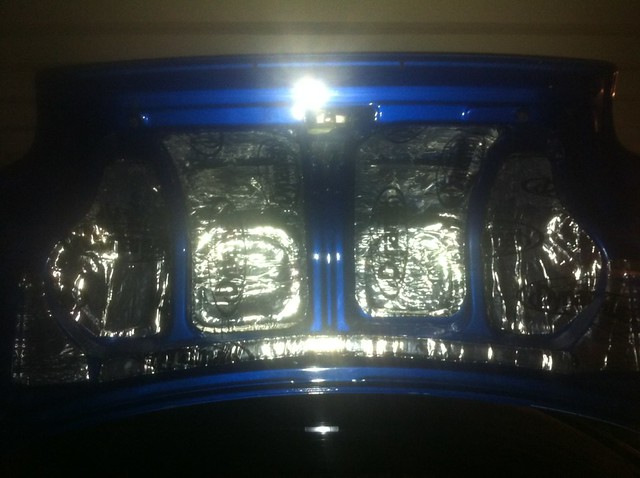 i noticed there were some small holes still left over along the boot so i cut a strip to size and a small square for another and placed them down using heat and roller this didn't make any noticeable improvement to me but i wanted everything covered. hope this was helpful feel free to pm me with questions or help : D thanks guys more boot install to be done tomorrow will post asap tris7an
|
|
#88
15-04-2012, 08:23 PM
|
||||
|
||||
|
Looks good at least you putting that matting to good use beats me looking at it for the past 3-4 years saying one day I will use it
Sent from da iPhone using Tapa on someone's unsecured wifi 
__________________
race tape y pipe running .05 bar till spares turn up.
|
|
| Tags |
| boot, diy, install |
|
|
 Similar Threads
|
||||
| Thread | Thread Starter | Forum | Replies | Last Post |
| Home DIY Artificial Lawn Install | American Dave | Non-WRX Discussion | 30 | 17-12-2010 08:17 AM |
| DIY H Brace install | Jezza | DIY Mechanical Modifications | 6 | 29-04-2009 03:17 PM |
| 02 STi boot install | scooby99 | Cosmetic | 6 | 28-01-2008 03:56 AM |
| URGENT SALE!!!! Custom Boot Install for RS Liberty FOR SALE | PROTOTYPE | For Sale | 0 | 09-05-2007 12:45 AM |
| Car Stereo: Full MY99/MY00 Boot Install | geoff | For Sale | 0 | 04-01-2006 12:40 AM |


 22Likes


 Linear Mode


