|
|||||||
 |
|
|
LinkBack | Thread Tools | Display Modes |
|
#1
 15-09-2013, 08:23 PM
|
||||
|
||||
|
Just over a year ago, I was having issues with the wiper arms on my GC8 making their own mind up on where to stop. The arms had about 10cm of play in them just by moving them up and down with your hands…
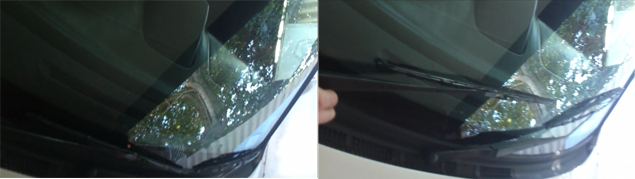 …and they’d smack the A pillar and cowling when being used. The issue is a worn bushing connecting the wiper motor to the wiper linkages. Subaru wanted $185 for replacement parts - needless to say, some internet digging followed and I found a way online to replace the bushings for much, much less. I’ll cover replacing the linkages with new Subaru ones, or modifying the existing ones to work properly. This was written with the GC8 in mind, but other Subaru models should be similar. I got told this would be a 2-3 hour job. I spent 7. Be warned... Also note, since doing this, I've been through everything from heavy rain and hail to cleaning bugs and dirt off my windscreen with the jets, and haven't had any problems. This is something you perform at your own risk, however. ____________________________________ What you’ll need: A socket set (10,12,14mm sockets + more if you have a strut brace) Long Nose Pliers Hot Water Automotive Grease Flat Head Screwdriver A small file And then either new linkages, or: Zip Ties Araldite/similar glue Doorman ‘Help!’ Part no. 49447 assorted bushing pack – ebay ‘wiper linkage bushings’ 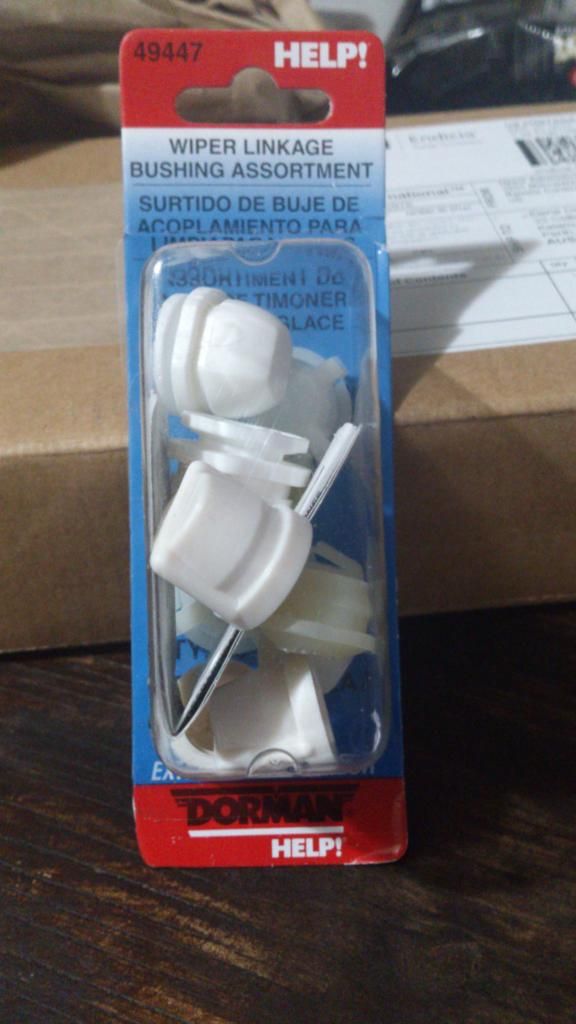 There are 3 of the bushings you’ll need in this pack. They’re the ones with the four clips on top…  ____________________________________ Stage 1: Removal Before you start, it’s a good idea to mark out where you want the wipers to sit. All the play in the arms makes this easy! 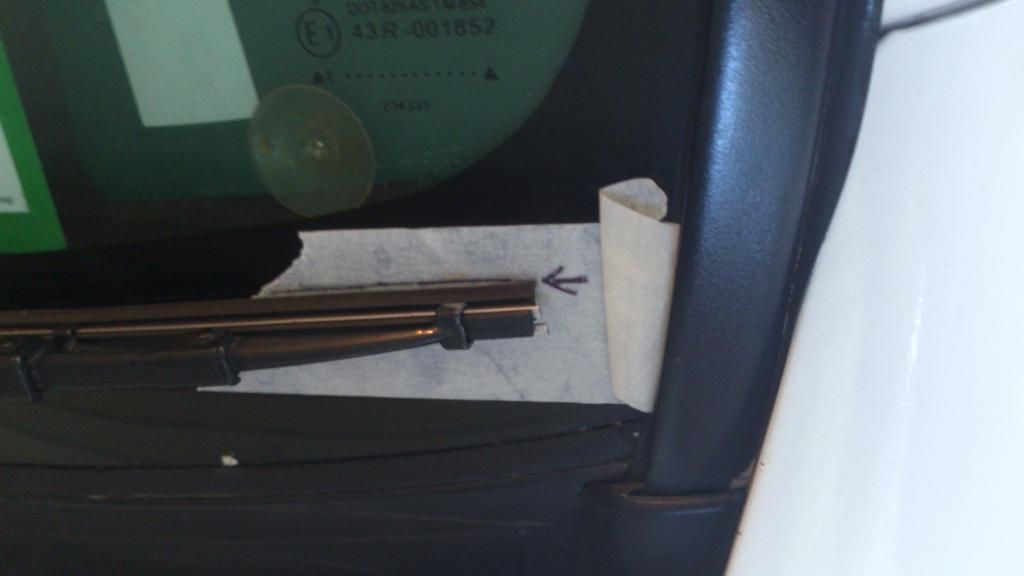 Getting to the links is easy too. Start by taking the rubber caps off the base of the wiper arms, and undoing the 14mm nut in the middle (You’ll find the middle one is easier with the bonnet down). From there, you’ll need to bend the wipers up, and wiggle the base of the arm off the splined shaft. This can be tricky if the wipers haven’t been off before. There’s a black plastic cap underneath the wiper arms too – take these off and put them somewhere safe. Next up is the cowl. This is held on by a string of small clips and three pins spaced out along the back edge. You can get to them from underneath, so a bit of patience and you should be able to get them out without snapping any. 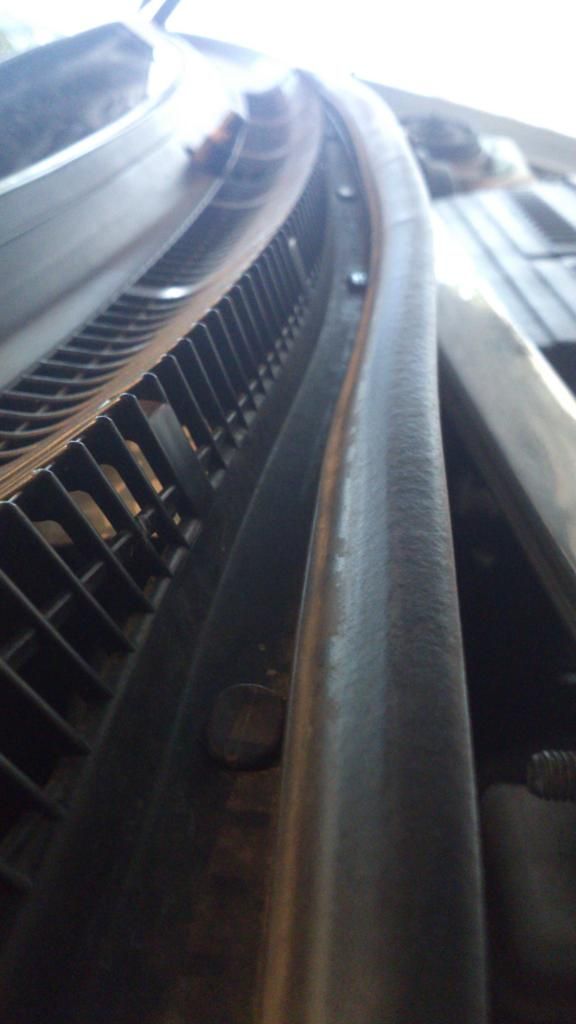 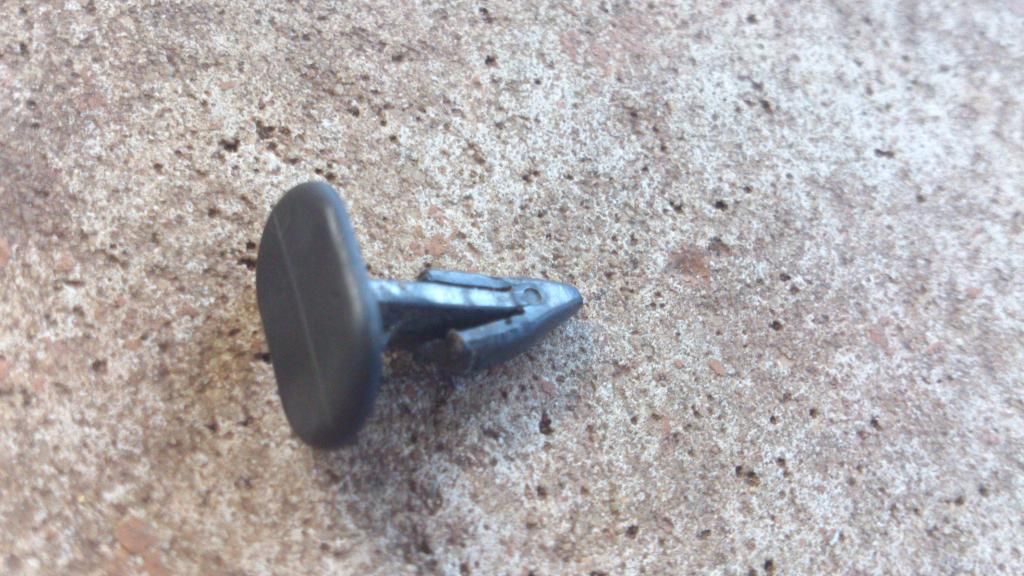 Give the cowl a tug and it should come out fairly easily, leaving you with something like this  The wiper arm shafts have 3 10mm bolts holding them in place. Undo these and push the splines through. 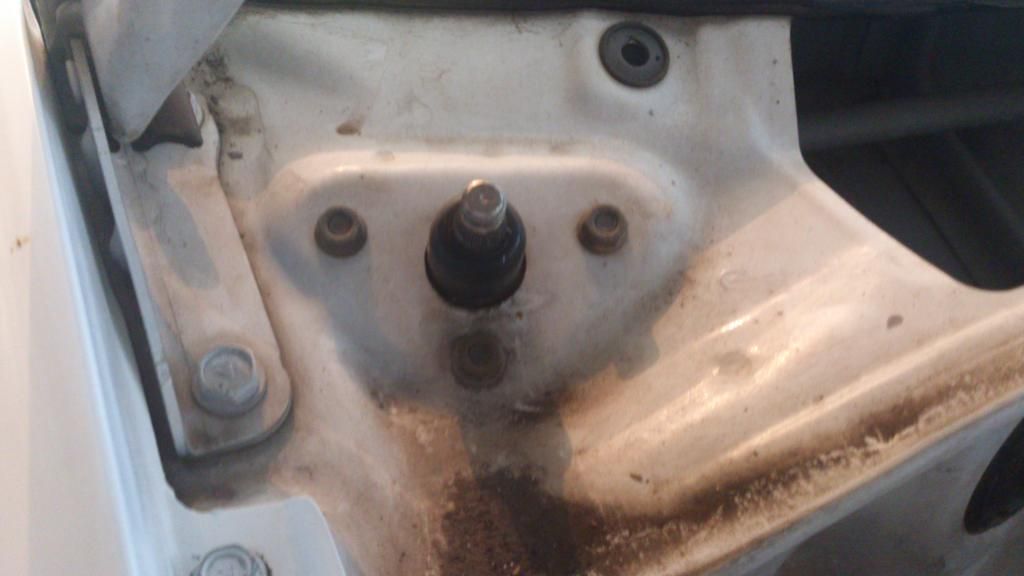 Before going any further, disconnect the wiper motor (pull the plug out). As Doug pointed out, "Be super careful if the motor is plugged in. If you accidentally move the arm it can start a full rotation even if the switch is off. They are reduction geared and can easily do some finger damage/severing. So disconnect the plug at the first opportunity.". Your arm has very limited movement when dealing with the ball joint on the back, and you will not be able to pull it out in time if it starts to move. Next step is to reach in on the passenger side and try and pull the link off the back of the wiper motor. For some unknown reason, Subaru have an access hole on the driver’s side, but absolutely nothing on the right – great if you drive on the wrong side of the road and your wiper motor is over there, but not much use to us. You’ll have to reach in through here… 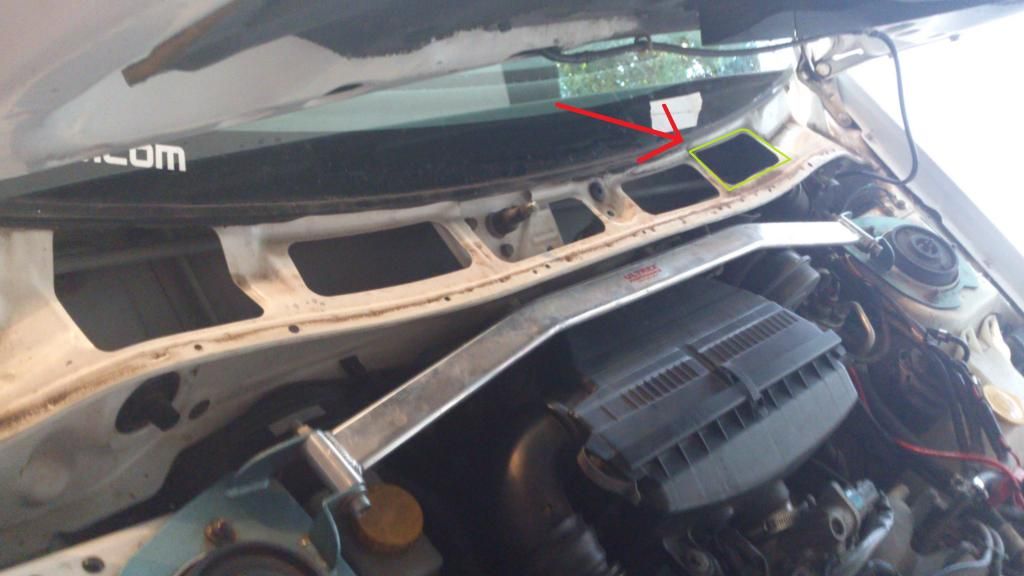 …to get to the ball joint, which looks like this:  There is a good chance that the old cap and a white washer that sits underneath are going to go flying, so keep this in mind – try to hold on to the cap if you can. Once that’s unhooked, undo the four 10mm bolts holding the wiper motor on. If you have a strutbrace, it’s a good idea to take this off too – good chance it’s going to get in the way. 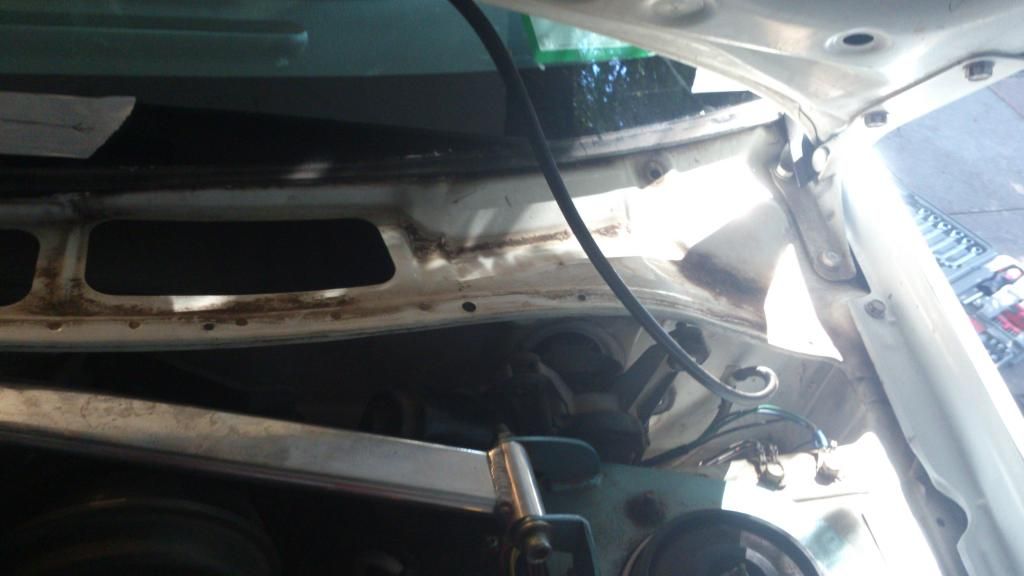 The motor will have an arm facing toward the passenger side that will make removal a bit tricky – just keep wigging and it should eventually come through. 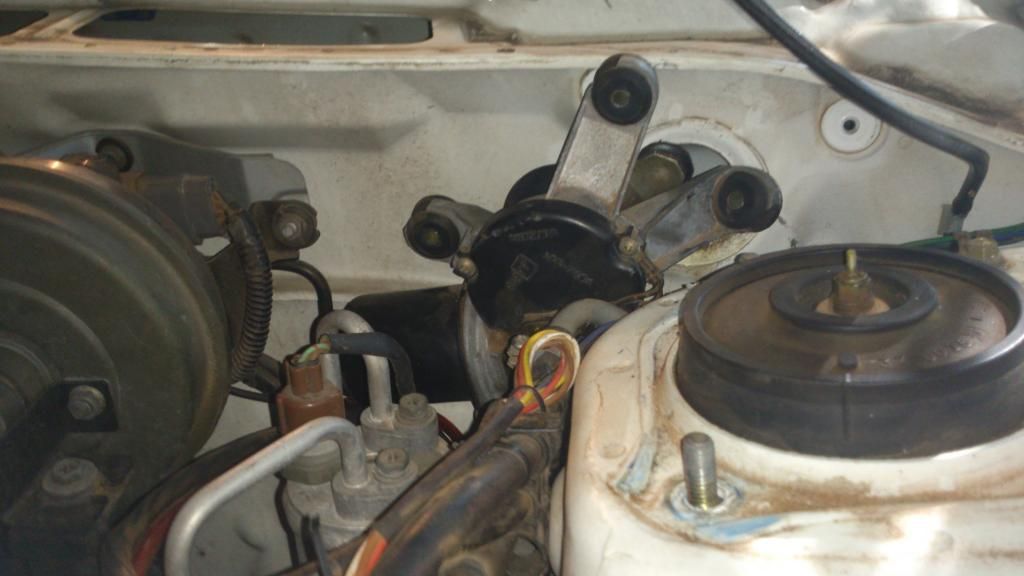 Next step is to go over to the access hole on the driver’s side and pull the linkages through. They will get caught on everything in there, so you may have to free it a few times.  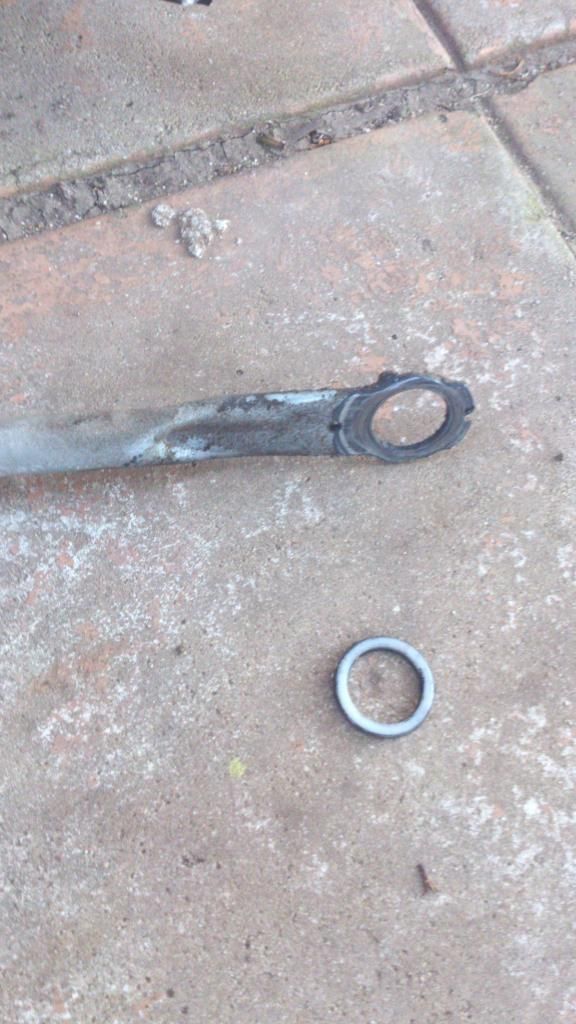 Note the white washer – you will need this. It may still be on the wiper motor arm under the ball joint. Depending on how the ball joint unhooking went, you may have to go searching for the old bushing in where the linkages sit. Once you dig it out, it’ll look something like this: 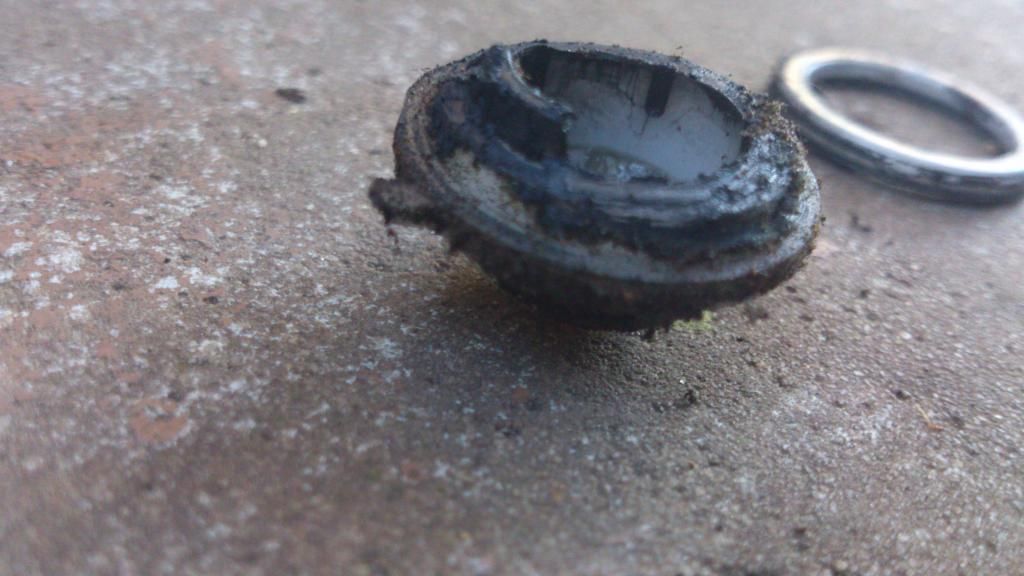 Normally it has 6 tabs holding it tight against the ball. Other ones I’ve seen with sloppy windscreen wipers have two or three tabs missing. As you can see, mine was even worse for wear. Stage 2: Bushing Install If you bought new linkages, skip to stage 3. If you are doing the bushing replacement, however, clean the arms up and take them to a space you can work on them properly. The new bushings aren’t direct replacements, and do need a bit of work to get them to fit. 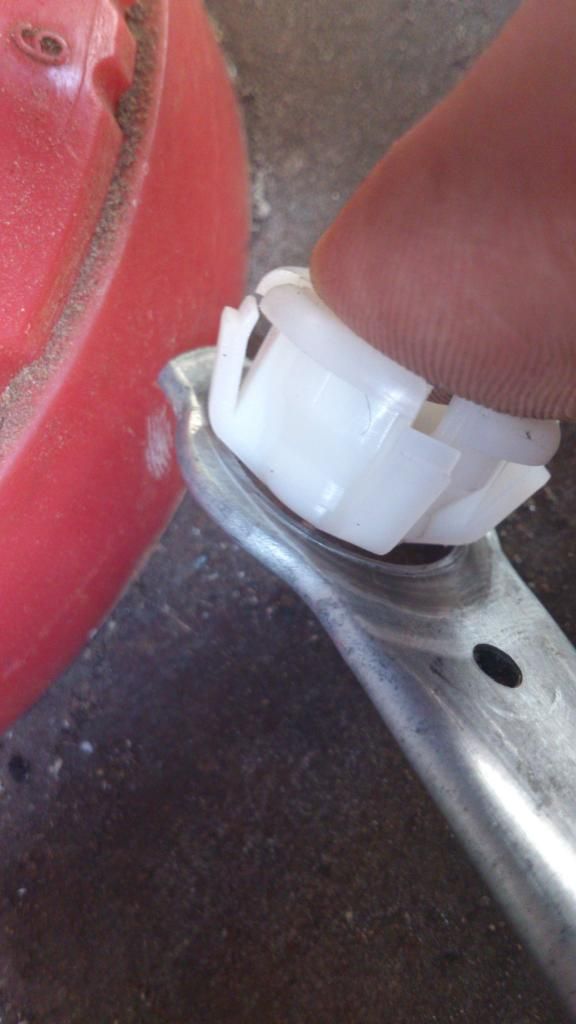 What I ended up doing was filing away a little bit of metal where the clips lined up and putting the clips in hot water to help soften them up a bit. From there, you should be able to start by getting one clip arm through, then two, and then using your filed out sections to get the final two arms through. It is fiddly, so if it doesn’t go, file it out a bit more, re-heat the bushings, and try again. I wasn’t happy with how much movement the bushing had here, so a bit of backyard spec improvisation followed. Don’t judge! 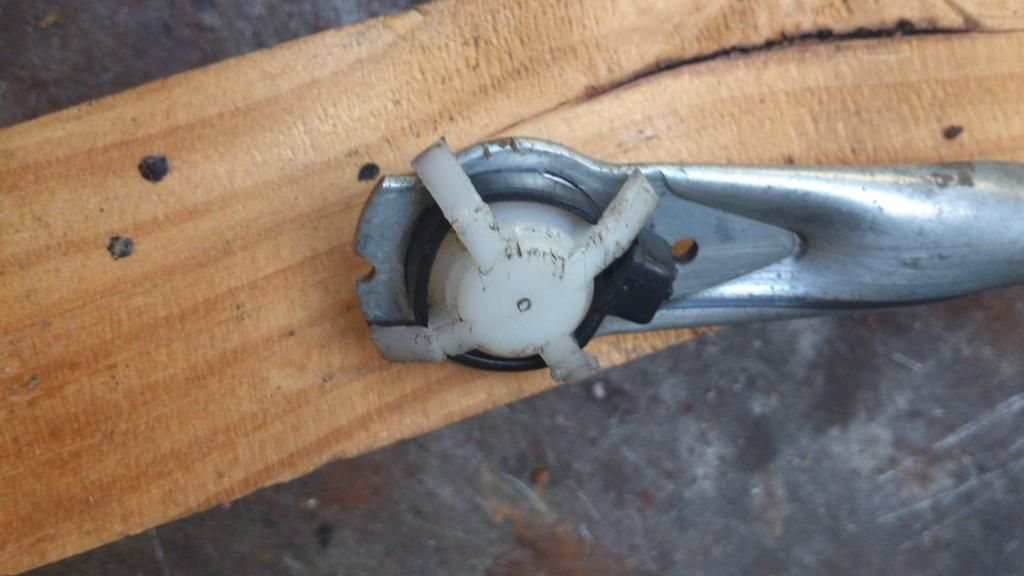 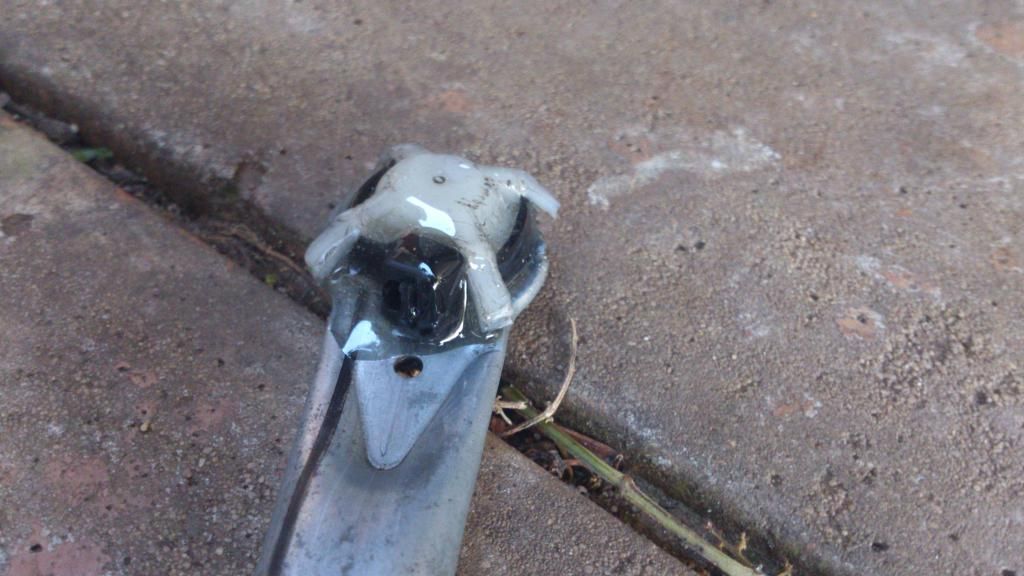 A cable tie and araldite. Set like a rock, and absolutely zero movement. Careful not to get it into the socket. I’d recommend giving the link a few hours to set if you choose this method. If you’ve gone “Not happening! I’m buying new links!”, don't worry - the next bit is still relevant! Stage 3: Re-install Reinstallation is simply the reversal of removal. Only 100x more difficult. Start by greasing up the bushings (I had some Castrol automotive grease lying about that I used), and then move on to feeding the links back through the access hole on the driver’s side. Don’t bolt the spline sections in, but do bolt the wiper motor in onto the firewall. Next is getting the ball joint back onto the link – for some, it’ll take a minute and be just another step. For others, it’ll be a 4 hour ordeal which will make you swear never to touch a wiper assembly ever again (I got the latter..). Getting access is the main issue, as to re-clip the joint back together, you need quite a bit of force; something your twisted left hand won't want to give. One trick I found is to turn the ignition on, and put the wipers on for half a cycle and then turn the ignition off, leaving the motor arm rotated 180 degrees – if you just switch them off at the stalk, the motor will go back to the rest position. From here, it’s a matter of awkwardly squeezing at the joint until the ball pops back into the socket. Once that's done, re-bolt the wiper arm shafts into position, then put the wipers on all speed ranges and just check the ends are doing what they’re supposed to be doing (you can see the shafts moving from the drivers seat). If all is well, re-install the cowl, the plastic spline caps, and your strut brace if you took it off. Then position the wipers along your marks and re-install, being careful not to strip the splines in the arms. Check it works and you’re done! 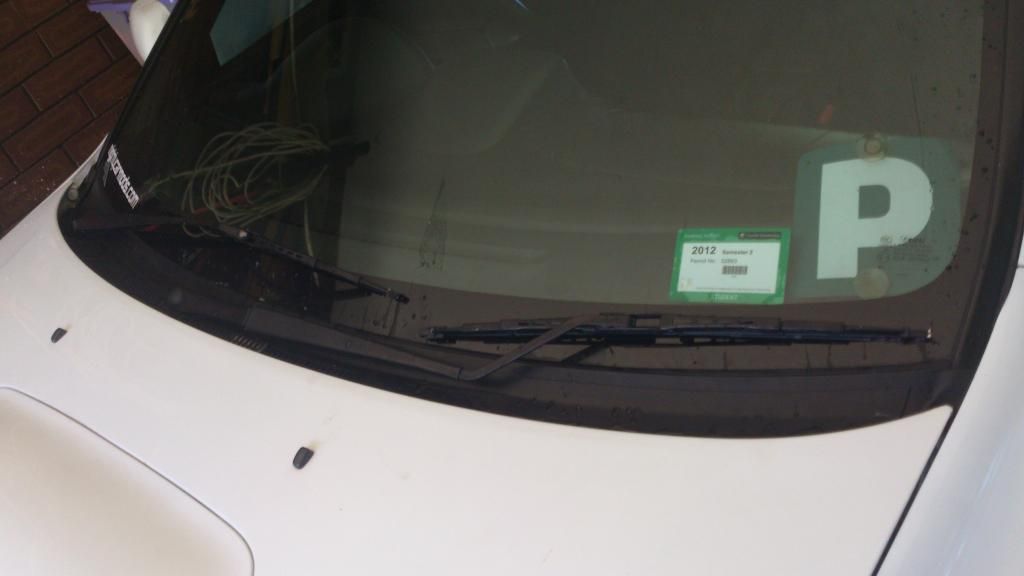
Last edited by Patch; 16-09-2013 at 08:25 PM. 
|
|
#2
16-09-2013, 07:19 PM
|
||||
|
||||
|
Excellent write up. Easy to follow with the pics. Good on you for giving it a crack, it's certainly not an easy task.
This is what the forum should be about, not whinging and bitching farken! I'll add one thing on the topic. Be super careful if the motor is plugged in. If you accidentally move the arm it can start a full rotation even if the switch is off. They are reduction geared and can easily do some finger damage/severing. So disconnect the plug at the first opportunity.
|
|
#3
16-09-2013, 08:22 PM
|
||||
|
||||
|
I'll edit accordingly, I had it disconnected for most of the time but didn't realise that could happen! Your arm really is jammed up behind the motor trying to get the link back on so that could end very badly
|
|
#4
17-09-2013, 10:34 AM
|
||||
|
||||
|
good DIY work patch, i did a similar mod on my old fozzy after pricing the arm from subaru... was around $65 iirc
 i used sellys 'knead it' instead of araldite tho i used sellys 'knead it' instead of araldite tho 
|
|
#5
17-09-2013, 12:39 PM
|
||||
|
||||
|
Knead It is great, would have done the job too - wish I thought of that!
I have a feeling there are a few different wiper linkage mechanisms running around would could explain the differences in quotes, either that or they were just taking me for a ride. But they couldn't just sell me a bushing or an arm, it had to be the entire link set-up between the motor to the wiper arms.
|
|
#6
03-09-2014, 09:31 PM
|
|||
|
|||
|
Hey Patch, I really appreciate this how-to as my 02 wrx has been experiencing this exact issue.
One question I do have is how has the araldite held up? I've rang the sellys info line & the tech guy wasn't positive this type of fix would hold up over the long term as the product isn't designed for vibration.
|
|
| Tags |
| diy, fix, gc8, sloppy, windscreen, wiper |
|
|
 Similar Threads
|
||||
| Thread | Thread Starter | Forum | Replies | Last Post |
| DIY Boost gauge install (GC8) | STiV6 | Mechanicals | 19 | 29-11-2012 03:05 PM |
| GC8 parts - inc. Free dash! | Patch | For Sale | 12 | 03-10-2012 06:42 PM |
| DIY walbro fuel pump install on gc8 | Bgwrx | Mechanicals | 16 | 09-01-2011 04:25 PM |
| anyone know a good sparky to fix air con in GC8? | olite | Mechanicals | 11 | 08-09-2007 09:30 AM |
| WTB: GC8 bits (the stuff sitting in your garage) | jEstEr? | Wanted | 1 | 30-12-2006 09:19 PM |


 12Likes


 Linear Mode


