|
|||||||
 |
|
|
LinkBack | Thread Tools | Display Modes |
|
#623
 18-09-2016, 02:41 PM
|
|||
|
|||
|
I have fully ducted the FMIC. The idea is to force the high pressure air generated infront of the front bar to flow through the FMIC core and not bypass it as the car moves forward through the air.
On the front of the FMIC i have cut out 2 flat plates that match the contour of the rear of the bumper bar. These are tack welded to the FMIC, and have a layer or foam on the front edge so they snug up against the bumper. This will stop the air bypassing the FMIC. Although only half the core is visible via the front opening, it will still get airflow over its entire surface area. I have left the top edge of the opening in the bumper bar clear of the core. This way air can enter the front bar opening, then it opens up behind the front bumper bar to expose the full core. Then i have sealed any edges along the top with foam. That way any air that enters the front lower opening is directed through the full face of the FMIC. Behind the FMIC and back to the radiator i have also ducted it. The reason is if the air infront of the FMIC is exposed to the bow pressure wave, but that same pressure wave is entering thorugh the front grill, and allowed to flow down to the area behind the FMIC. Then you get a situation where the pressure before and aft the FMIC is similar, and therefor a reduced air flow though the FMIC core. But if i seperate the air exiting the FMIC, from the air entering thrpugh the top grille, and only allow those 2 streams of air to meet after the radiator, then in theory, more air should be directed through the FMIC. Because that air cannot bypass the core via the front grille. 
__________________
Doing it for all the wagons out there 
|
|
#624
16-10-2016, 02:23 PM
|
|||
|
|||
|
Been a while since i updated. Ive been slowly chipping away at loose ends on the low mount turbo conversion. Progress has been slow because of a trip to hospital with deadly gastro, a pet dieing, girlfriend trouble, and a housemate moving out / new housmate moving in. Plus it seems every weekend lately here has been pretty miserable weather which hasnt helped.
Anyways. Most of the fabrication is complete. Headers are fully finished, including welding a reinforcement brace to support the turbo wieght. Dump pipe and exhaust is fully finished. Intercooler piping is fully finished except i want to order a bunch of Murray clamps to replace the China T-bolts. Whats actually taking the longest is all the loose ends like sorting coolant and oil plumbing. Blocking the unused holes from the stock location turbo plumbing. Relocating things like catch-cans and general tidying up the little stuff. I have mounted the scavenger pump. I have put it as low and central as i can for low CoG and wieght distribution. (The pump is all metal and actually pretty damn heavy.) Its mounted onto the Cusco front H-Brace. I will be pumping the oil directly into the Moroso sump utilizing a dedicated drain port on the top of the sump. I havent made the hose yet. But thats a pretty simple job. A check valve will be installed between the pump and main sump just incase any oil will want to flow back. Oil Scavenge pump mounted on Cusco H-brace.  I have mounted the oil filter relocation kit. The filter is mounted on the passenger side frame rail. Just forward of the front tyre. A new thermostatic take off for an oil cooler is also at the filter. (Old Mishimoto unit is forsale, as it has M20 not 3/4UNF.) Because i have converted to a 3/4 UNF thread filter, i can run a much larger filter than OEM. Currently have the biggest KnN oil filter. Its a tight fit, but totoaly doable. The oil filter and cooler locations means i can actually use a smidgen less hose than my previous oil cooler install AND relocated the filter away from where it usually is to make way for the low mount turbo. Oil filter relocation remote filter.  Oil filter relocation adapter / take-off. (Also note the brace on the headers)  I have ordered a Canton Racing Accusump which will be plumbed into the oil supply to the block as well. A check valve will be installed straight after the oil pump to prevent oil bleed back when not in use, and also facilitate the Accusump instal. Accusump was chosen primarily as a pre-oiler given the car is now only a rarely started track hack. They say the most engine wear happens at start up, so the pre-oiling feature should be a nice upgrade, and any oil surge protection it offers while racing will be incredibly valuable too. I hadnt noticed oil surge at RAC with the large capacity moroso sump. But its not like im looking at the oil guage while racing. And now that RAC is closed down, i will probably have to start doing Barbagallo, which could induce oil surge with those bigger corners. I have to wait for the Accusump to arrive to pick a mounting location, but im thinking tucked up under the floor kind of opposite where the exhaust dump would be. That will be a very low spot which will be ideal for CoG, and also good as the low location will ensure the system stays full of oil, and not generate air pockets. I have drilled and tapped in the GM air temp sensor directly into the intake manifold directly behind the throttle plate. This will be needed for the Link Thunder ECU. AIT sensor behind throttle body. 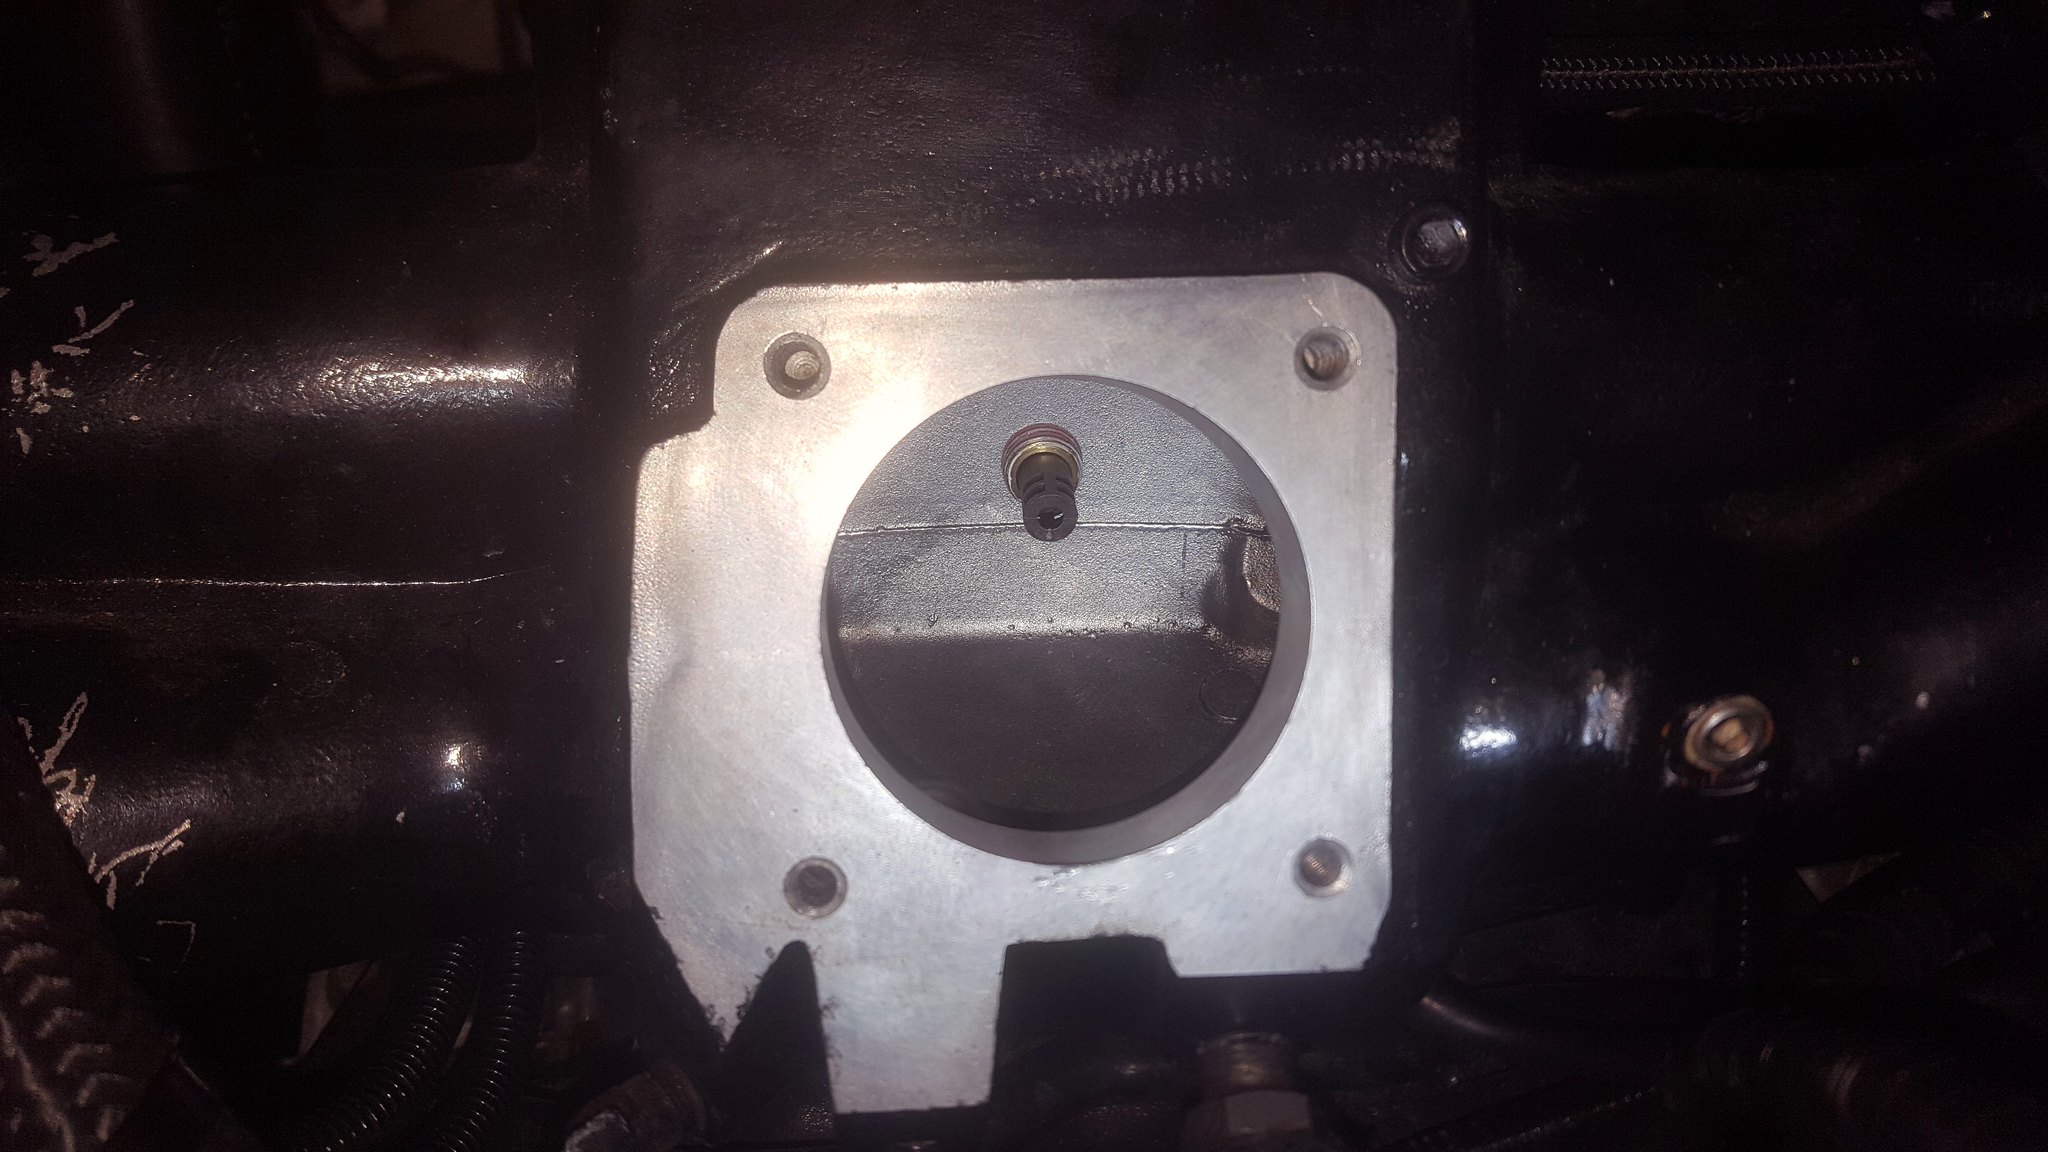 I have also re-located the coolant overflow tank i built before. I originally had planned to have it right next to where the OEM item was. But with the removal of the TMIC and stock location turbo / dump, it has oppened up a fair bit of useable space. So again, for better wirght distribution, the tank has been relocated to about where the old dump pipe would sit. Gets a little bit of wieght back behind the front wheels atleast. And shorter hose run to the header tank aswell. Coolant overflow tank mounted near clutch resivoir.  New bracket for coolant tank. Attaches directly to existing bolt holes on engine/gearbox  I have also relocated the catchcans to pretty much centraly located back near the firewall, hanging off the strut bar. Again, for wieght distribution, and also shorter hose runs. And also gets the cans a bit higher for hopefully better oil separation / function with high G corners. I have finally decided to remove the AOS completely and now just run the 2 catch cans, ot makes the plumbing alot more efficient and shorter. Because i now will no longer have a turbo inlet, the fresh air connection for the head breather catch can will be one of those little air filters that old V8 guys stick on the rocker covers. I have also made a new brake booster vaccume supply hose. The OEM items actually have a check valve built in to prevent boost pressurizing the brake booster. And because of the manifold flip, i needed a sligjtly longer hose with valve. I actually cut the old valve out of the hose and carefully forced it into the new hose. Progress shot. Catch cans relocated. New brake booster vacuume hose.  Havent even touched on the Link ECU install yet. But i have ordered some Tyco Electric 1mm AMP Superseal plug kits. These are the plugs to go into the ECU. I have deided i will probably just cut the OEM ECU plug off, and terminate the wires needed for the new ECU directly in its place. I think this will be the neatest instal. But it means theres no easy going back to stock ECU haha. I have powered the ECU up and had a little play with the software on the laptop. It seams i can select a base map for the 2.5L EJ engine, then customize the map to suit. I wont be tuning the car. But im hoping i can atleast get it to start and run on the new ECU before it goes in. I have also bought a new Bosch LSU4.9 wideband sensor which can be wired and controlled directly by the new ECU. And i will scavenge the existing sensor from the PLX AFR gen 3 and wire direct to the ECU aswell as a back-up AFR sensor. (Well atleast so i can compare the accuracy of the 2 sensors to each other.) I have decided i will probably do-away with the PLX guage setup. Instead i will utilise the existing PLX sensors, and wire them directly into the new ECU. The long term plan is to fit a Race Tecnology Dash2 display / datalogger into the Link ECU. That will give me alot more usefull and intergrated data capture and a display system that can communicate directly to the ECU via the CANbus communications. Bit thats a long term pipe dream.
__________________
Doing it for all the wagons out there
|
|
#625
23-10-2016, 12:57 PM
|
|||
|
|||
|
Canton Racing Accusump is fitted. I went with the 3quart (near on 3L) model because typical Yeti Sled over kill. Should have got the 2q model as its a big bastard to fit somewhere. Although they say 3q, it actually only like half that because half the accusump is full of air.
I had to make a custom bracket to hold it. I put it down the side of the Gbox basically inplace of the dump pipe. The bracket is alluminium sheet with a thin piece of angle down the side for rigidity, and a larger piece of angle to mount to some bolt hols. I had to paint the ally after because i started with a used piece that was already painted, and after my cleaning it, and the welding, it looked like a bucket full of fisted arseholes. So a quick clean, etch prime and rattle can respray so you cant see the sh1tty finnish. Im really impressed with the ali bracket. The sheet is very thin, and even after welding it all over. There was bugger all distortion. And with the angle strip down the side,its actually surprisingly light and rigid. Im in 2 minds about the orientation of the unit. They say it should be mounted with the oil side up if possible, and the air side down. As that will prevent air from being trapped inside the accusump oil chamber. But for me this means the wieght of the oil will be higher. And the air guage will be at the bottom. And the plumbing is longer. With it air side facing up, the plumbing is easy. The air guage and fill port are accessable. And the wieght is lower CoG. If i bleed the unit properly before fitting it, and be carefull not to allow it to have air ingress. (Like after an oil filter change etc) Then it should always remain without air in the oil chamber. So im thinking i will do it that way. Ive inspected inside the oil chamber and with the accusump piston fully to the oil side, there is only a CM or so of chamber that wont be cleared. So it can realistically only ever collect a small amount of air (50-100ml) anyways. Which even if it does, wont ever be an issue unless i try and drive the car upside down.... in which case i will have other issues to worry about. Still have to plum it up. But that will happen when i do the rest of the plumbing. Waiting on a few fittings to do the plumbing. I will be using an electric solenoid to activate the Accusump aswell.     
__________________
Doing it for all the wagons out there
|
|
#627
23-10-2016, 07:00 PM
|
|||
|
|||
|
Quote:
__________________
Doing it for all the wagons out there
|
|
#629
24-10-2016, 09:17 AM
|
||||
|
||||
|
you should have seen it when he had the crop reticulation/irrigation tmic spray
 as usual bram, hats off for thinking outside the box, can't wait to see this fired up & driven in anger 
|
|
#630
24-10-2016, 10:11 AM
|
|||
|
|||
|
Quote:
__________________
Doing it for all the wagons out there Last edited by Bram; 24-10-2016 at 10:21 AM.
|
|
| Tags |
| sled, yeti |
|
|


 636Likes
![Dan [GTI] is offline](http://www.perth-wrx.com/vb/pwrxstyle/images/statusicon/user_offline.gif)
![Dan [GTI] knows their stuff](http://www.perth-wrx.com/vb/pwrxstyle/images/reputation/reputation_pos.gif)


 Linear Mode


